Learn how to connect to Exasol with DBeaver Community edition.
DBeaver Community is a free, universal SQL client and database administration tool that runs on Windows, Linux, and macOS. DBeaver comes with a pre-installed JDBC driver for Exasol. For more information, refer to the DBeaver Community website.
This article explains how to connect to Exasol using DBeaver Community edition on Windows. The procedure is essentially the same on all platforms. For more help, refer to the DBeaver Documentation.
Exasol takes no responsibility for changes in functionality or terms of use for third-party tools. For more details about the compatibility and use of these tools with Exasol, refer to the respective software vendor’s website.
Prerequisites
-
DBeaver Community must be installed. For download links and instructions, visit the DBeaver Community website.
-
Your Exasol database must be running and reachable from the environment where the tool is used.
Exasol SaaS
-
The IP address of the host where the tool is running must be in the allowed IP address list in Exasol SaaS. To learn how to allow traffic to your database, see Network security (SaaS).
-
To connect the tool to an Exasol SaaS cluster you will need the connection string and a personal access token (PAT) for authentication. To learn how to get the connection details, see Connect to Exasol SaaS.
Connect to Exasol
-
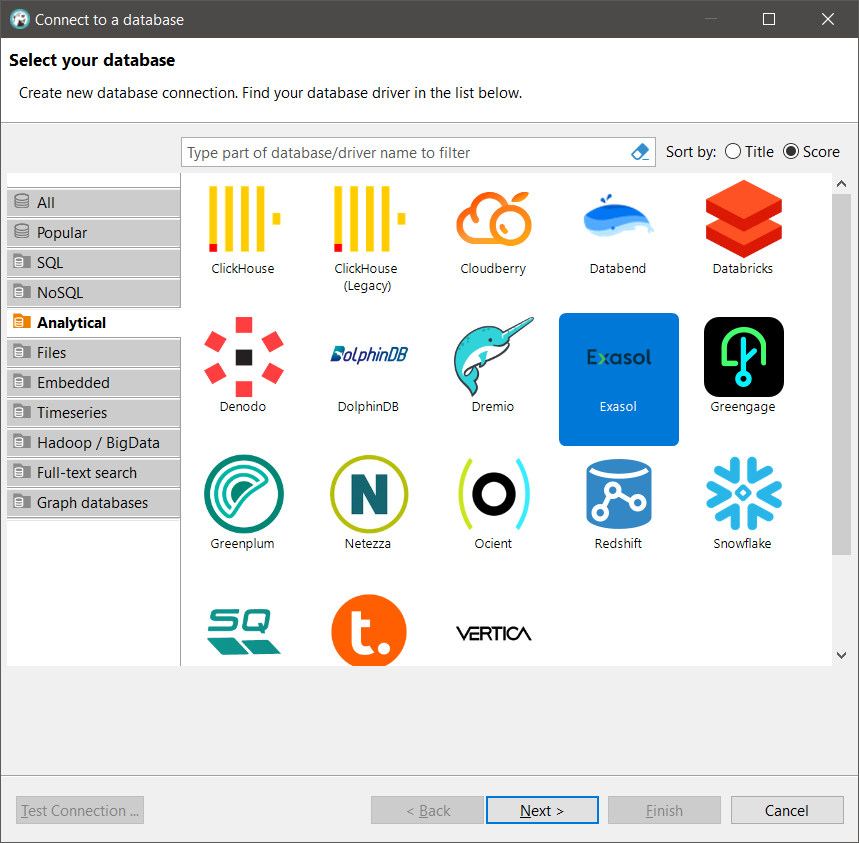
In DBeaver, select Database > New Database Connection and select Exasol in the list of database drivers, then click on Next.
-
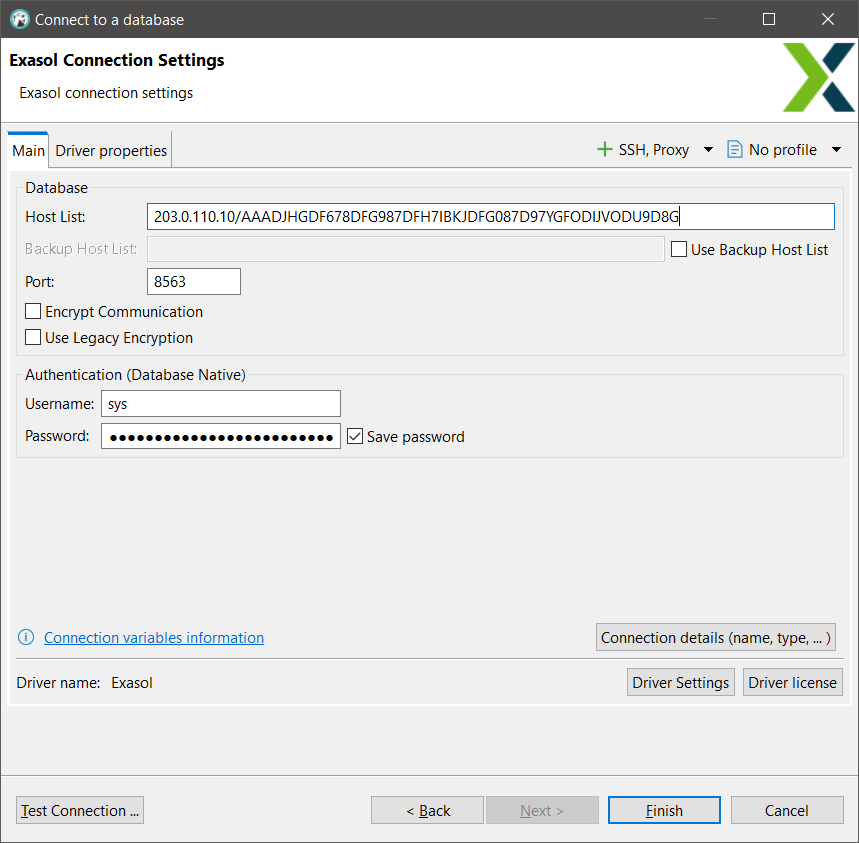
In Exasol Connection Settings, enter the following connection details:
Host List: The hostname, or a list of hosts.
For example:
203.0.110.11or203.0.110.11..13For Exasol SaaS, use the connection string provided in the web console as hostname.
If the connection requires TLS encryption and a valid certificate is not found, include the certificate fingerprint in the connection string.
For example:
203.0.110.11/AAADJHGDF678DFG987DFH71BKJDFG087D97YGFODIJVODU9D8GTo learn about supported URL structures for the JDBC driver, see Exasol URL structure.
Port: The Exasol database port number. The default port is 8563.
User name: The username of the Exasol user.
Password: The password of the Exasol user.
For Exasol SaaS, use a valid personal access token as password.
Example:
-
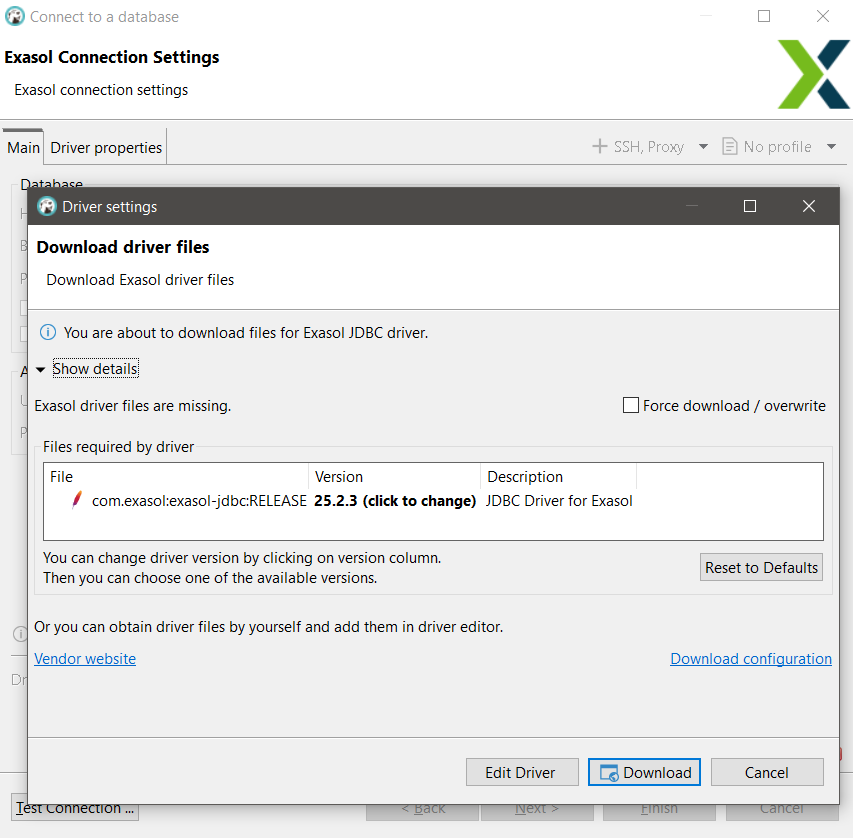
Click on Test Connection .... DBeaver will first check for an available JDBC driver for Exasol and prompt you to download the latest driver version if required.
-
In Download driver files, click on Show details to see details about the driver version selected by DBeaver. This should normally be the latet version. The Exasol JDBC drivers are backwards compatible, and we recommend that you always use the latest version.
-
Click on Download. DBeaver will download and install the driver, and will then try to connect. If the connection is successful, a confirmation message is shown.
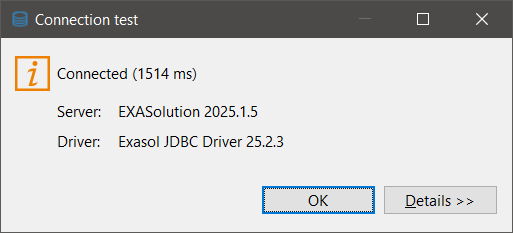
If the connection test fails, check the connection string and authentication details.
-
Click on OK to close the Connection test dialog, then click on Finish to finish setting up the connection.
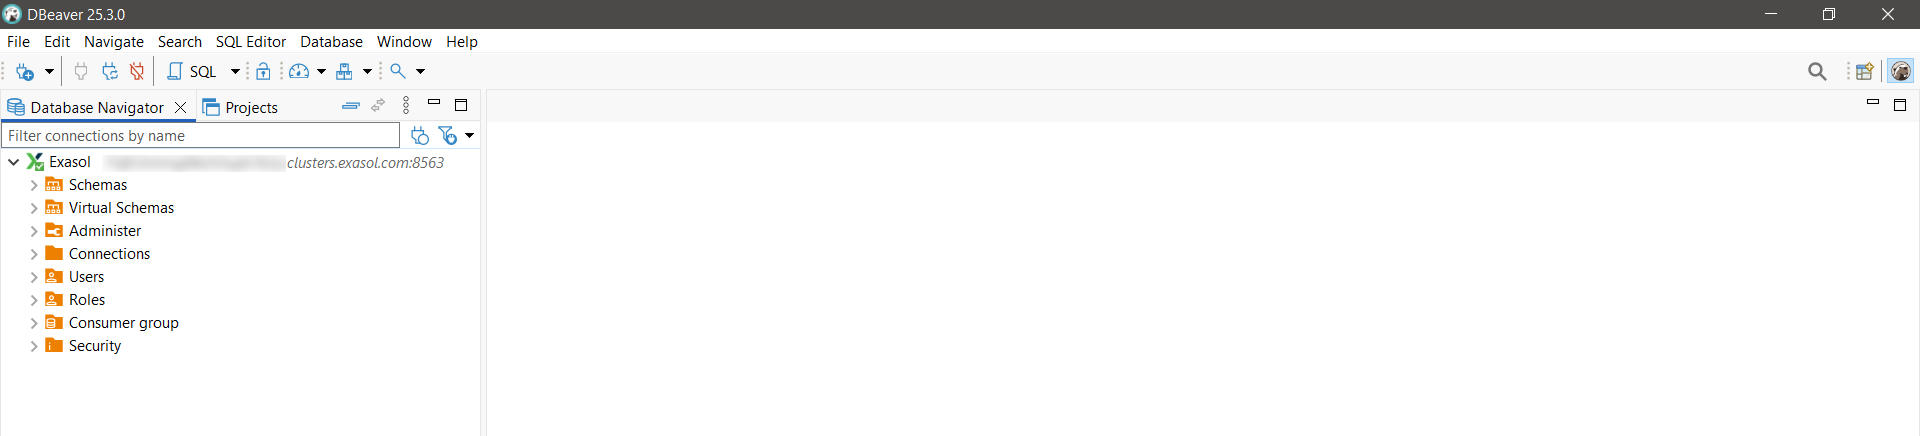
The Exasol database should now be listed in the Database Navigator section in DBeaver.
Next steps
To learn more about how to use DBeaver, refer to the DBeaver Documentation.