Personal access token (SaaS)
Learn how to use personal access tokens for authentication in Exasol SaaS.
You can use a personal access token (PAT) to authenticate when connecting to an Exasol SaaS database using JDBC, ODBC, ADO.NET, or WebSockets. You can also use a PAT to authenticate when using the Exasol SaaS REST API. Each token is created with a specific access scope, which means that you can create multiple tokens for different types of access to the database or web console. When a token is not needed anymore, you can revoke it.
Scope of personal access tokens
Exasol SaaS has a number of pre-defined scope categories that control access to the database and the Rest API. When you create a PAT you must select at least one of the scopes described in the following table:
| Category | Scope | Acess rights |
|---|---|---|
| Database | Use |
View and connect to databases that you have access to |
| Use & Operate |
Full access to the databases, including:
|
|
| Users | Read | View the list of users in your organization |
| Read & Write |
View, invite, and remove users in your organization |
|
| Security | Read | Read the IP addresses in the allowed list |
| Read & Write |
Read, add, and remove IP addresses in the allowed list |
|
| Billing | Read | View the current billing information, including credit card details |
| Read & Write |
View and update billing details, including adding or updating credit card details |
|
| Monitoring | Read | View usage details for the organization, including compute, storage, and network usage |
| File management | Write | Access to the file management APIs |
Create a personal access token
-
In the web console, open your profile menu and select Personal access tokens.
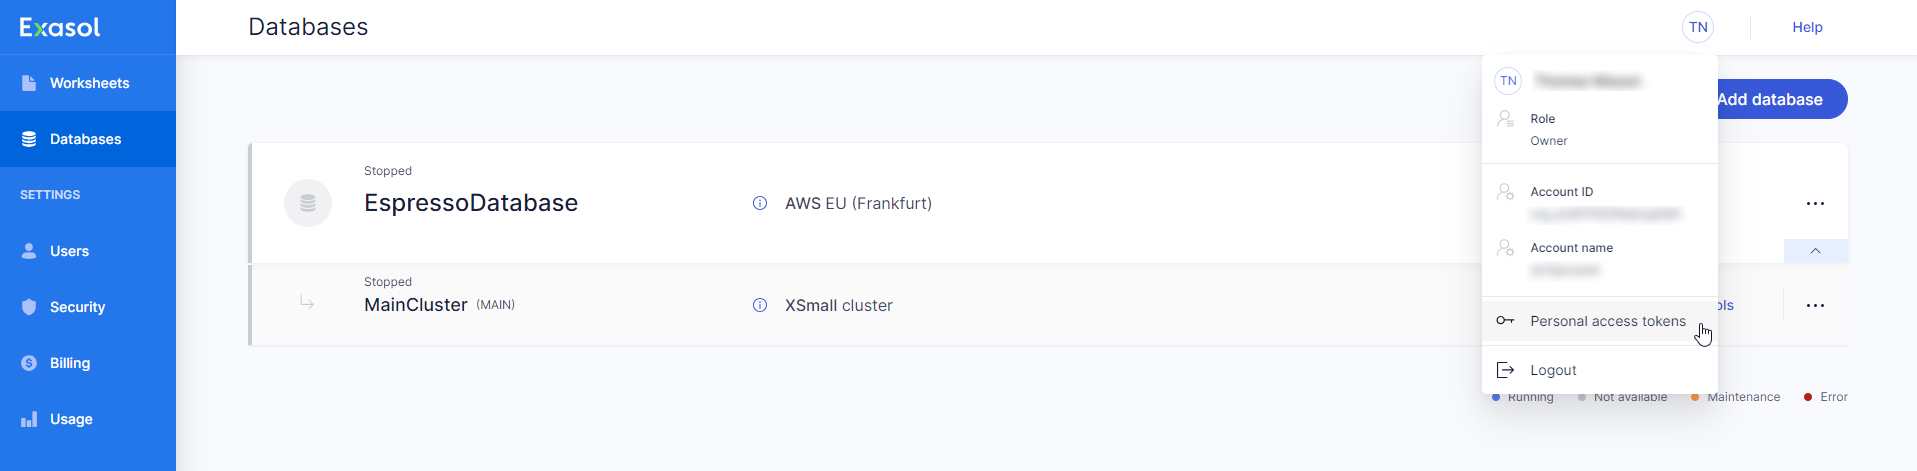
-
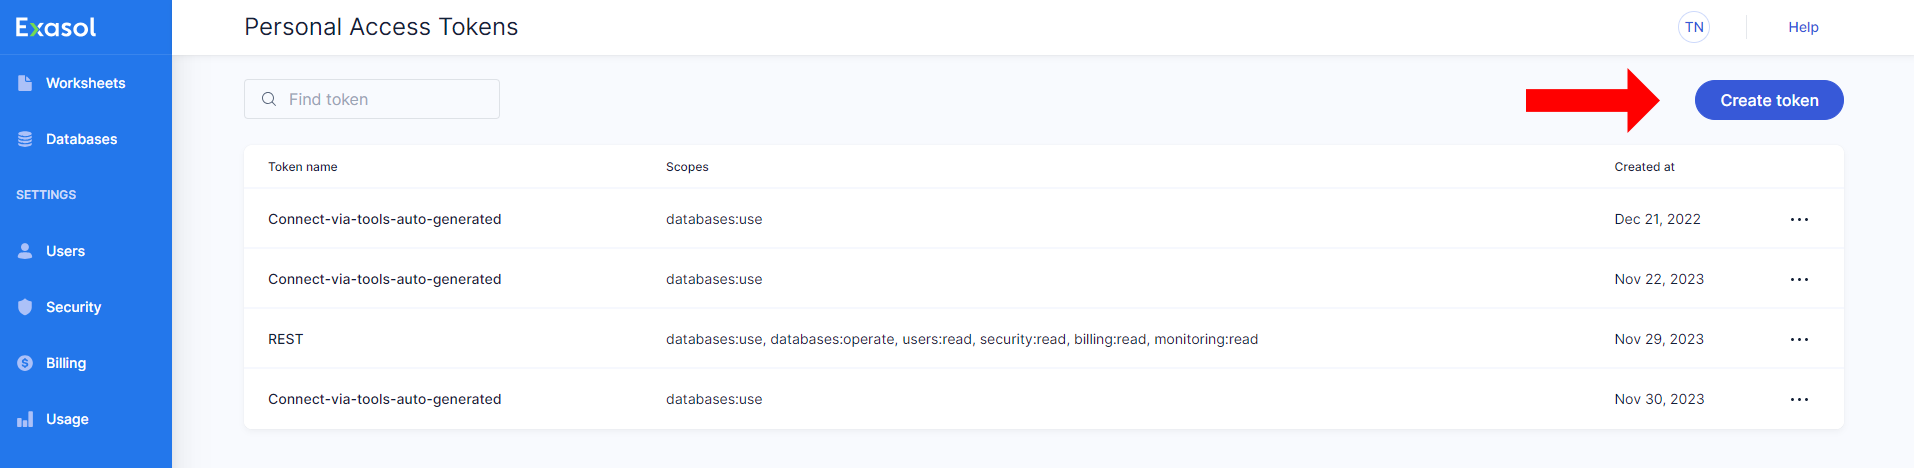
The Personal Access Tokens window shows any existing tokens in the current account and allows you to create and revoke tokens.
To create a new token, click on Create token.
-
In the Create personal access token dialog, enter a descriptive name for the token and select the desired scope.
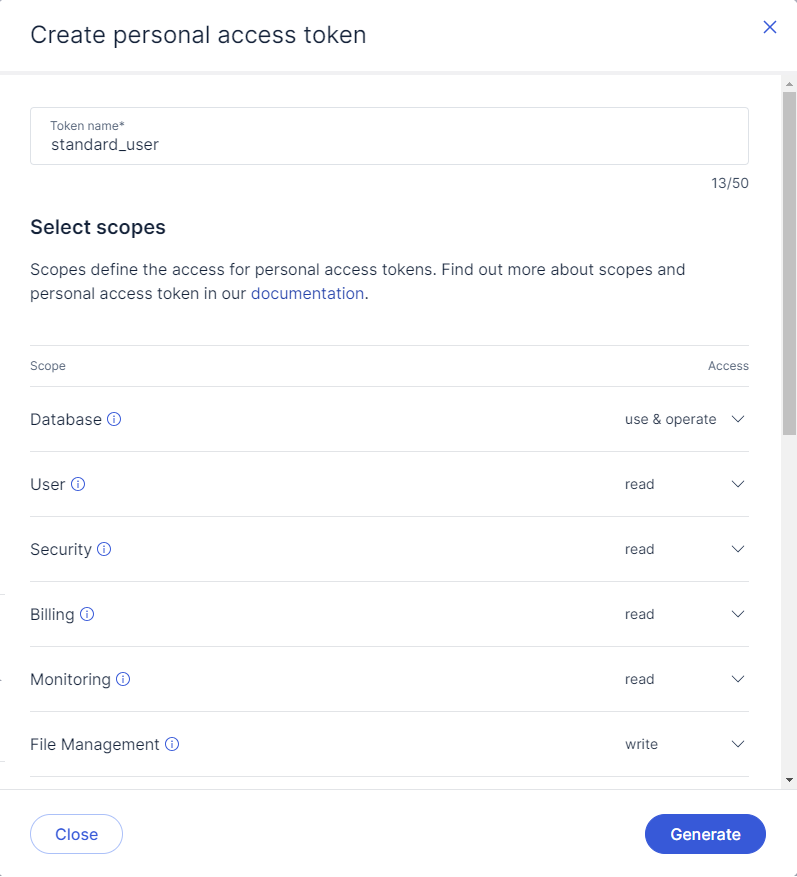
-
Click on Generate to generate the new token.
If your profile is not complete you will be asked to complete it before the token can be generated.
-
When the token has been generated it will be displayed as a message in the Personal Access Tokens window. Click on copy to copy the token to your clipboard.

The token is only shown once and will disappear when you close or refresh the page. Make sure that you copy the token and store it in a safe location. The token cannot be retrieved later.
Revoke a token
If a token is no longer needed, you can revoke it.
-
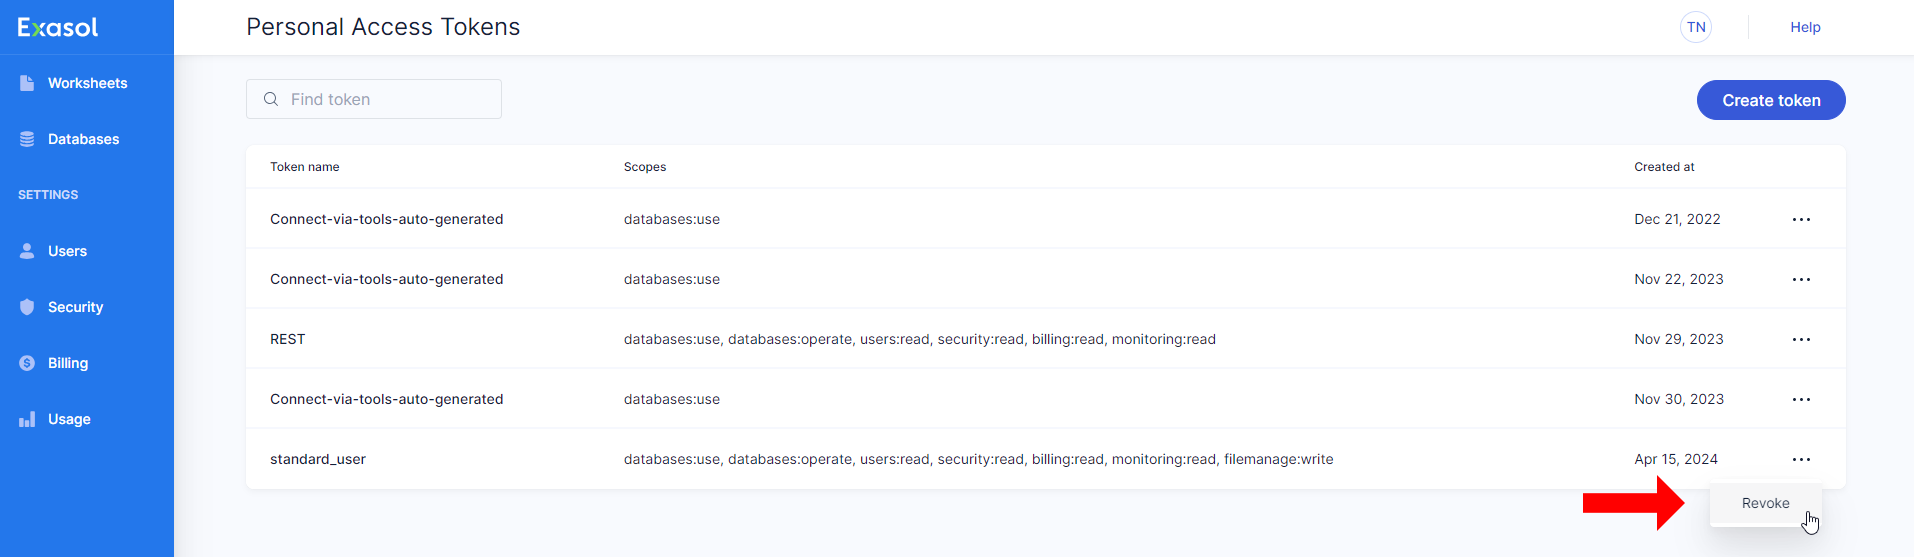
In the web console, open your profile menu and select Personal access tokens.
-
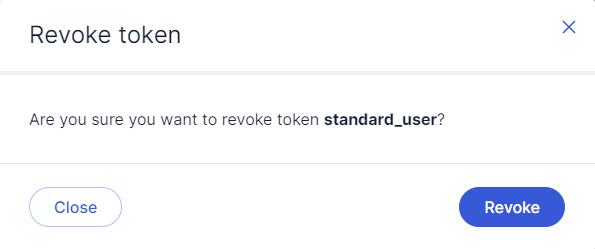
In the Personal Access Tokens window, click on ... and select Revoke.
-
In the confirmation window, click on Revoke to revoke the token, or click on Close to cancel the operation.