This article explains how to connect to Exasol with DbVisualizer.
DbVisualizer Pro is the SQL client recommended by Exasol and is used extensively in our documentation and training materials. This article explains how to connect to Exasol with DbVisualizer Pro version 25.3 on Windows. The procedure is essentially the same in the free edition and on other platforms.
For more information about the different editions and how to use DbVisualizer, refer to the DbVisualizer User Guide.
Exasol takes no responsibility for changes in functionality or terms of use for third-party tools. For more details about the compatibility and use of these tools with Exasol, refer to the respective software vendor’s website.
Prerequisites
- DbVisualizer must be installed. For download links and instructions, see Download DbVisualizer on the DbVisualizer website.
-
Your Exasol SaaS database must be running.
-
The IP address of the host where the tool is running must be in the allowed IP address list.
To learn more about how to allow traffic to your database, see Network Security.
Get the connection details
-
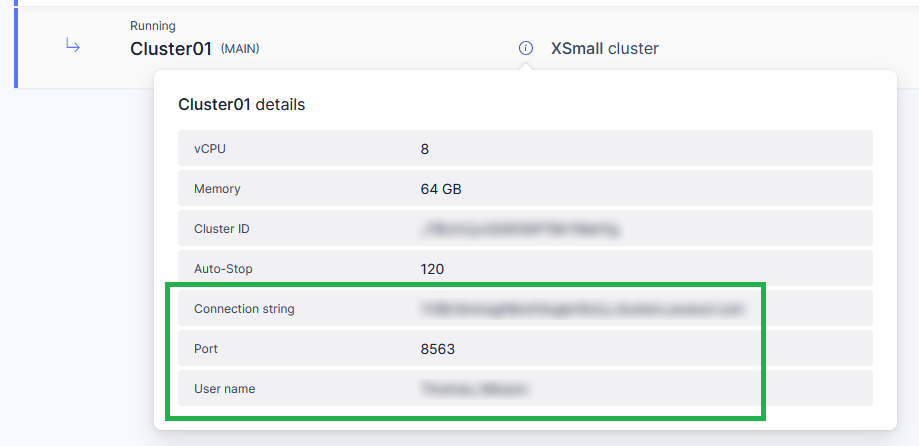
On the Databases page in the Exasol SaaS web console, click on the info button on the cluster.
-
Copy the connection string, port, and username from the cluster details window. You will need this information when you configure the connection in the client.
-
If you do not already have a personal access token (PAT), follow the instructions in Personal access token to create a new token. The token and the username will be used by the client to authenticate to Exasol.
The token is only shown once and will disappear when you close or refresh the page. Make sure that you copy the token, since it cannot be retrieved if you lose it. In that case you must create a new token.
Connect to Exasol
-
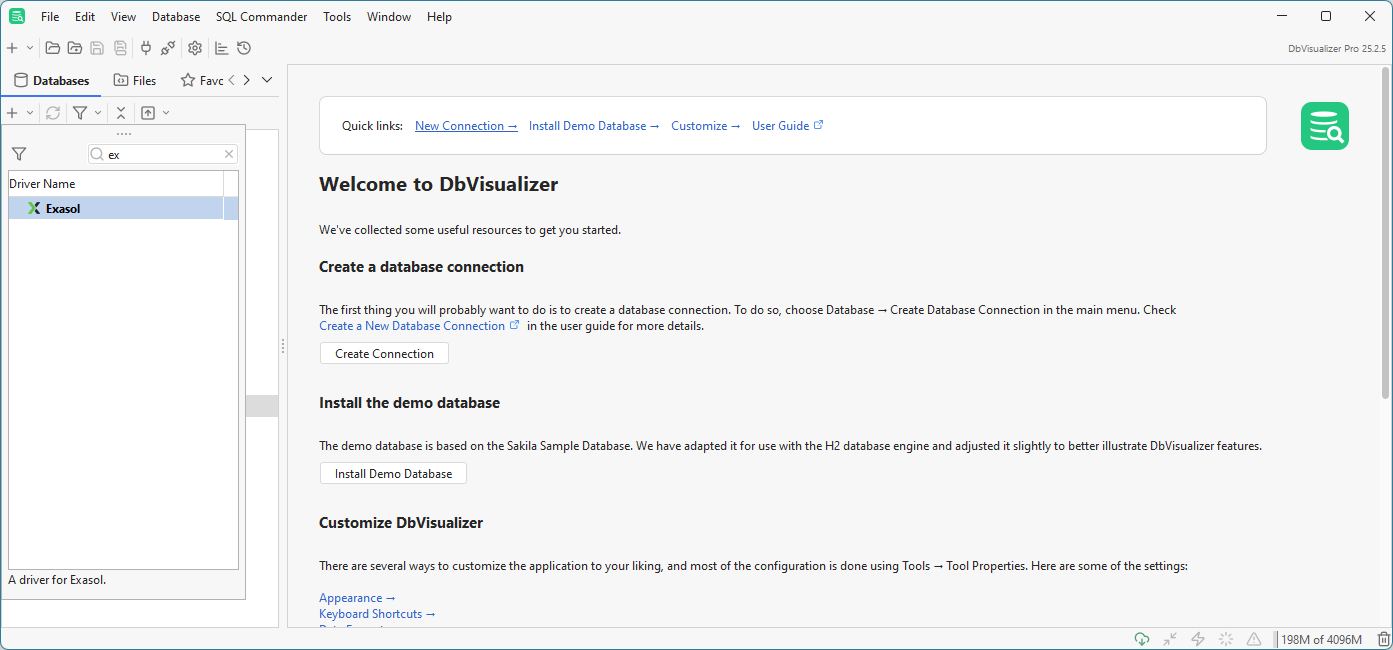
In DbVisualizer, run the Create Connection wizard from the start page or select Database > Create Database Connection.
-
In the dropdown menu, double-click on Exasol to create a new connection.
You can use the search field in the dropdown menu to quickly find Exasol in the list of drivers.
-
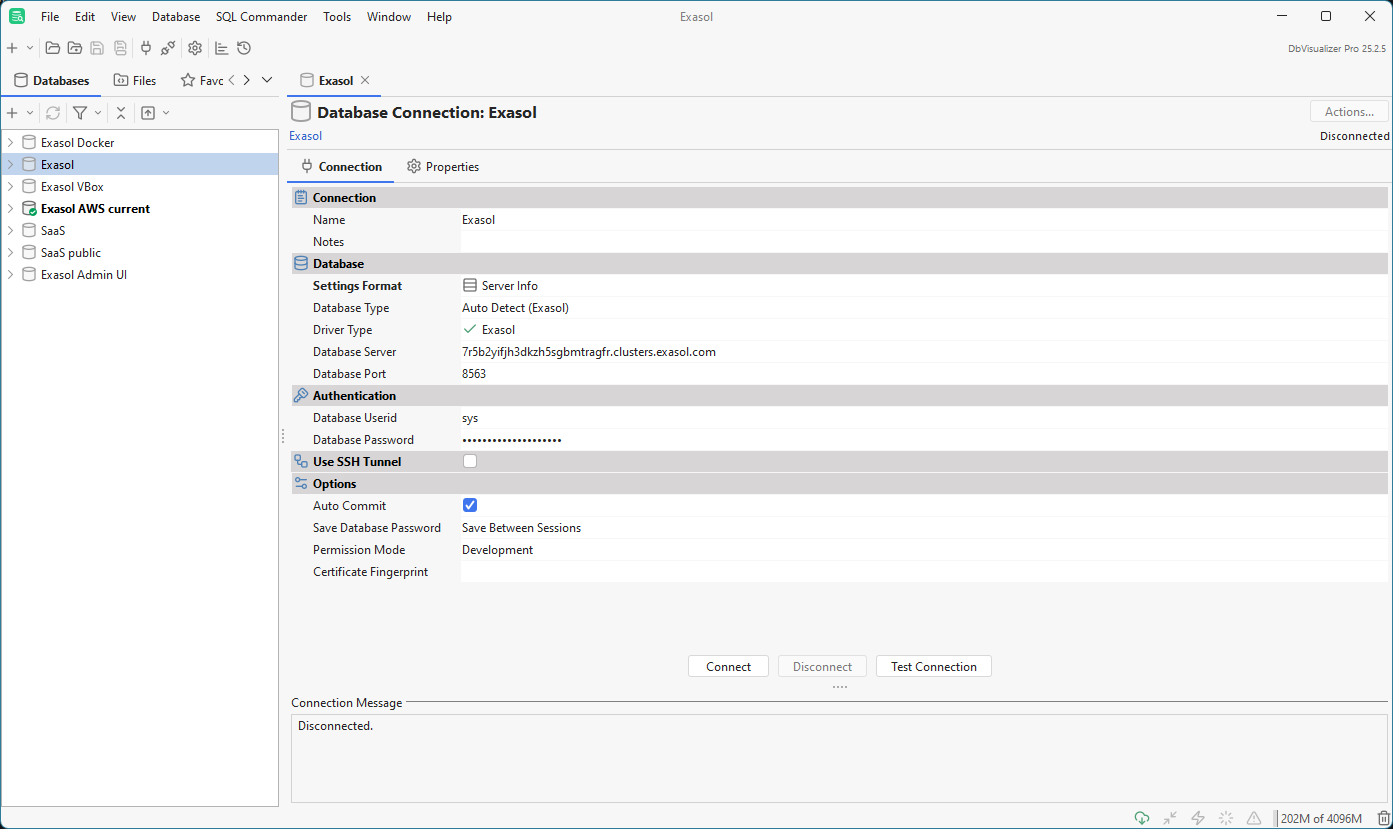
In Database Connection: Exasol, use the connection details that you fetched in Get the connection details:
Database Server: The connection string for the Exasol SaaS database.
Database Port: The database port number. The default port is 8563.
Database Userid: Your Exasol SaaS username.
Database Password: Your personal access token (PAT).
Certificate Fingerprint: If the connection requires TLS encryption and there is no valid TLS certificate, you can use the certificate fingerprint to connect (see also the next step).
-
Click on Test Connection. If the connection attempt is successful, a confirmation message is shown.
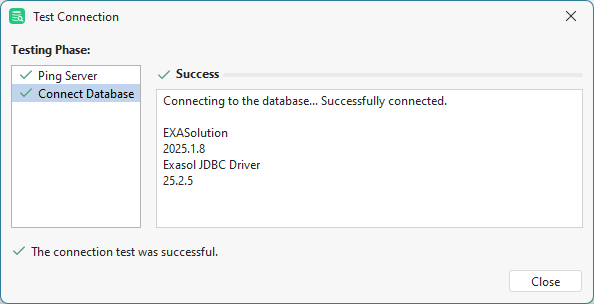
If the connection uses TLS encryption and a valid certificate or fingerprint is not found, the connection will fail. Copy the fingerprint from the error message and paste it into the Certificate Fingerprint field, then test the connection again.
-
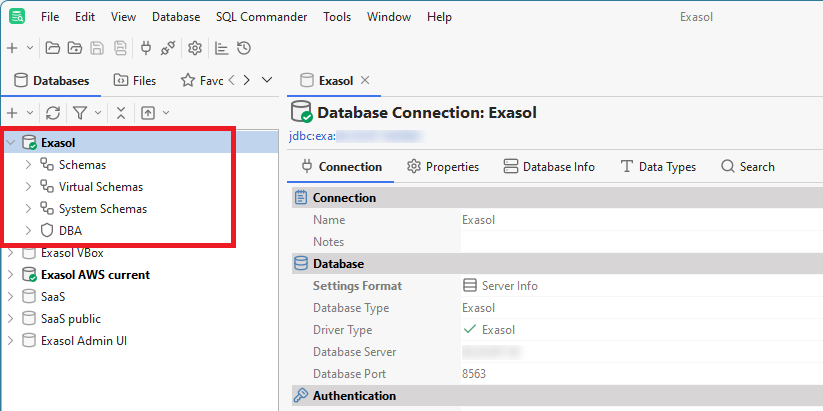
If the connection test was successful, click on Connect to connect to the Exasol database. The database should now be listed in the Databases pane.
If the connection test fails, check the connection string and authentication details.
Next steps
To learn more about how to use DbVisualizer with Exasol, refer to the DbVisualizer User Guide.
