This article explains how to connect Pentaho Data Integration and Analytics to Exasol through JDBC.
Prerequisites
-
Your Exasol SaaS database must be running.
-
The IP address of the host where the tool is running must be in the allowed IP address list.
To learn more about how to allow traffic to your database, see Network Security.
-
Pentaho Data Integration and Analytics must be installed.
-
Basic knowledge about how to configure and use Pentaho DIA is assumed.
Get JDBC driver and connection details
To connect to your Exasol SaaS database from a tool you need a valid connection string. You must also allow network access to the database from the tool, and make sure that the latest Exasol JDBC driver is installed.
-
On the Databases page in the web console, click on Connect via tools on the cluster that you want to connect to.
-
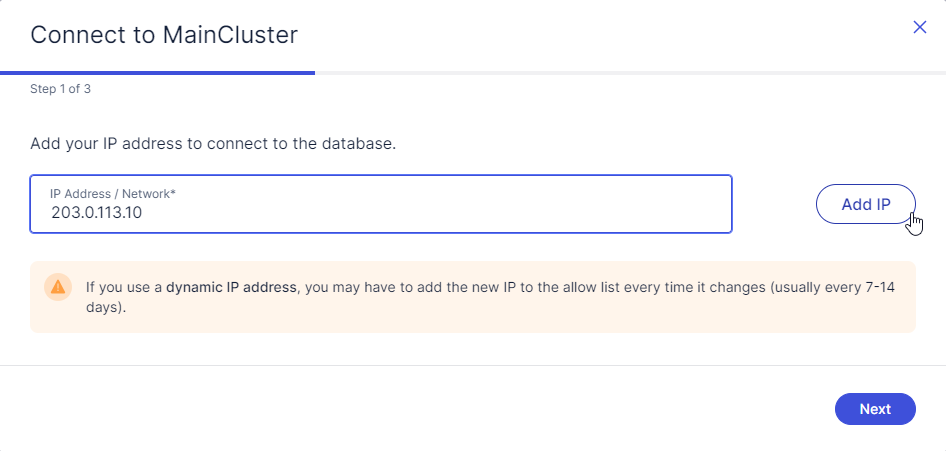
In the wizard, enter the IP address of the client or server that will connect to the database and click Add IP, then click Next. This will add the IP address to the list of IP addresses that are allowed network access to the cluster. The allow list is found on the Security page in the web console. For more information, see Network Security.
If the IP address is already present in the allow list, just click Next.
-
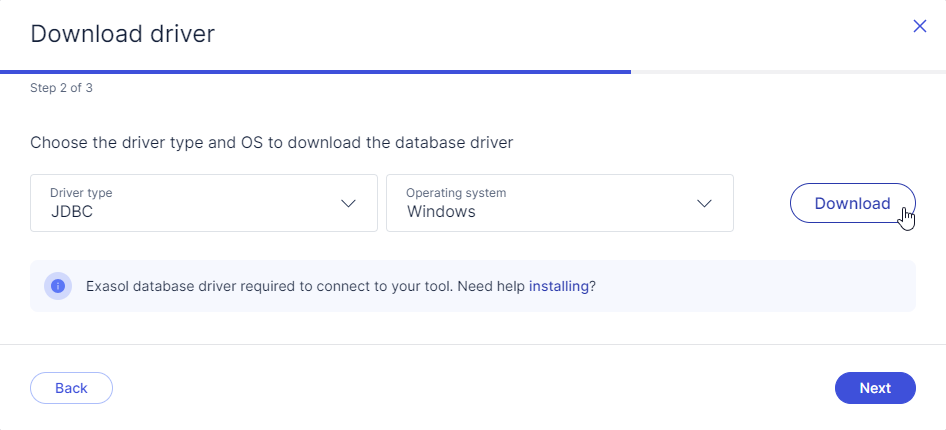
If the latest JDBC driver for your operating system is not already installed, select the driver type and operating system and click on Download to download the latest driver to your local system. For more information about how to install the driver, see JDBC Driver.
-
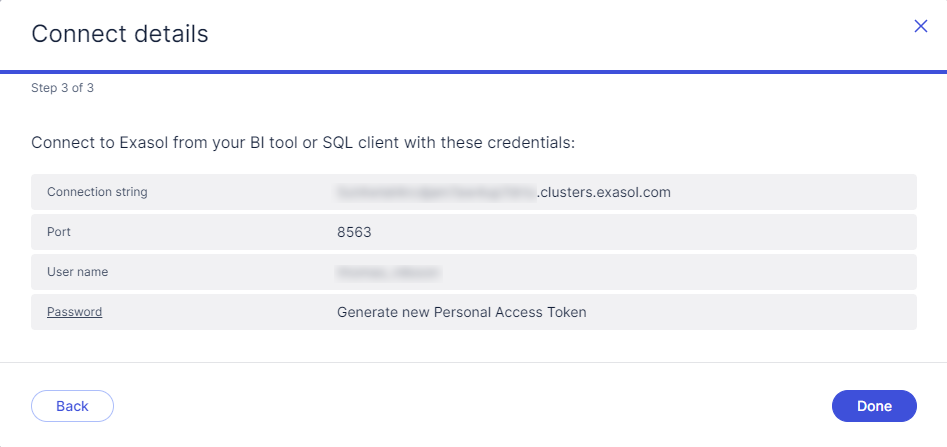
Click on Next to view your connection details:
-
Copy the Connection string, Port, and User name values from the Connect details dialog. You will need to enter these details in the tool that should connect to the Exasol SaaS database.
-
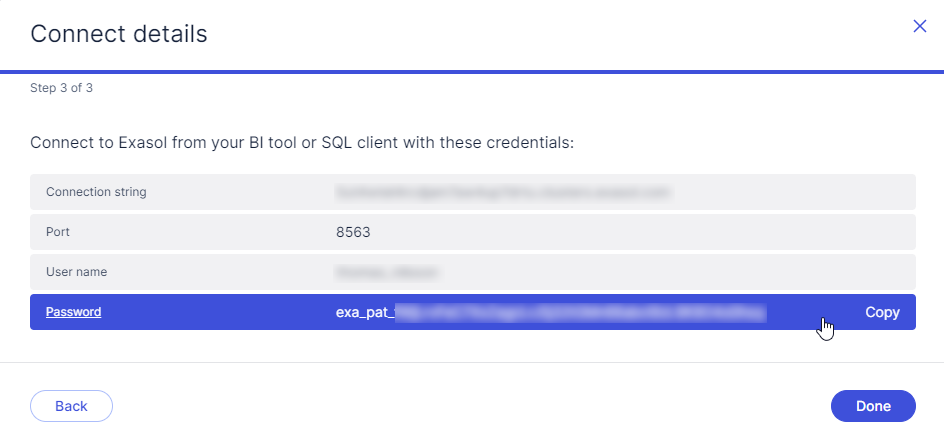
To generate a new Personal Access Token (PAT) to use for authentication in the client, click on the Password row, then click on Copy to copy the PAT to your clipboard. For more information, see Personal access token.
The generated PAT is only shown once and cannot be retrieved after you have closed the wizard.
-
Click on Done to close the wizard.
Connect Pentaho to Exasol
-
Make sure that Pentaho is not running.
-
Copy the Exasol JDBC driver into the Pentaho Data Integration driver library.
-
Launch Pentaho and create a new database connection. Select Exasol 4 as the connection type and Native (JDBC) as the access type.
-
Enter the following settings:
-
The hostname or IP address and the port of the Exasol cluster
-
The Exasol database name
-
The user name and password of the database user
-
For more information about how to configure and use Pentaho DIA with Exasol, refer to the documentation on the Pentaho Data Integration website.


