Pentaho Business Analytics
This article explains how to connect Pentaho Business Analytics to an Exasol database.
Exasol takes no responsibility for changes in functionality or terms of use for third-party tools. For more details about the compatibility and use of these tools with Exasol, refer to the respective software vendor’s website.
Prerequisites
-
Your Exasol SaaS database must be running.
-
The IP address of the host where the tool is running must be in the allowed IP address list.
To learn more about how to allow traffic to your database, see Network Security.
- Exasol JDBC driver is installed
Get JDBC Driver and Connection Details
To connect to your Exasol SaaS database from a tool you need a valid connection string. You must also allow network access to the database from the tool, and make sure that the latest Exasol JDBC driver is installed.
-
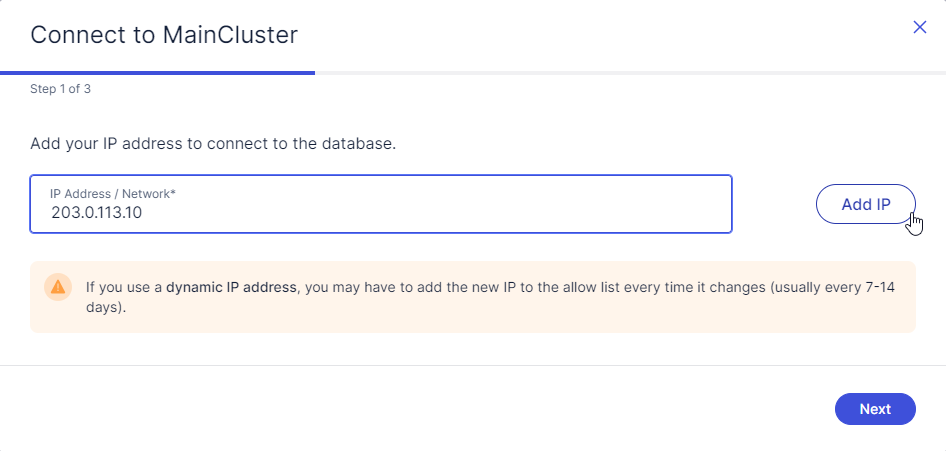
On the Databases page in the web console, click on Connect via tools on the cluster that you want to connect to.
-
In the wizard, enter the IP address of the client or server that will connect to the database and click Add IP, then click Next. This will add the IP address to the list of IP addresses that are allowed network access to the cluster. The allow list is found on the Security page in the web console. For more information, see Network Security.
If the IP address is already present in the allow list, just click Next.
-
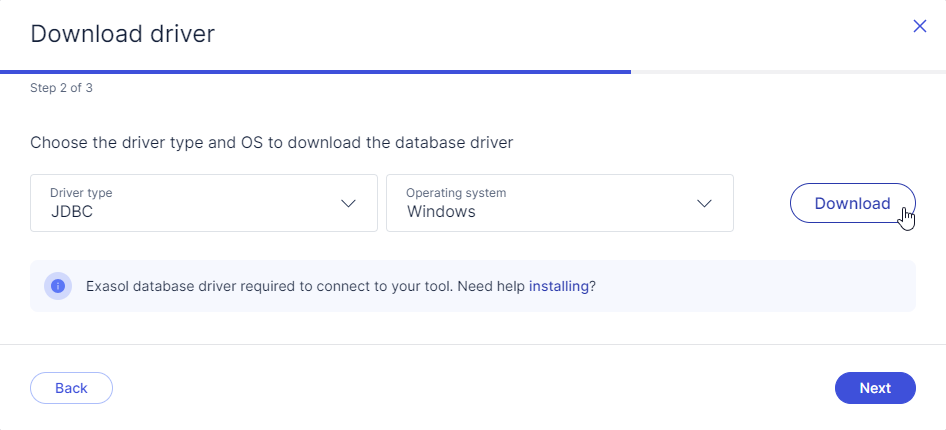
If the latest JDBC driver for your operating system is not already installed, select the driver type and operating system and click on Download to download the latest driver to your local system. For more information about how to install the driver, see JDBC Driver.
-
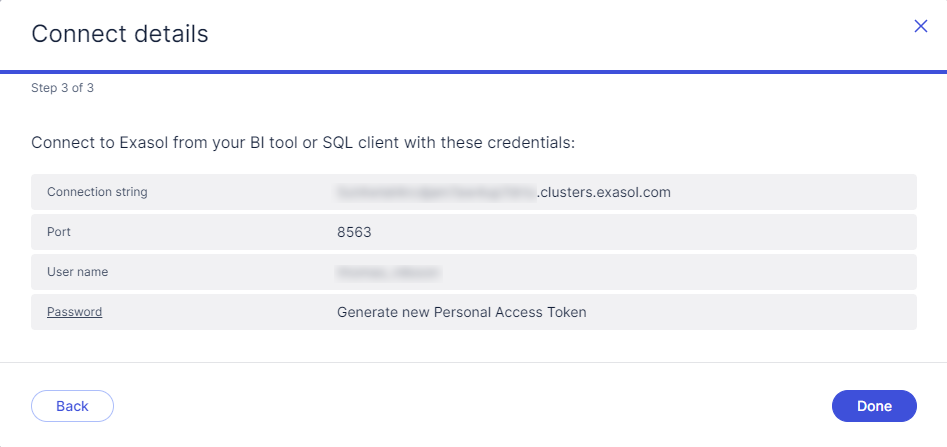
Click on Next to view your connection details:
-
Copy the Connection string, Port, and User name values from the Connect details dialog. You will need to enter these details in the tool that should connect to the Exasol SaaS database.
-
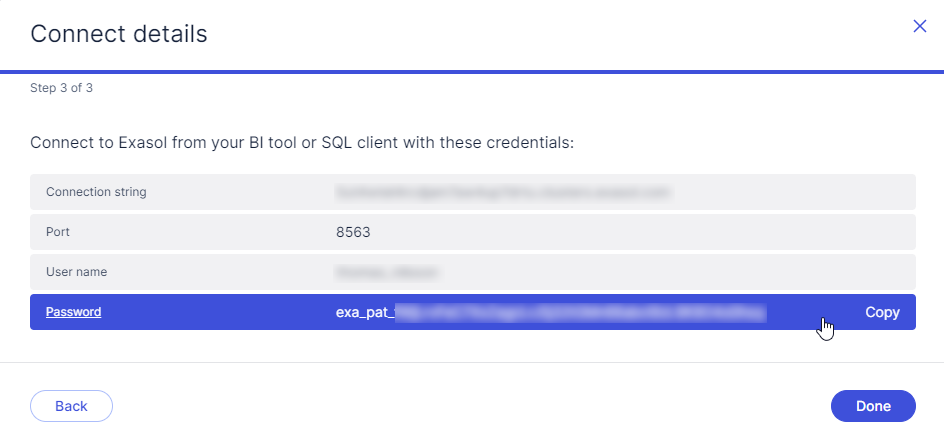
To generate a new Personal Access Token (PAT) to use for authentication in the client, click on the Password row, then click on Copy to copy the PAT to your clipboard. For more information, see Personal access token.
The generated PAT is only shown once and cannot be retrieved after you have closed the wizard.
-
Click on Done to close the wizard.
Connect Pentaho to Exasol
- Copy and paste the Exasol JDBC driver into the Pentaho server directory. The server directory is located at C:\Program Files (x86)\Pentaho\server\pentaho-server\tomcat\lib
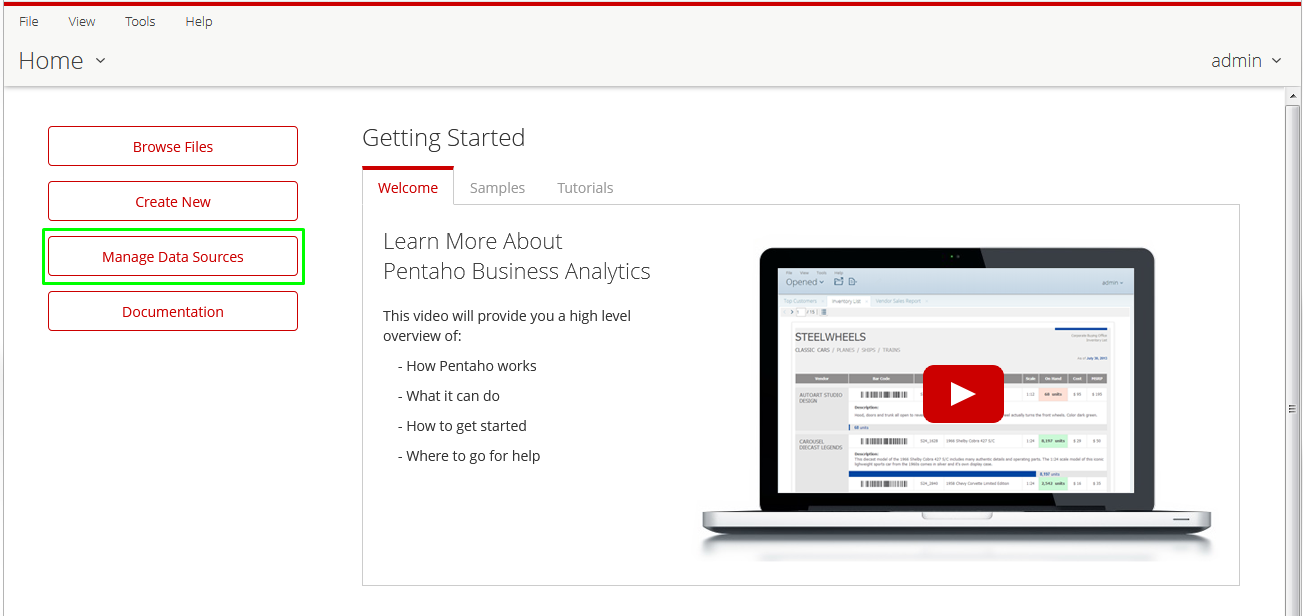
- From the Pentaho User Console (PUC), click Manage Data Sources.
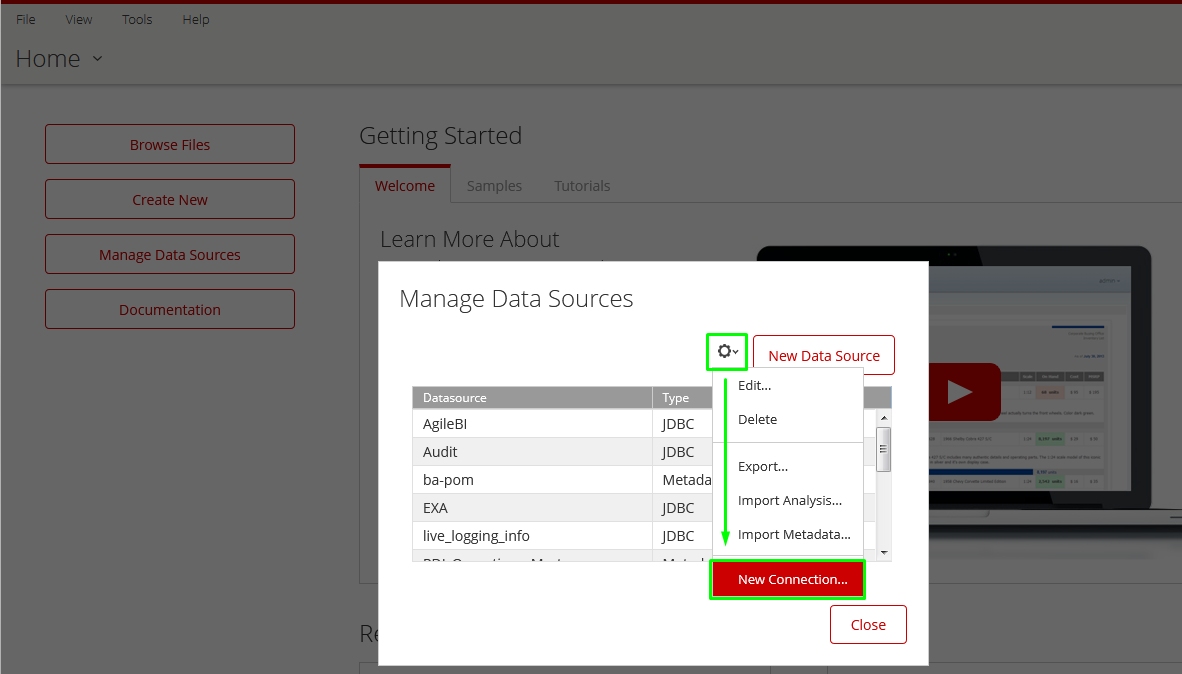
- On the Manage Data Source dialog box, you need to define a new connection. Click the gear icon for more menu options and then click New Connection.
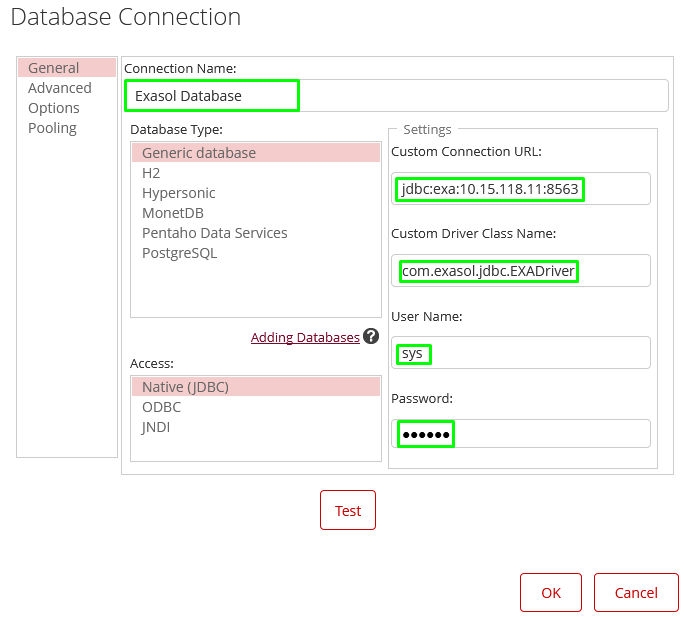
- The Database Connection dialog box is displayed as show in the below image. Enter the data connection information:
- Connection Name: Enter a name for the connection.
- Database Type: Set the database type to Generic database.
- Access: Set it to Native (JDBC).
- Settings:
- Custom Connection URL: Enter the connection URL to your database instance along with the port number.
- Custom Driver Class Name: Enter the drive class name, which is
com.exasol.jdbc.EXADriver. - User Name: Enter the user name to connect to the database. This step is optional.
- Password: Enter the password to connect to the database. This step is optional.
- Click Test to test the connection. A success message is displayed if a connection is established.
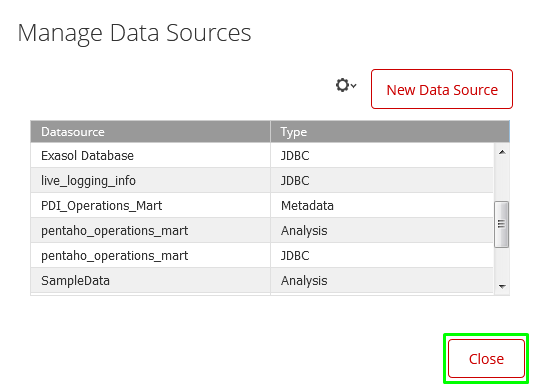
- Click Ok to close the Database Connection dialog box and then click Close.
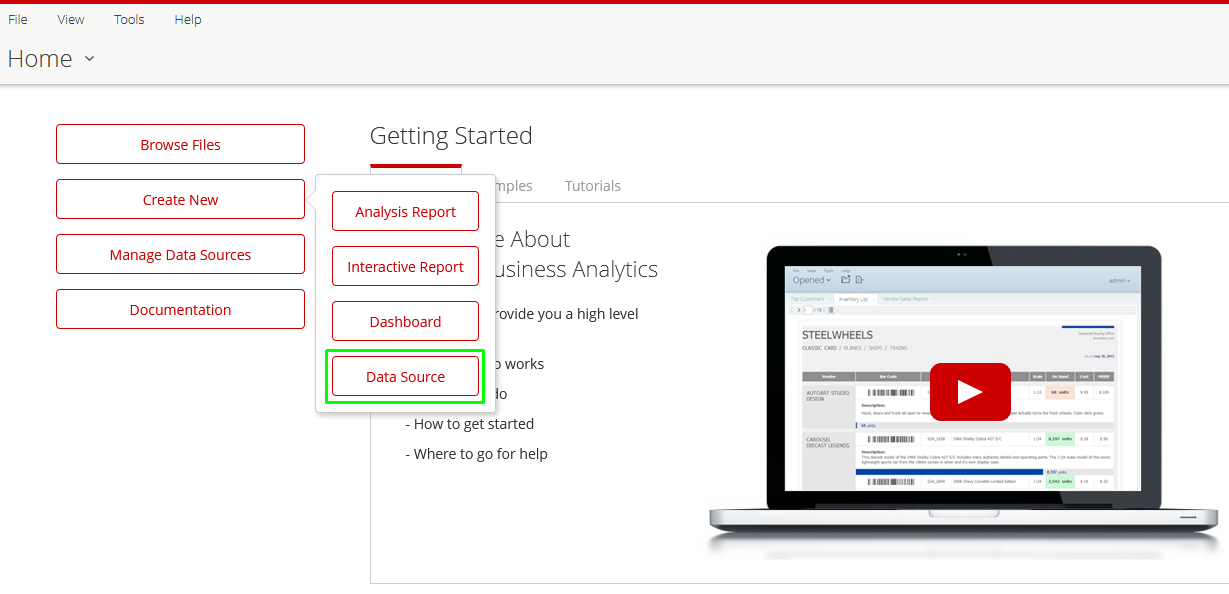
- To be able to use tables that you need from the Exasol instance, you may need to create a new data source. On the User Console Home, click Create New, then click Data Source.
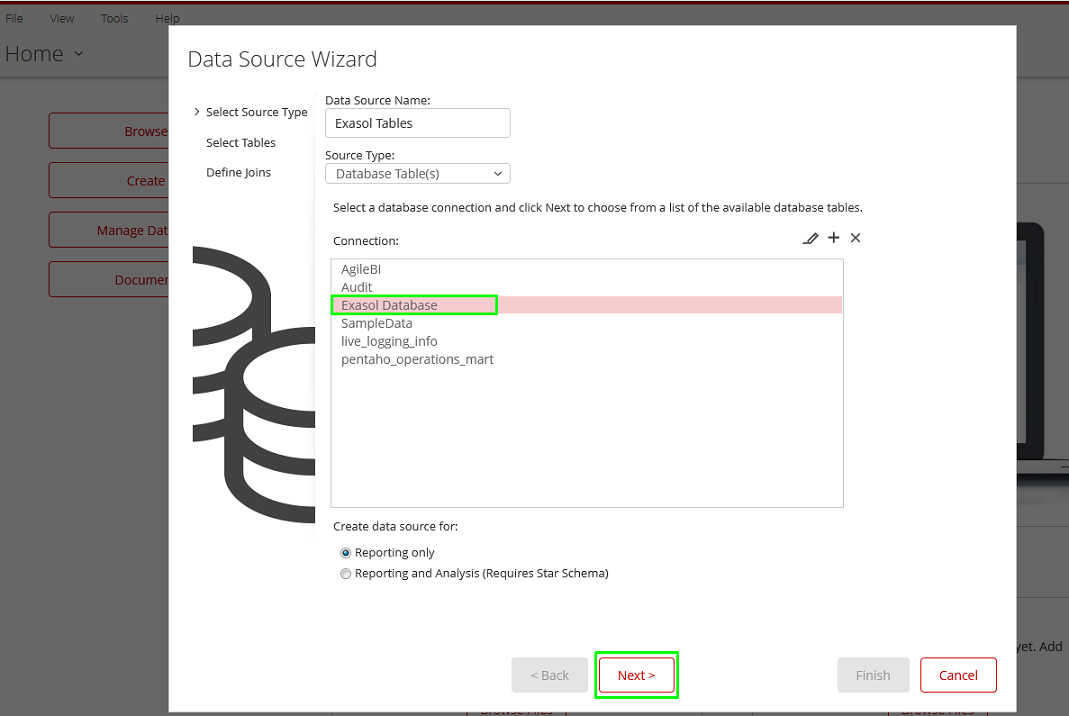
- The Data Source Wizard is displayed. Enter a name for the data source. From the Source Type drop-down list select Database Tables(s). Click Next.
- In the Connections section, select the connection you created in earlier (in step 3). Click Next.
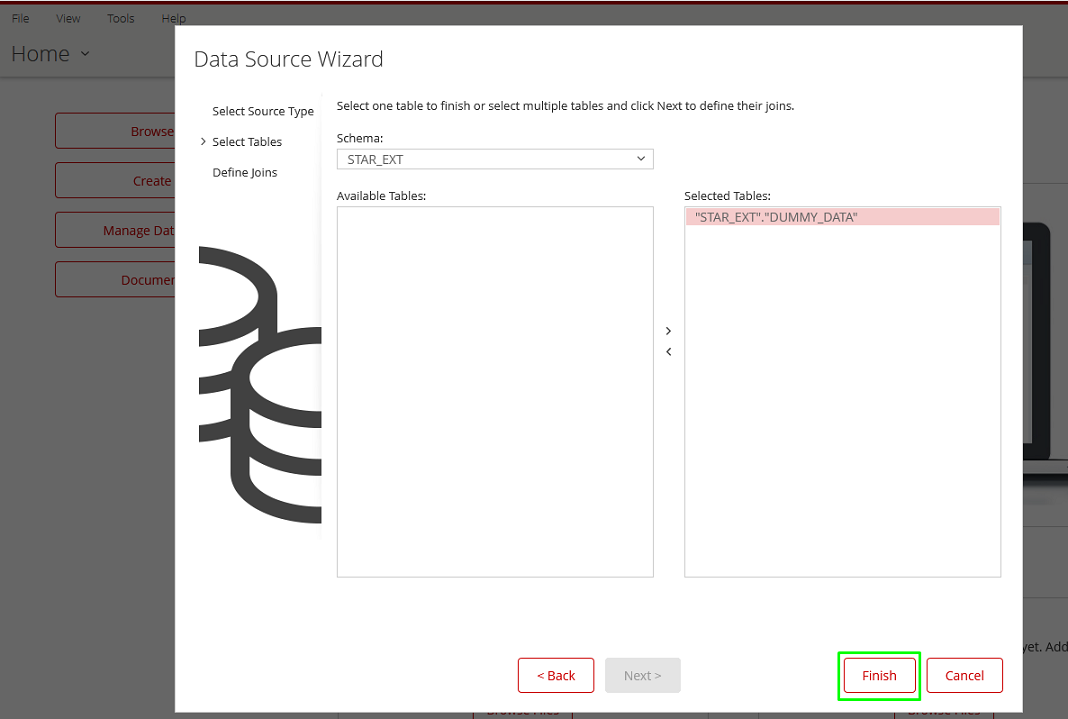
- Select the schema you want to use from the Schema drop-down list and select the tables by moving them to the Selected Tables section.
- Click Finish. You will now be able to create dashboards and reports from User Console Home.
Once done, you need to restart the Pentaho server if it is already running.

