Add JDBC driver (SaaS)
Learn how to add a JDBC driver to your Exasol SaaS system.
Exasol can exchange data with other databases using JDBC. In the IMPORT and EXPORT statements, you can specify a JDBC connection string to define the connection to another system. The CREATE CONNECTION command saves this connection string in a connection object that can be reused in other queries.
Exasol requires that a JDBC driver is installed to be able to exchange data using JDBC. Drivers are managed through the File Management page in Exasol SaaS. You must first create a folder hierarchy in the file system to store the driver, and then upload the driver and configuration files.
To learn more about how to create and manage files and folders in Exasol SaaS, see also File management (SaaS).
Prerequisites
-
The JDBC driver must be downloaded to your local machine and must consist of one or more jar files.
-
You must be logged in as a user with the
Owner
role.
Create a configuration
Create a configuration file settings.cfg
that specifies the configuration parameters for your driver using the following format:
DRIVERNAME=$MY_DRIVERNAME
PREFIX=$PREFIX
FETCHSIZE=100000
INSERTSIZE=-1
- Replace
$MY_DRIVERNAMEwith a unique name of your choice. This name is used in thedriverclause in an IMPORT or EXPORT statement. - Replace
$PREFIXwith the required URL prefix for the JDBC driver. The prefix can be found on the driver manufacturer's website.
Do not modify the FETCHSIZE or INSERTSIZE parameters without consulting Exasol support.
Every line in the settings.cfg
file, including the final line, must end with a newline character (LF).
Optional parameters
You can force the IMPORT/EXPORT statement to use only a subset of the uploaded JAR files by adding a line for each file in settings.cfg
, using the syntax JAR=my-file-n.jar. For example:
JAR=mssql-jdbc-11.2.0.jre8.jarExasol will normally determine the main JDBC driver class to load. In case this does not work, you can specify the main driver explicitly in the configuration using the DRIVERMAIN parameter. For example:
DRIVERMAIN=com.amazon.redshift.jdbc42.DriverWith some drivers you may receive an error message indicating file permission issues, or the query will hang without an error message. To resolve this issue, you may have to disable the security manager by adding the line NOSECURITY=YES in the configuration.
Example:
The following example is a configuration file for the Exasol JDBC driver (when connecting to another Exasol system):
DRIVERNAME=EXASOL_JDBC
PREFIX=jdbc:exa:
FETCHSIZE=100000
INSERTSIZE=-1
Upload driver and configuration
-
On the Databases page in the web console, open the database dropdown menu and select Manage UDF Files.

-
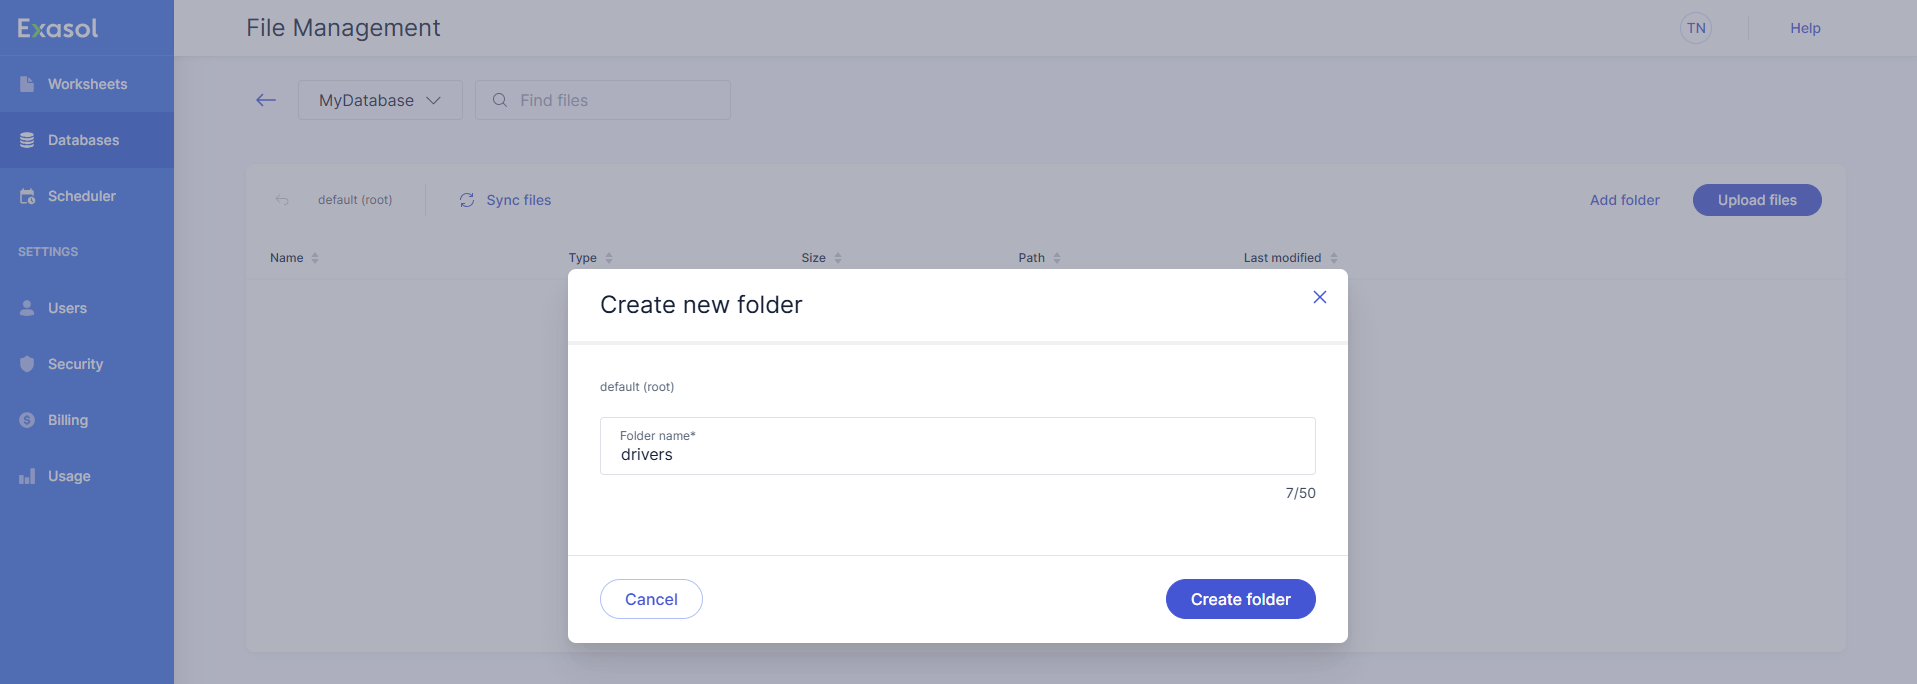
On the File Management page, click on Add folder and create a folder with the name
drivers
.
-
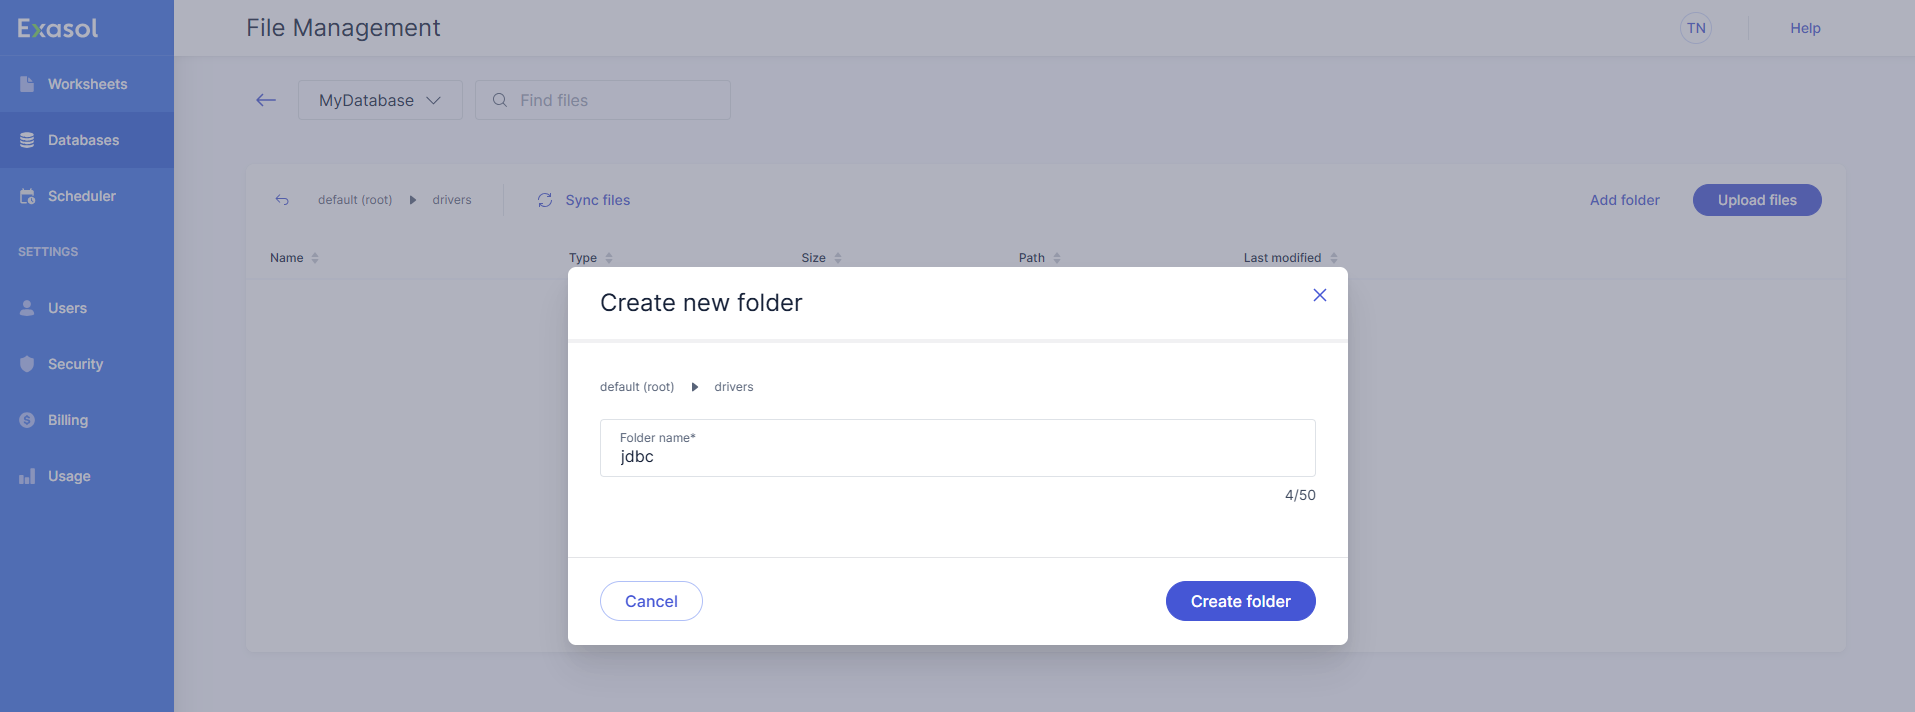
Select the
drivers
folder and click on Add folder to create a child folder inside it with the namejdbc
.
-
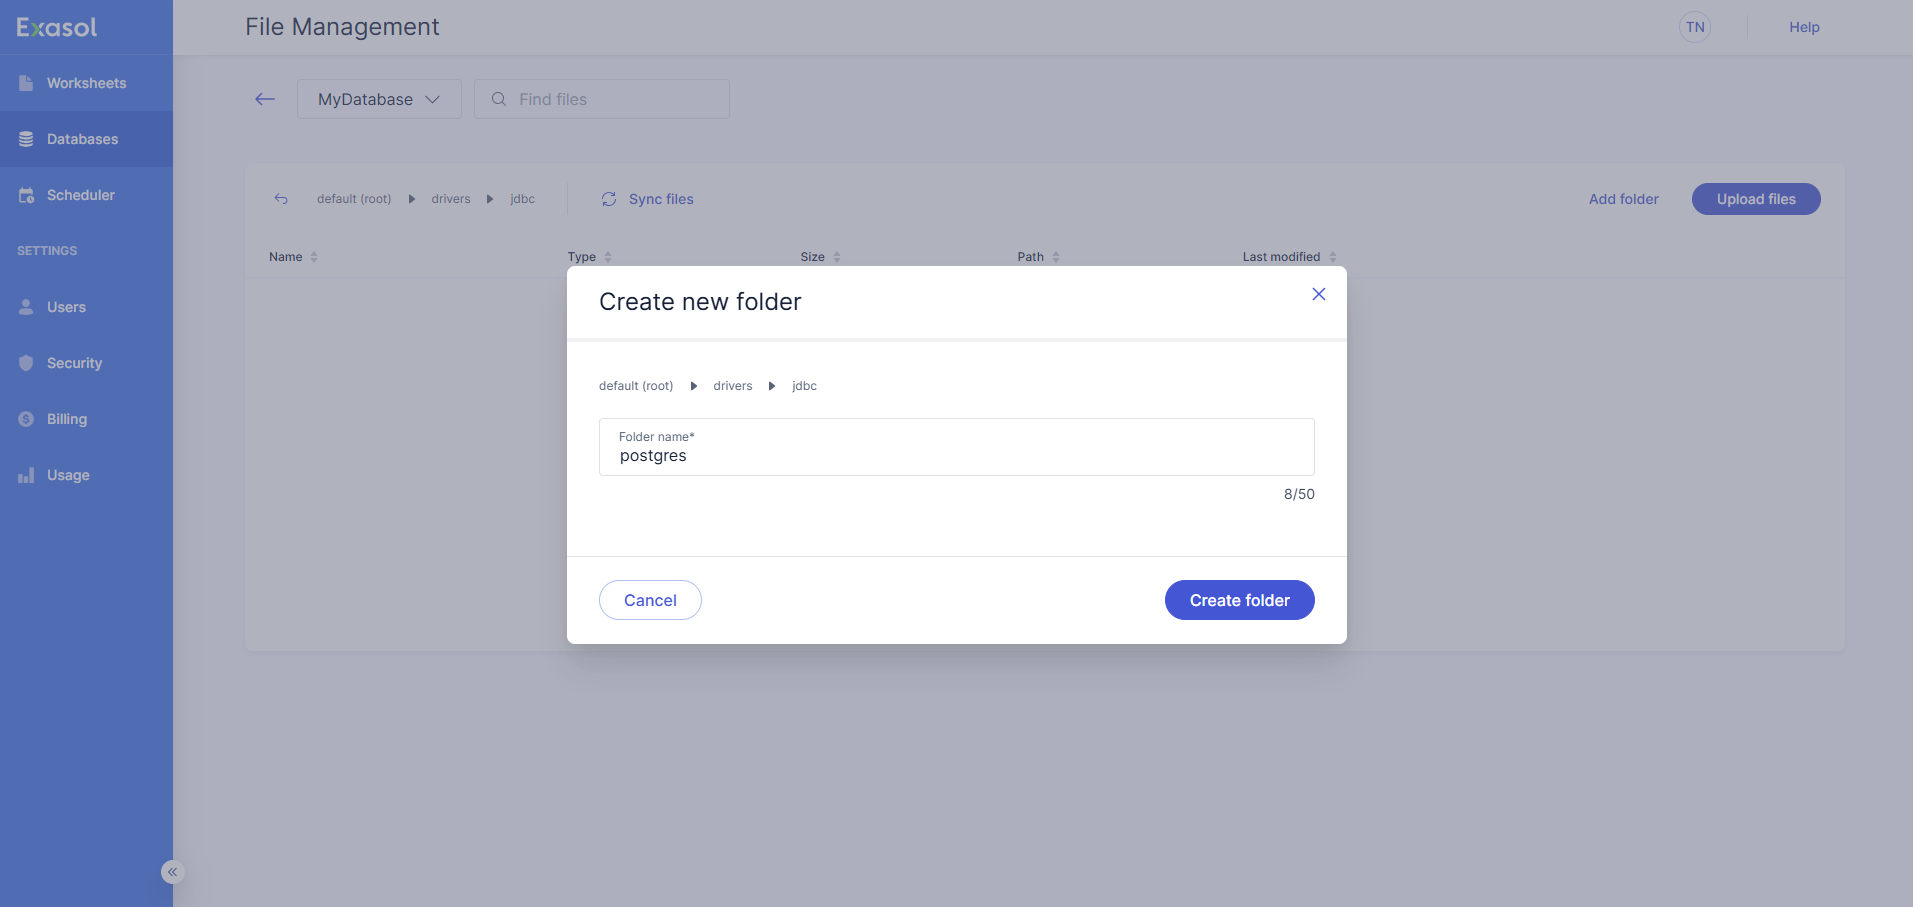
Select the
jdbc
folder and click on Add folder to create a folder inside it with the name of the driver, for example,postgres
.
-
Select the driver folder, for example
drivers > jdbc > postgres
, then click on Upload file.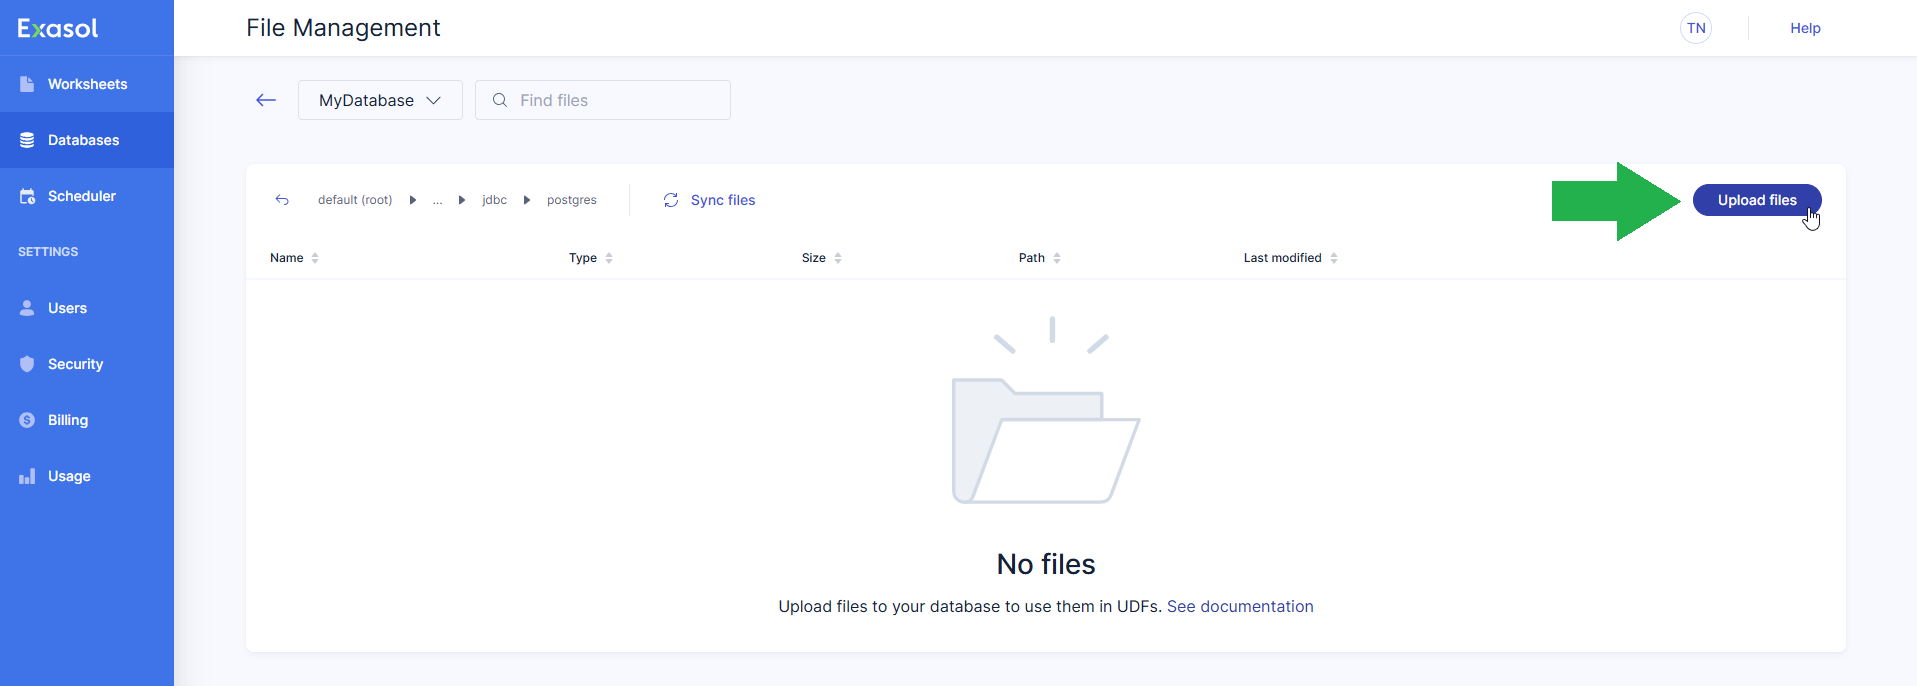
-
Select the
<driver>.jar
andsettings.cfg
files on your computer to add them to the Upload files dialog, then click on Upload to upload the files to the driver folder, or click on Cancel to abort the upload. For example: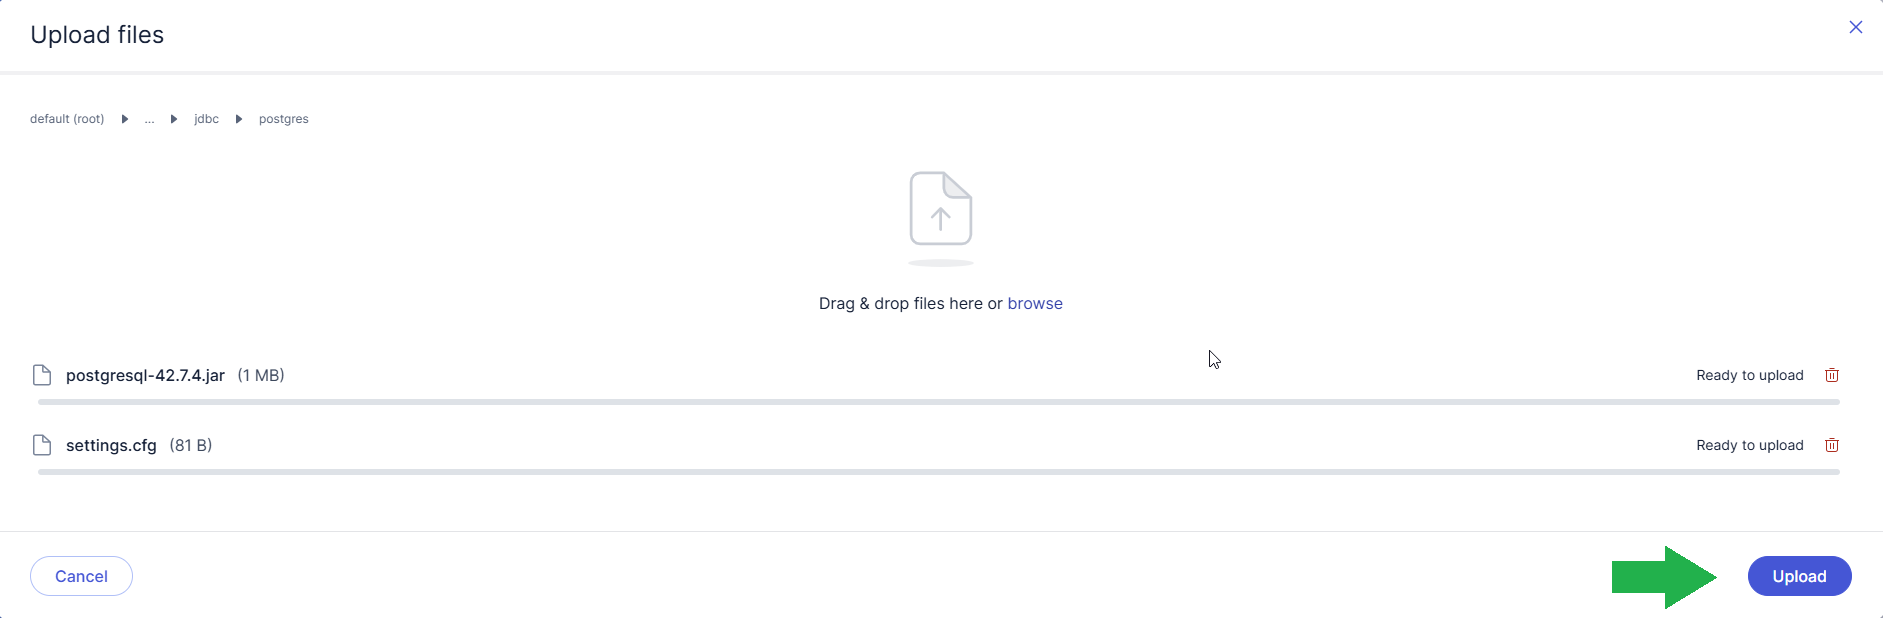
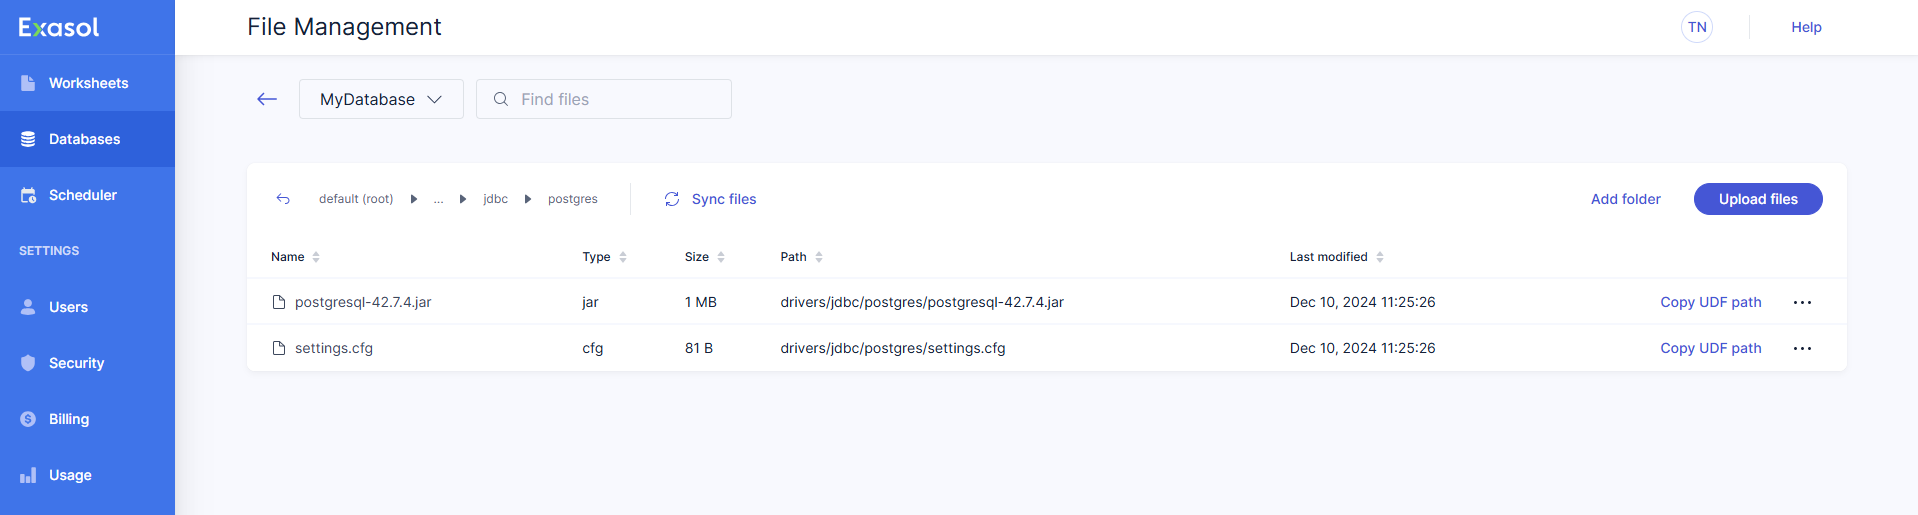
-
Verify that the driver files have been added to the file system.