Configure backups

To make sure that your data is continuously protected in case of a database failure, you can schedule full and incremental backups to be run with regular intervals. You can also create backups manually when required, for example before a system update.
Backups are stored on archive volumes. Archive volumes can be configured either locally within the cluster (local archive) or on a location outside of the cluster (remote archive). This articke explains how to create a local archive volume and a simple backup schedule.
To learn more about backups, see Backup and restore.
To learn more about how to create and manage archive volumes, see Storage management.
The following examples use ConfD through the command-line tool confd_client, which is available on all database nodes. You can also access ConfD through XML-RPC in your own Python programs. For more information, see ConfD.
Create a local archive volume
-
Connect to the cluster operating system (COS) using
c4 connect -i PLAY_ID -s cos.Example:
Copy./c4 connect -i c3275f84 -s cosTo find the play ID, you can use
c4 ps.For more information about how to use c4 commands, see How to use c4.
-
To create a local archive volume, use the ConfD job st_volume_create and configure the required parameters as described in the following table.
Some parameter values for the archive volume must match the corresponding values for the data volume. To find out the values for the data volume, use the ConfD jobs db_info and st_node_list.
 Show examples of output from db_info and st_node_list
Copy
Show examples of output from db_info and st_node_list
Copyconfd_client db_info db_name: Exasol
config:
...
nodes:
- 11
- 12
- 13
- 14
num_active_nodes: 3
...
owner:
- 500
- 500
...
nodes:
active:
- n11
- n12
- n13
reserve:
- n14
...Copyconfd_client st_node_list
'0':
hdd_free_space:
disk1: 93.5566 GiB
hdds:
name: /dev/nvme2n1
type: disk1
...
name: /dev/nvme3n1
type: disk1
...
name: n11
...
'1':
hdd_free_space:
disk1: 93.5566 GiB
hdds:
name: /dev/nvme2n1
type: disk1
...
name: /dev/nvme3n1
type: disk1
...
name: n12
...
'2':
hdd_free_space:
disk1: 93.5566 GiB
hdds:
name: /dev/nvme2n1
type: disk1
...
name: /dev/nvme3n1
type: disk1
...
name: n13
...
'3':
hdd_free_space:
disk1: 93.5566 GiB
hdds:
name: /dev/nvme2n1
type: disk1
...
name: /dev/nvme3n1
type: disk1
...
name: n14
...Required parameters
The following parameters must be included with the st_volume_create command:
Parameter name
Data type Value
diskstring The disk name in Exasol for the storage disk where the data volume resides.
ownertuple, list Owner tuple (or list of tuples) for the data volume.
nodeslist List of node IDs in the data volume.
num_master_nodesinteger The number of master nodes (active nodes) in the data volume.
namestring A name for the new archive volume.
redundancyinteger The redundancy level of the archive volume.
sizestring Volume size for the archive volume as a string, with unit (MiB, GiB, or TiB).
The size value depends on the database size and the backup schedule.
partition_sizestring, integer 4294967296for volumes <250 GiB34359738368for volumes ≥ 250 GiB and <1TiB274877906944for volumes ≥ 1 TiBsharedboolean truetypestring archiveblock_sizestring 512 KiBstripe_sizestring 512 KiBMaster nodes
The parameter
num_master_nodesdefines the number of master nodes that the volume will use, which is the number of active nodes in the cluster. For example, in a cluster with 3 active nodes and 1 reserve node (3+1),num_master_nodesmust be set to3.Example:
To create a 1 TiB data volume with the name
LocalArchiveVolume1
on the storage diskdisk1
with 3 master nodes and redundancy 2, execute the following ConfD job:Copyconfd_client st_volume_create name: LocalArchiveVolume1 disk: disk1 type: archive size: '1 TiB' nodes: '[11, 12, 13]' num_master_nodes: 3 redundancy: 2 block_size: '512 KiB' stripe_size: '512 KiB' partition_size: 274877906944 shared: true owner: '[500,500]'
# ConfD returns the volume ID of the new archive volume:
vid: 3
Create a backup schedule
-
Log in to Exasol Admin and open the Schedules page.
-
Click on the + icon at the top of the list.

-
Enter the required details in the Add schedule dialog.
Name A name to identify the schedule Database The database that the backup will run on Volumes The archive volume to use Levels The backup level Frequency When and how often the backup will run Expiration (optional) An expiration time for the backup 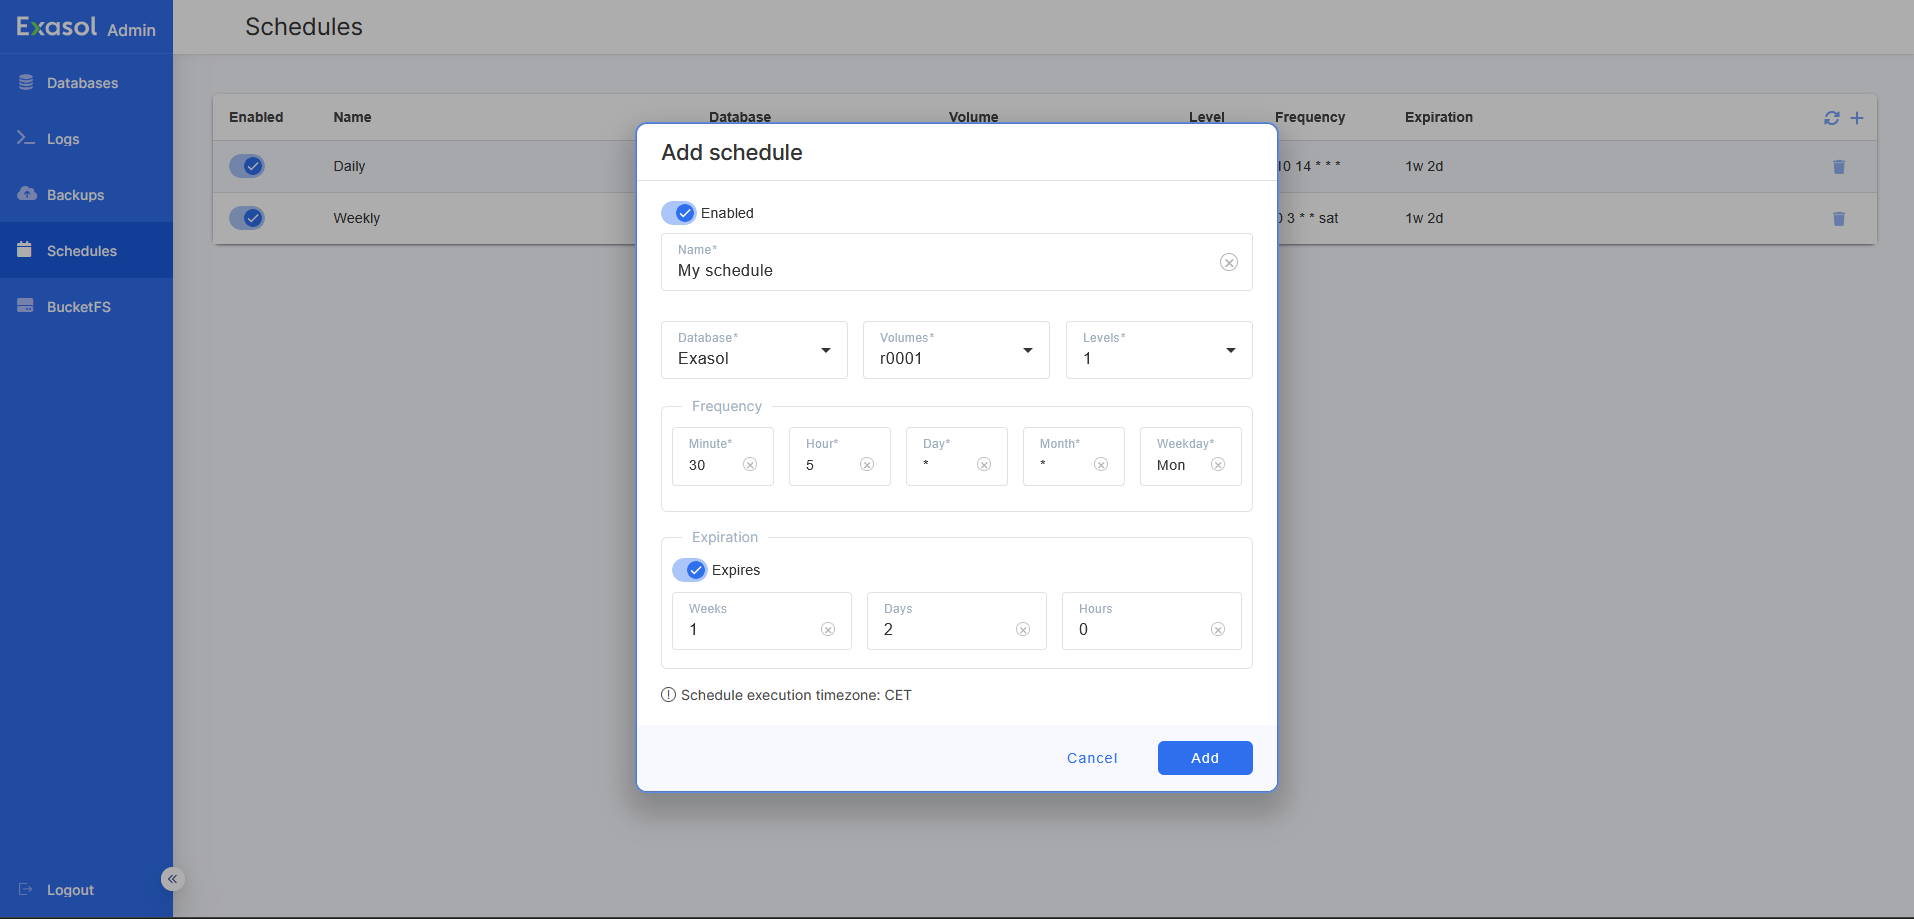
-
Click on Add to create the schedule.