Create new bucket
Learn how to create a bucket in a BucketFS service.
In Exasol 2026.1.0 and later you can use Exasol Admin for this procedure. For earlier versions, you must use ConfD.
Prerequisites
-
A BucketFS service must be running.
-
To use Exasol Admin to add buckets, the Exasol Admin service must be enabled in your deployment. For more information, see Exasol Admin.
Procedure (Exasol Admin)
-
Log in to Exasol Admin and go to the BucketFS page.
-
Click on the
Add a new bucket
button
-
Enter a name for the new bucket and unique, secure passwords for read and write access. To make the bucket publicly readable, disable require read password.
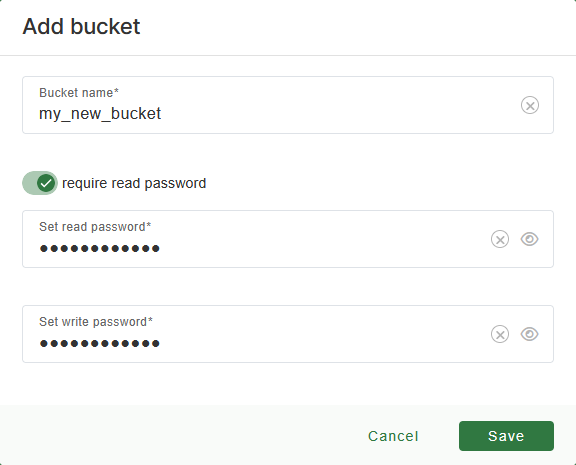
The name of the bucket cannot be changed later.
Always use unique, secure passwords. Do not use the same password for write and read access.
-
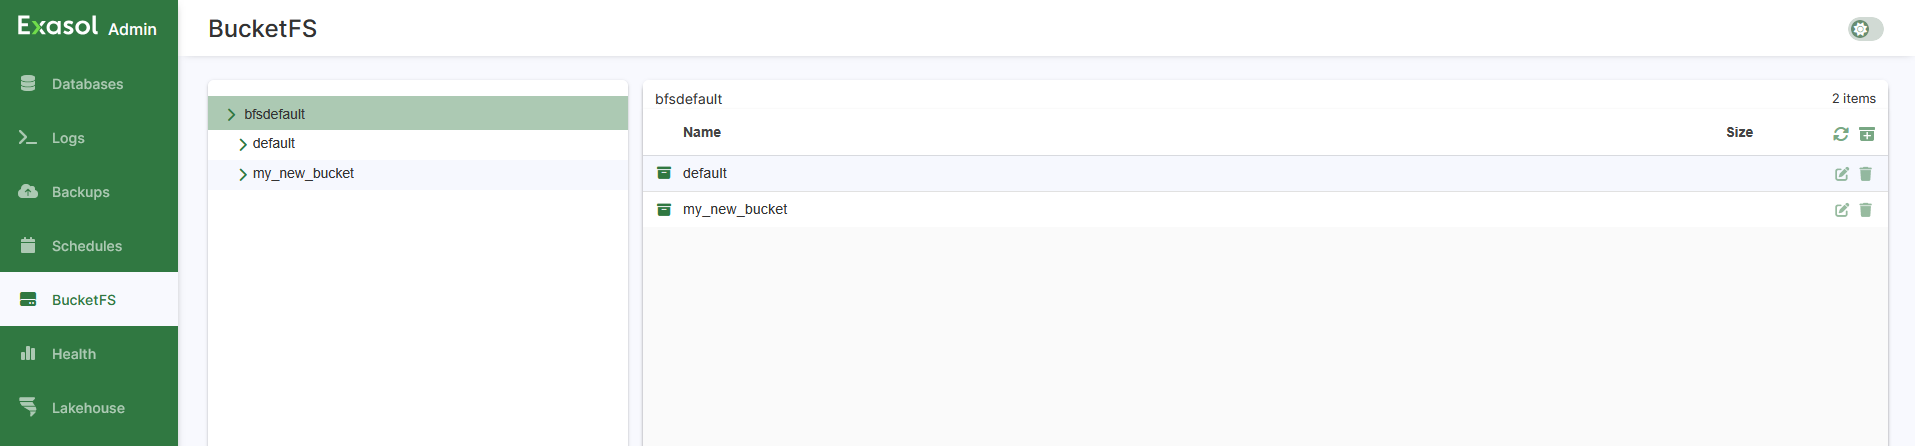
Click on Save to create the bucket.
Delete a bucket
To delete a bucket, click on the icon (trash). You will be asked to confirm before the bucket is deleted.
A bucket that has been deleted cannot be restored.
Edit bucket access
To edit the read/write passwords for a bucket (or make it public), click on the icon (pencil). For more information, see Change bucket password.
Procedure (command line)
The following examples use ConfD through the command-line tool confd_client, which is available on all database nodes. You can also access ConfD through XML-RPC in your own Python programs. For more information, see ConfD.
To create a bucket, use the ConfD job bucket_add with the following parameters:
| Parameter name | Data type | Description |
|---|---|---|
bucket_name
|
string | The name of the new bucket. |
bucketfs_name
|
string |
The name of the BucketFS service that will store the new bucket. This can be either the default service See also Create new BucketFS service. |
public
|
boolean |
Indicates whether the bucket content should be public. Valid values are |
read_password
|
string | Password for read permissions in the bucket. |
write_password
|
string | Password for read+write permissions in the bucket. |
For example:
confd_client bucket_add bucket_name: my_bucket bucketfs_name: my_bucketfs public: False read_password: READPW write_password: WRITEPWVerification
To verify that the bucket was successfully created, use the ConfD job bucketfs_info.
This ConfD job returns the full details about the specified BucketFS service including all buckets. If you only want to verify that the newly created bucket exists, use | grep <bucket name>.
Example:
confd_client bucketfs_info bucketfs_name: my_bucketfs | grep my_bucket
  my_bucket:
    _sec_name: 'Bucket : my_bucket'
    name: my_bucket
For information about how to access and use the new bucket, see Manage files in BucketFS.
For information about how to expand scripting languages using BucketFS, see Adding new packages to existing script languages.