Get started with Lakehouse Turbo
Learn how to get started using Lakehouse Turbo.
This article describes Lakehouse Turbo in an as-application deployment of Exasol. To learn how to use Lakehouse Turbo in Exasol SaaS, see Get started with Lakehouse Turbo in Exasol SaaS.
Lakehouse Turbo is supported in Exasol SaaS and in as-application deployments of Exasol 2026.1 and later, including Exasol Personal.
Prerequisites
-
An on-premises installation of Exasol 2026.1.0 or later with Exasol Admin enabled. For more information, see Install and deploy Exasol and Exasol Admin.
-
Podman must be installed on all nodes in the Exasol cluster.
Using Databricks
-
An active Databricks account with external data access enabled for the metastore
If external access is not enabled in Databricks (for vended credentials), you also need:
-
Access to the AWS or Azure account that hosts the data lakehouse
-
Adequate permissions on the storage account to grant Lakehouse Turbo access to the data
Using Apache Iceberg
This article shows how to use Lakehouse Turbo with Databricks. To use Lakehouse Turbo with Apache Iceberg you must change the default source system for Lakehouse Turbo through the REST API.
For more information, see Lakehouse Turbo with Apache Iceberg.
-
The Iceberg catalog must be reachable from the system running Lakehouse Turbo.
Activate Lakehouse Turbo
-
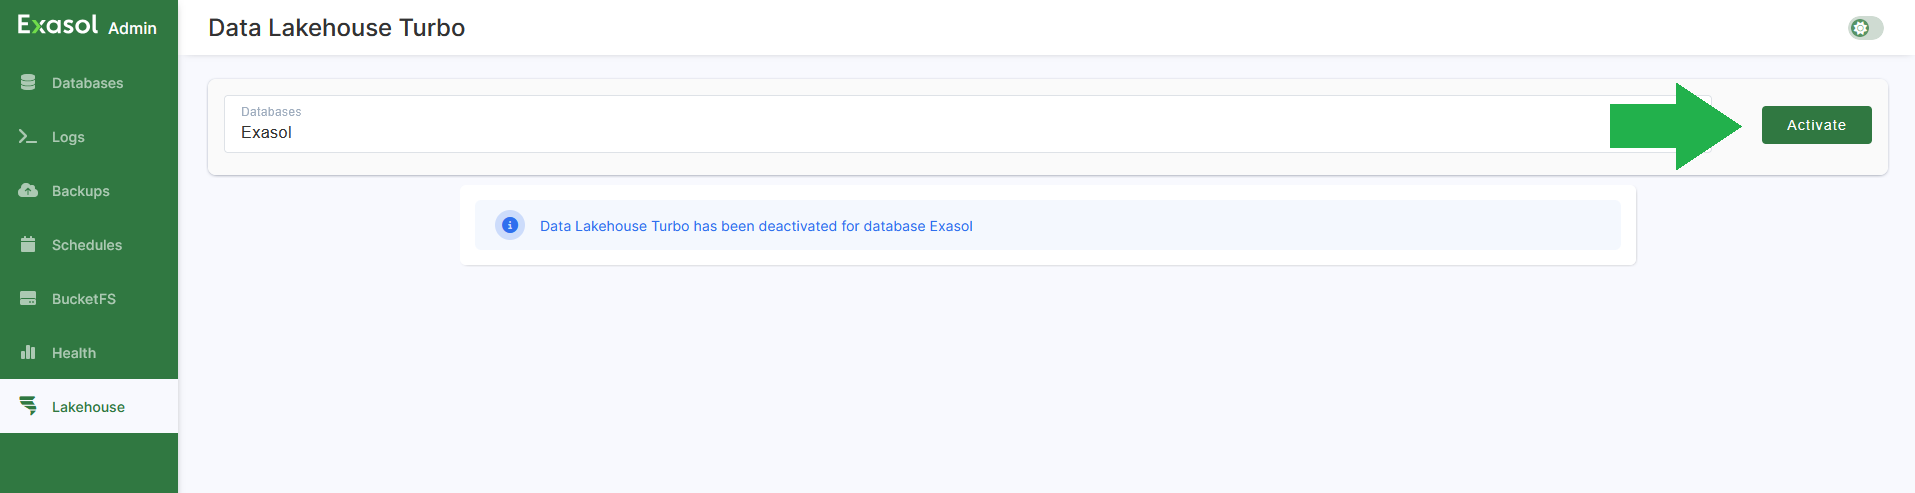
Log in to Exasol Admin and open the Lakehouse page.
-
Click on Activate to activate Lakehouse Turbo for the selected database.
Configure access
This section describes connecting to a Databricks catalog using the Lakehouse Turbo UI. To connect to Apache Iceberg catalogs you must change the default source system to Iceberg through the REST API. For more information, see Lakehouse Turbo REST API.
Screenshots and descriptions of the Databricks UI are for orientation only and may differ from the current version of Databricks. For up-to-date information, refer to the Databricks documentation.
To be able to mirror selected tables within Exasol, Lakehouse Turbo needs read access to the metadata (Catalog) and storage layer (Data Lake).
-
To grant access to the catalog in Databricks you can use a Databricks personal access token (PAT) or OAuth.
-
To grant access to the data lakehouse you can either use vended credentials (recommended) or use authentication provided by the storage provider (AWS or Azure).
Catalog access (Databricks PAT)
-
In your Databricks account, go to Settings > Access tokens > Manage > Generate new Token to generate a new personal access token.
Select the scope unity-catalog for the token, enter a descriptive comment (name) and a and click on Generate.
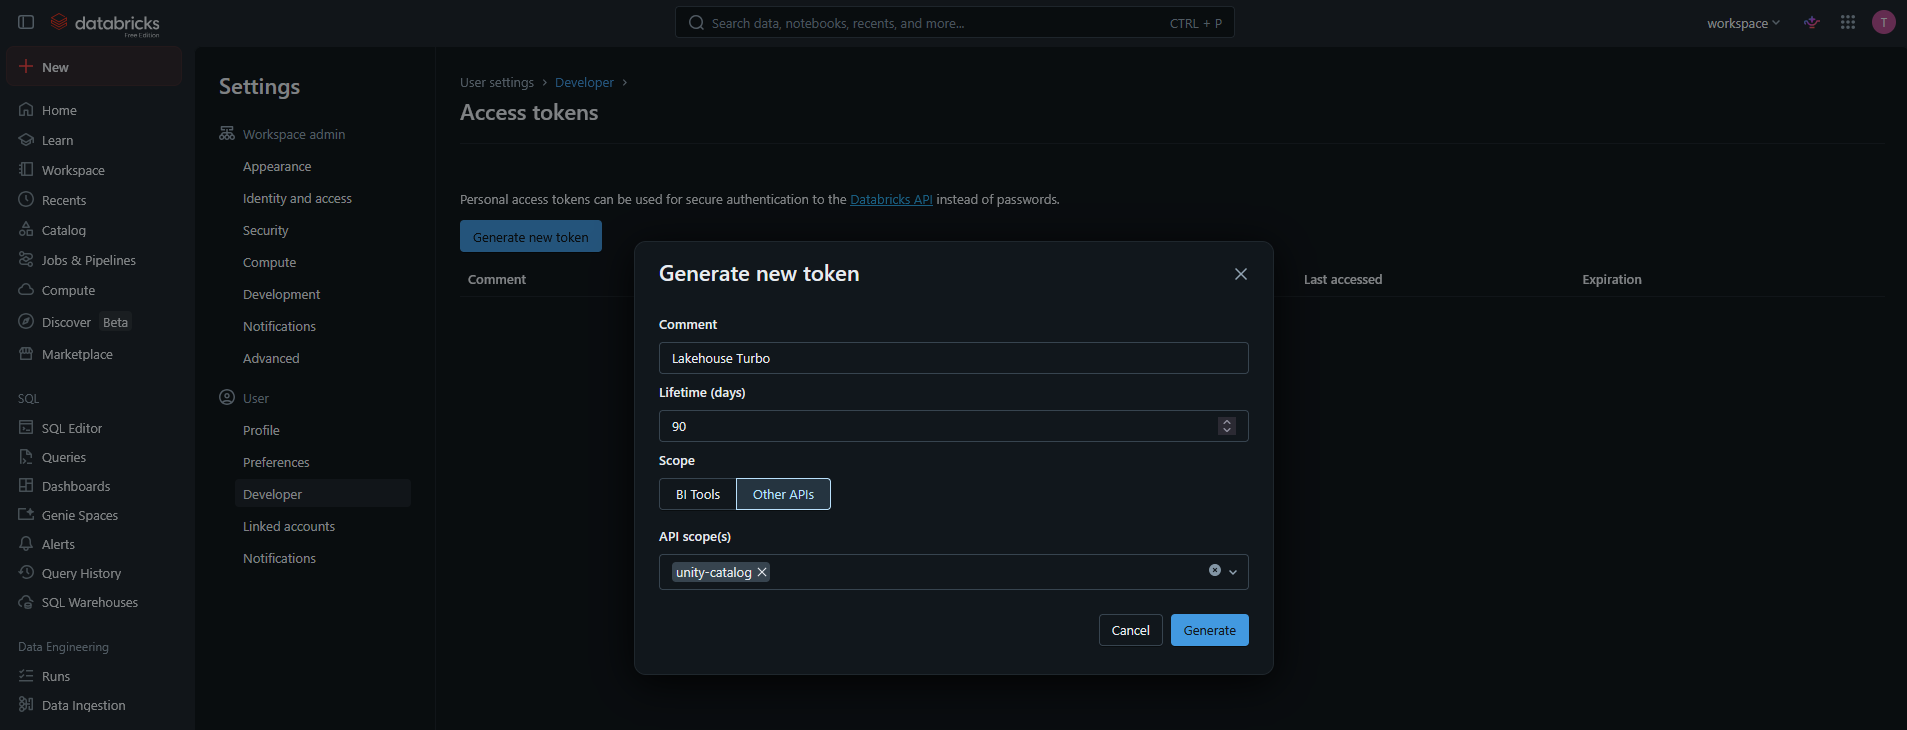
Copy the token from the dialog window.
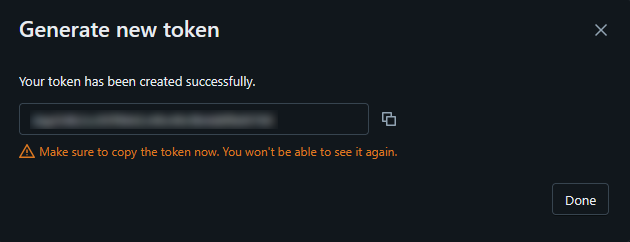
Make sure to copy the token since it is only shown once and cannot be retrieved later.
For more help, see Create personal access tokens for workspace users in the Databricks documentation.
-
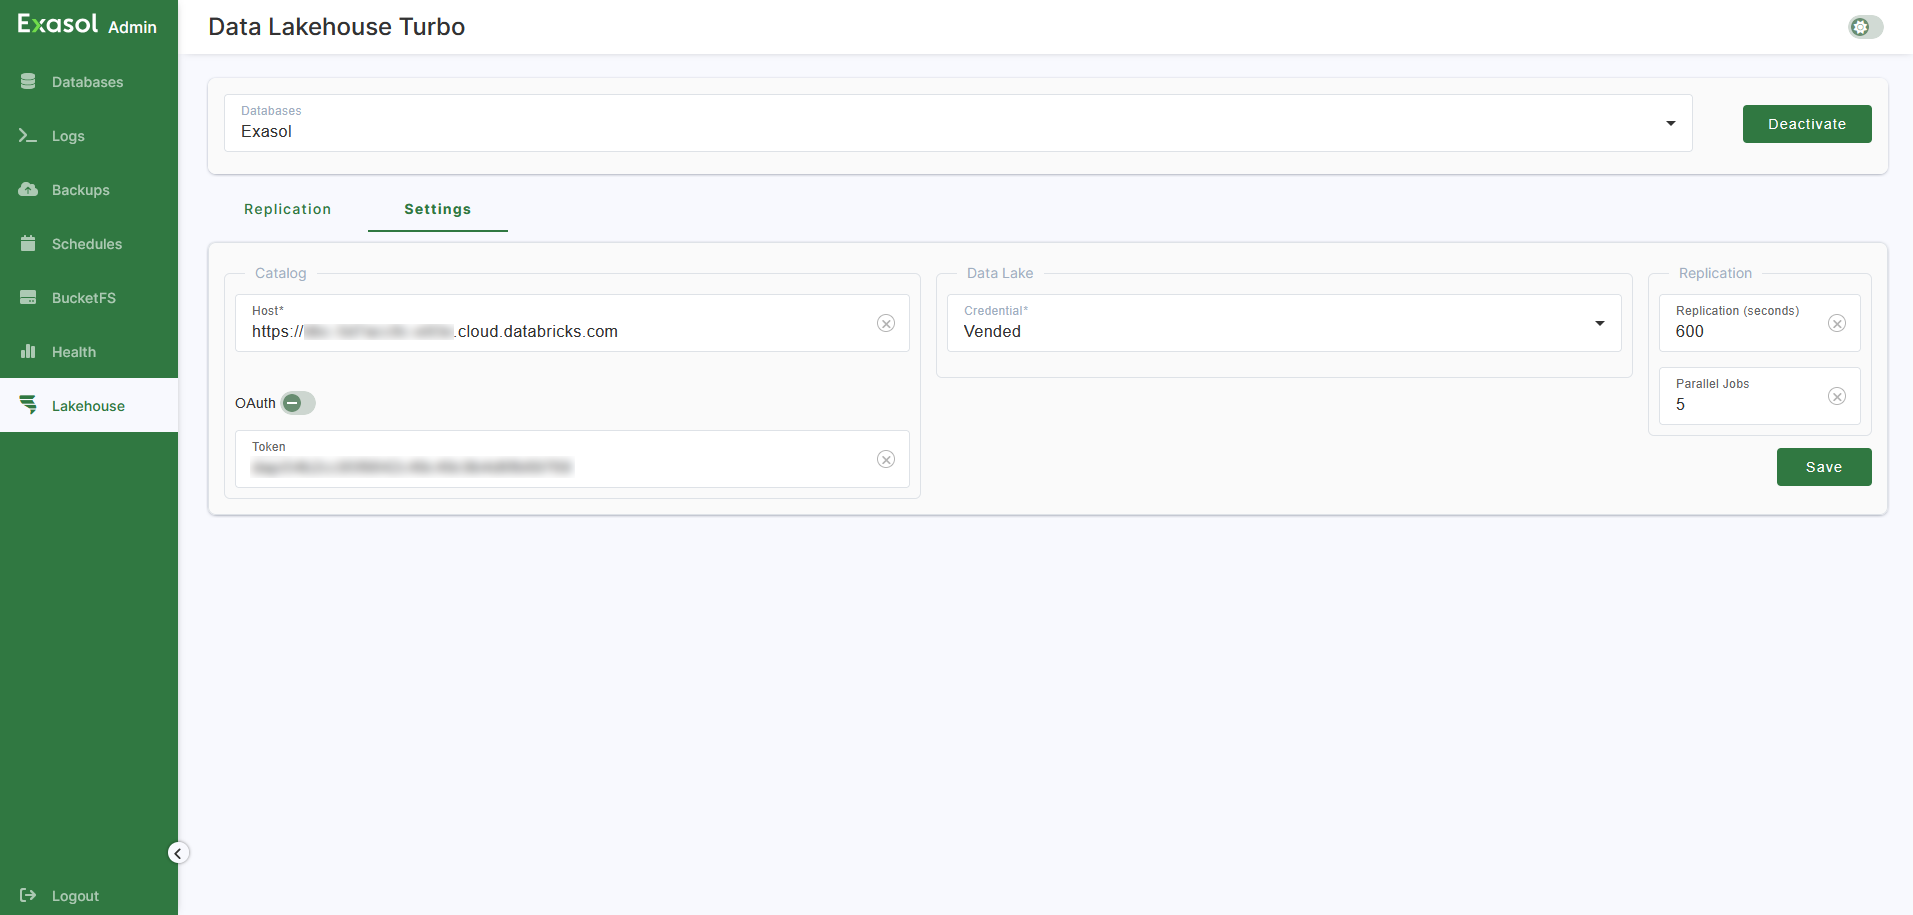
In Exasol Admin, go to the Lakehouse > Settings tab.
-
In Catalog > Host, enter the URL of the Databricks workspace host.
-
Disable OAuth if it is enabled.
-
In Catalog > Token, enter the Databricks personal access token.
-
Click on Save to save the settings.
Catalog access (OAuth)
To use OAuth with Databricks, you must create an OAuth service principal in the Databricks account and grant it read access to Databricks REST API.
For information about using OAuth with Iceberg catalogs, refer to the catalog provider's documentation.
-
Create an OAuth Principal in your Databricks account
In Databricks you can add service principals either on the account level or on the workspace level. To add and configure a service principal on the account level you must have the account admin role. See the following sections in the Databricks documentation:
-
Assign the OAuth service principal to your Databricks workspace
The next step is to assign the OAuth service principal to your Databricks workspace. You can do this using either the account console or the workspace admin settings page. See the following sections in the Databricks documentation:
-
Grant the following privileges to the service principal on the catalogs, schemas, or tables that should be mirrored by Lakehouse Turbo:
-
USE SCHEMA(prerequisite) -
EXECUTE(read) -
READ VOLUME(read) -
SELECT(read)
-
-
Generate a secret to enable authentication for the service principal.
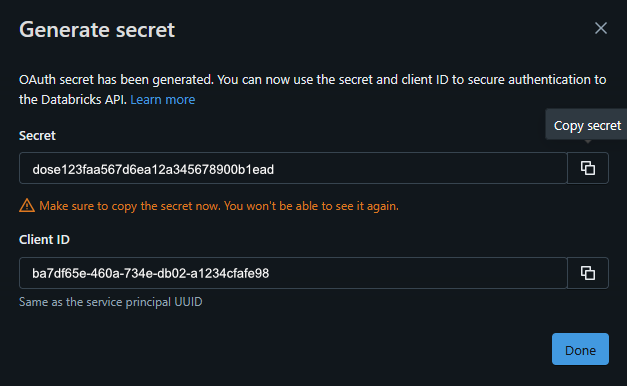
Make sure to copy the secret since it is only shown once and cannot be retrieved later.
-
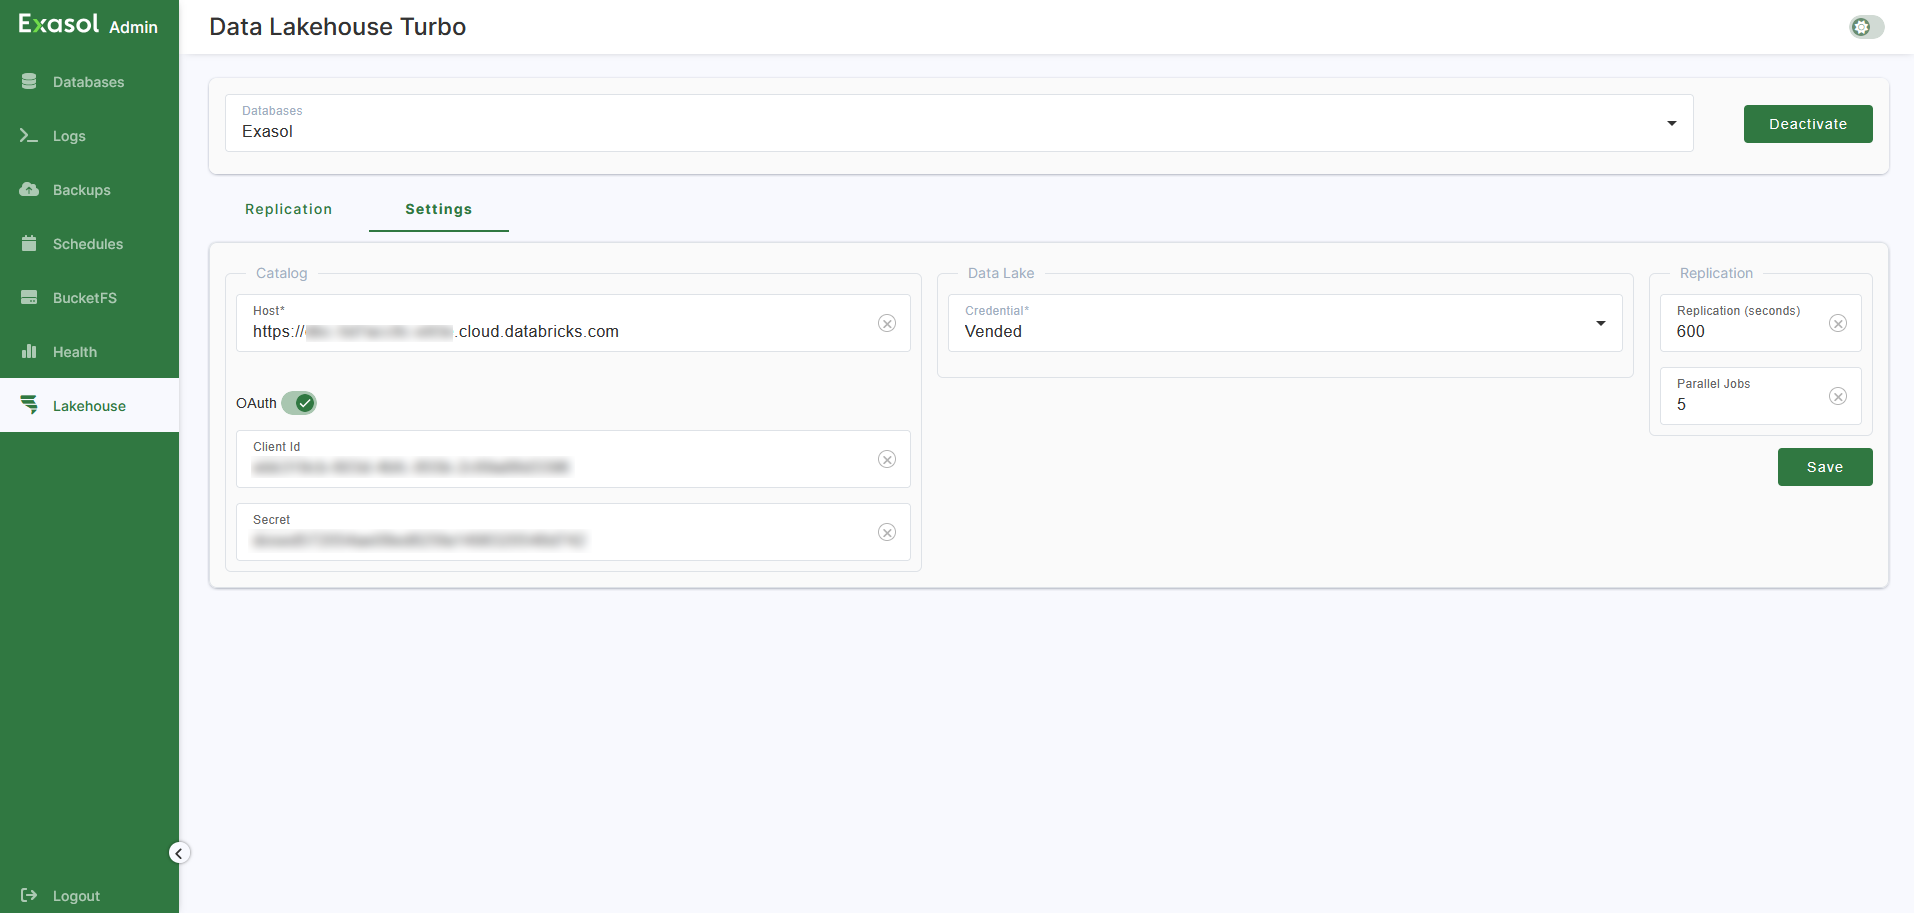
In Exasol Admin, go to the Lakehouse > Settings tab.
-
Enable OAuth and enter the Client ID and Secret that you generated for the OAuth service principal.
-
Click on Save to save the settings.
Data lake access (Vended)
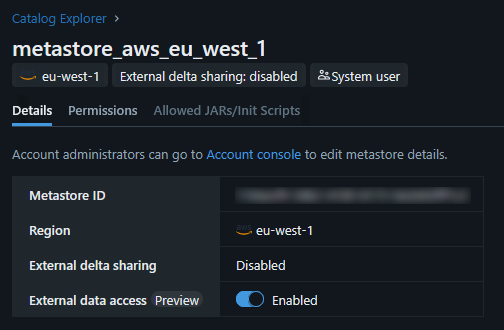
If you choose to use vended credentials, Databricks provides temporary table credentials to access both the catalog metadata and the underlying storage. External data access must be enabled in the Databricks metastore, and the user must have the EXTERNAL USE SCHEMA privilege on the schema or its parent catalog. No further configuration is needed in Lakehouse Turbo.
If external data access is not be available in your Databricks account, contact your Databricks account administrator.
For information about using vended credentials with Iceberg catalogs, refer to the catalog provider's documentation.
-
In the Databricks workspace, enable External data access for the metastore.
-
Grant the
EXTERNAL USE SCHEMAprivilege on the catalog or schema to the principal (user):Copy-- grant access to a schema
GRANT EXTERNAL USE SCHEMA ON SCHEMA <catalog_name>.<schema_name> TO `my_user@example.com`
-- grant access to a whole catalog
GRANT EXTERNAL USE SCHEMA ON CATALOG <catalog_name> TO `my_user@example.com`For more help, see Enable external data access to Unity Catalog in the Databricks documentation.
-
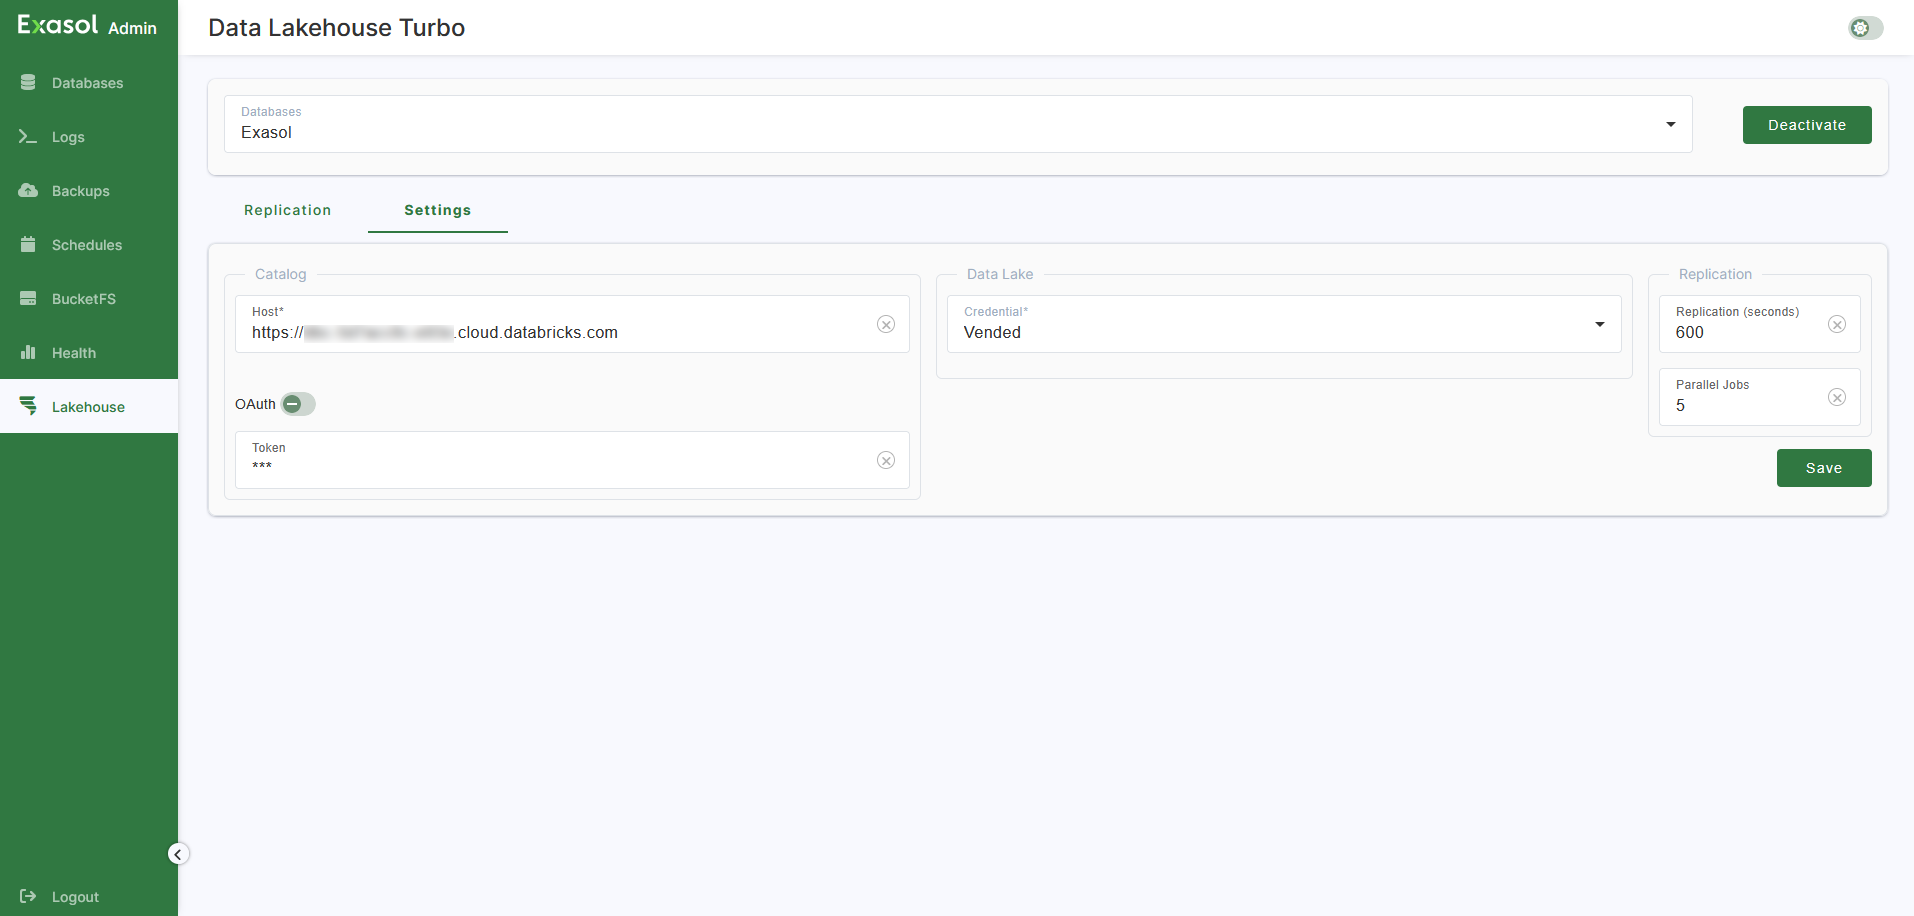
In Exasol Admin, go to the Lakehouse > Settings tab.
-
In Data Lake > Credential, select Vended.
-
Click on Save to save the settings.
Data lake access (Azure)
-
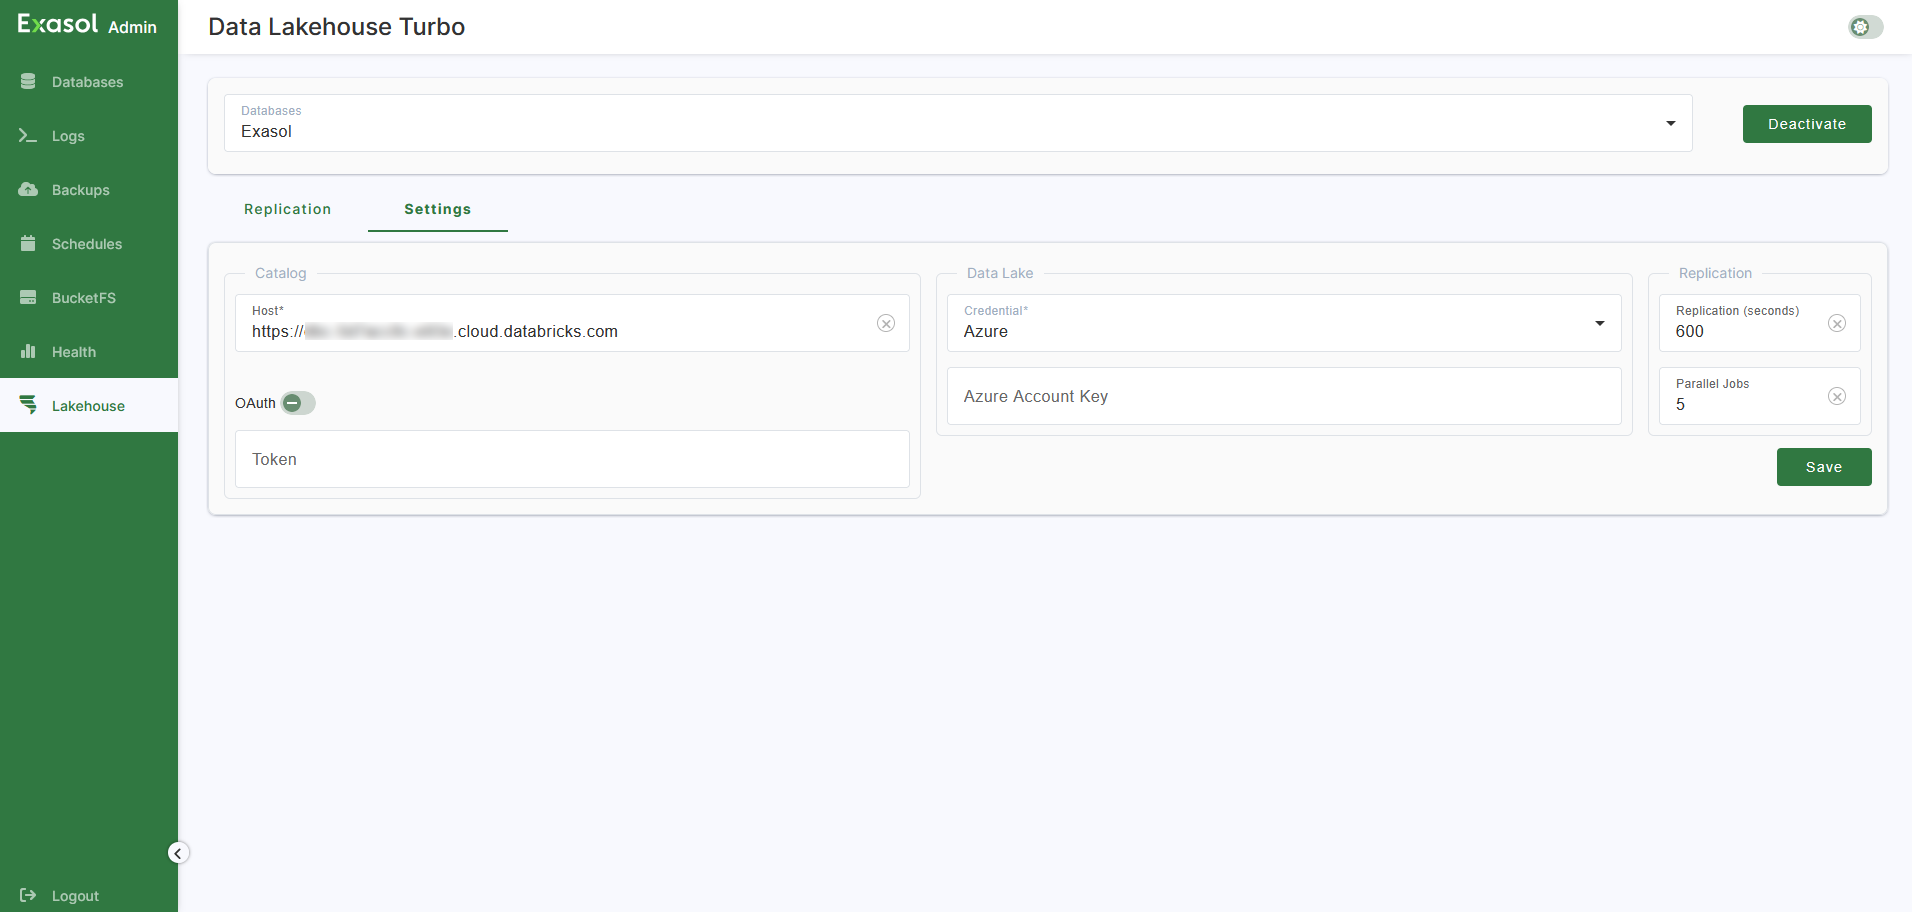
In Exasol Admin, go to the Lakehouse > Settings tab.
-
In Data Lake > Credential, select Azure.
-
In Azure Account Key, provide your Azure storage account access key.
Data lake access (AWS)
Step 1: Get prerequisites
-
In Exasol Admin, go to the Lakehouse > Settings tab.
-
In Data Lake > Credential, select AWS.
-
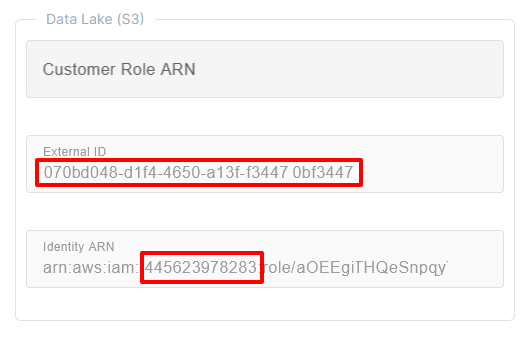
Copy the contents of the External ID field and the the 12-digit AWS Account ID from the Identity ARN field.
Example:
Step 2: Create a new IAM role in AWS
-
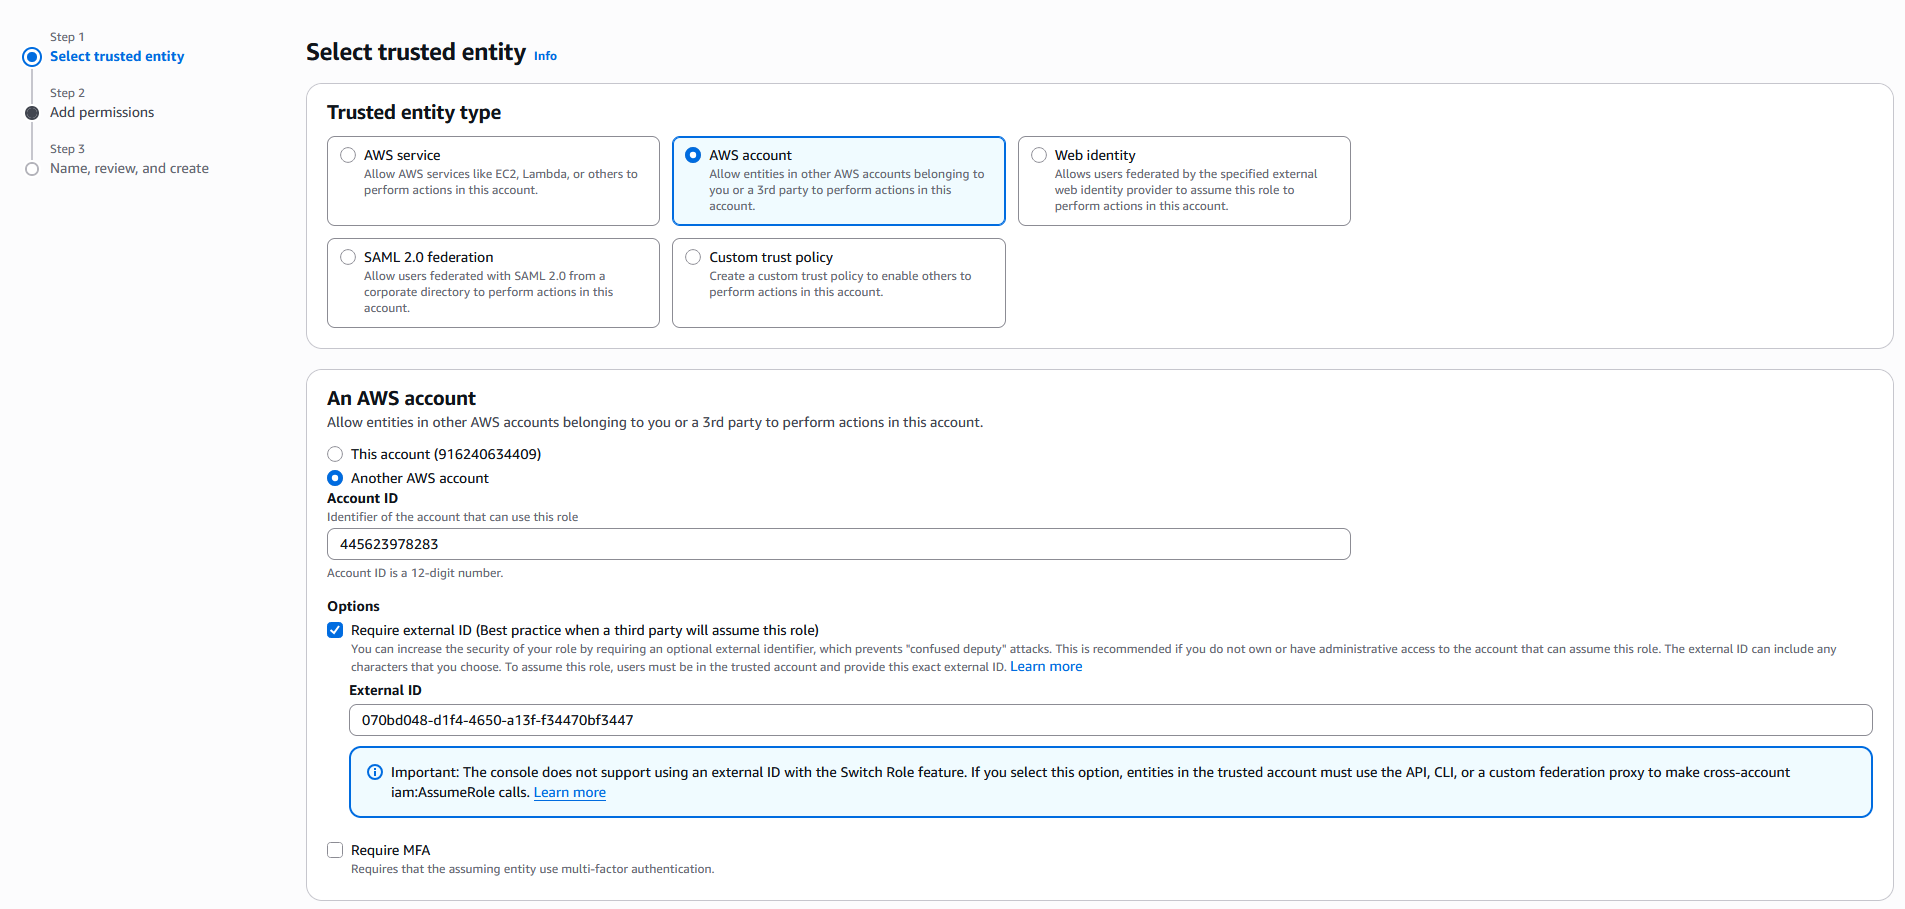
In the AWS account that hosts the S3 bucket of the data lakehouse, navigate to IAM and create a new role with the following settings:
-
Trusted entity type = AWS Account
-
Another AWS Account -> Account ID = AWS Account ID copied from the Lakehouse Turbo Settings tab (see previous step)
-
External ID = External ID copied from the Lakehouse Turbo Settings tab
Example:
-
-
Add the permission policy
AmazonS3ReadOnlyAccess
. If desired, set a permissions boundary to limit access to the S3 bucket.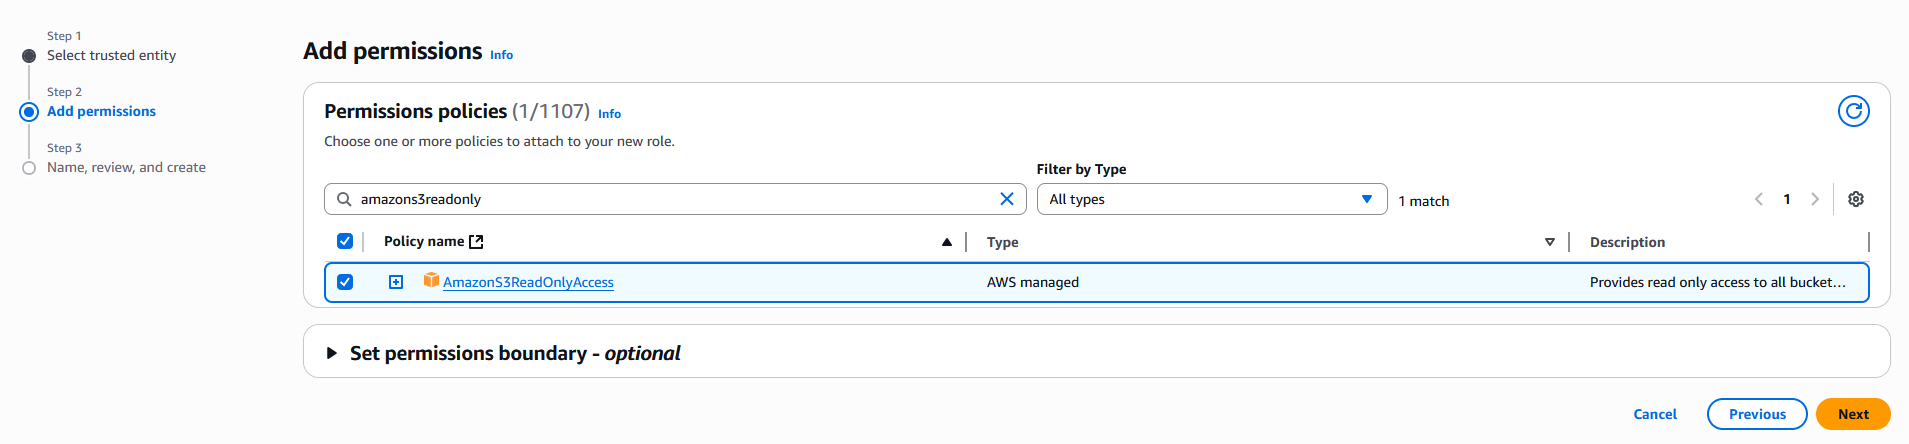
-
Click on Next, review the settings and add a name and description for the role, then click on Create role.
For more help with configuring IAM roles, see the AWS IAM documentation.
Step 3: Add the Customer Role ARN in Lakehouse Turbo
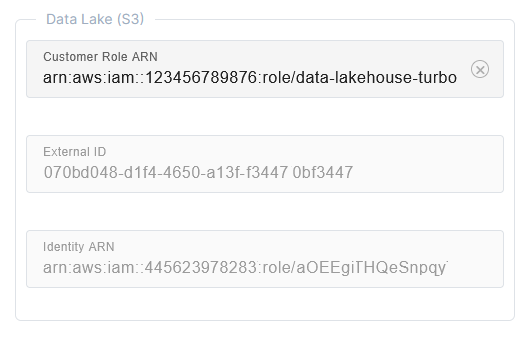
In the Lakehouse TurboSettings tab, enter the ARN of the newly created role in the Customer Role ARN field in the Data Lake (S3) section.
Example:
Optional - Grant access to the role within S3
This step is only required if the created IAM role is in a different AWS account than the S3 bucket.
In the AWS account that hosts the S3 bucket of the data lakehouse, navigate to S3 and do the following:
-
Locate the S3 bucket of your datalake
-
Click on the bucket name and navigate to the Permissions tab
-
Create the role and copy the ARN of the role
-
Add the following statement to the Bucket policy:
Copy{
"Sid": "Grant access for Data Lakehouse Turbo",
"Effect": "Allow",
"Principal": {
"AWS": "${ROLE_ARN}"
},
"Action": [
"s3:GetObject",
"s3:ListBucket"
],
"Resource": [
"${BUCKET_ARN}/*",
"${BUCKET_ARN}"
]
}
Next steps
Once you have connected to your data lakehouse, the next step is to select the catalog and schemas that you want to accelerate using the smart caching in Lakehouse Turbo.