Add database
Learn how to add a new Exasol SaaS database.
You can add up to five databases. If you need more than five databases, click on Help > Support in the web console to open a support request.
Prerequisites
You must be logged in as a user with the Owner
role.
Procedure
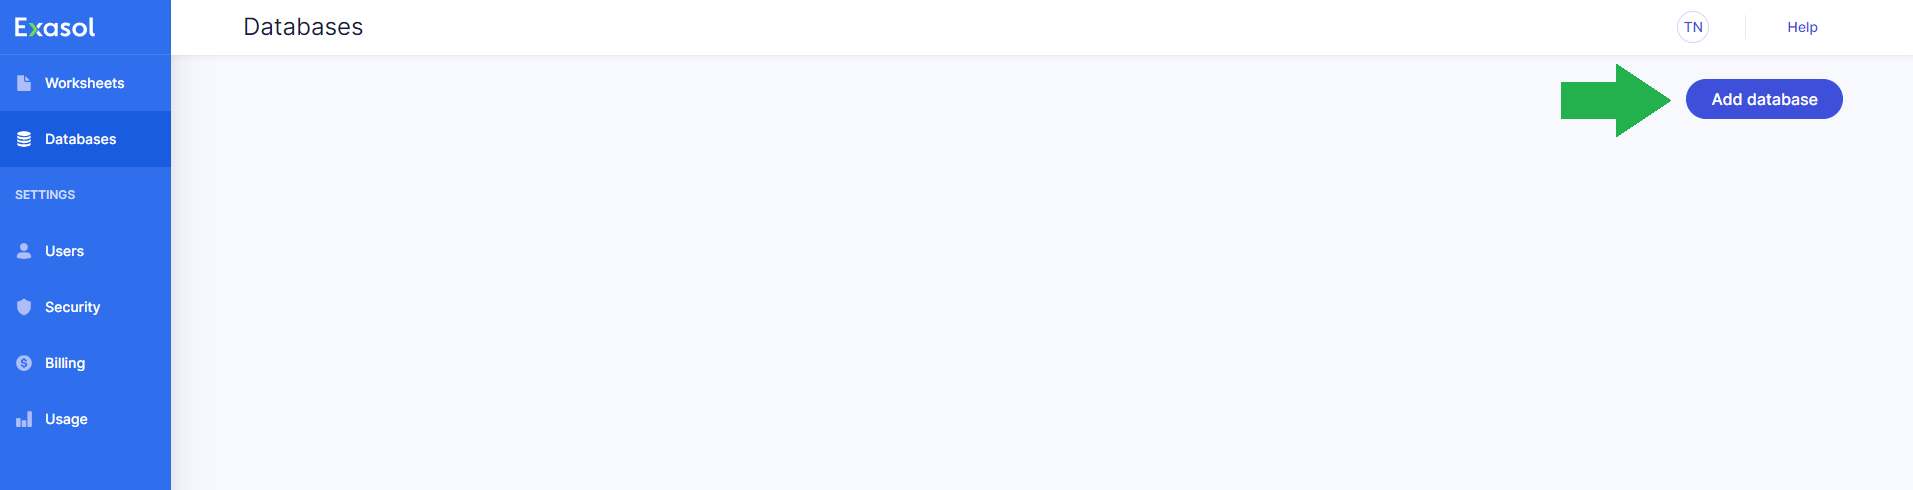
On the Databases page, click on Add database.
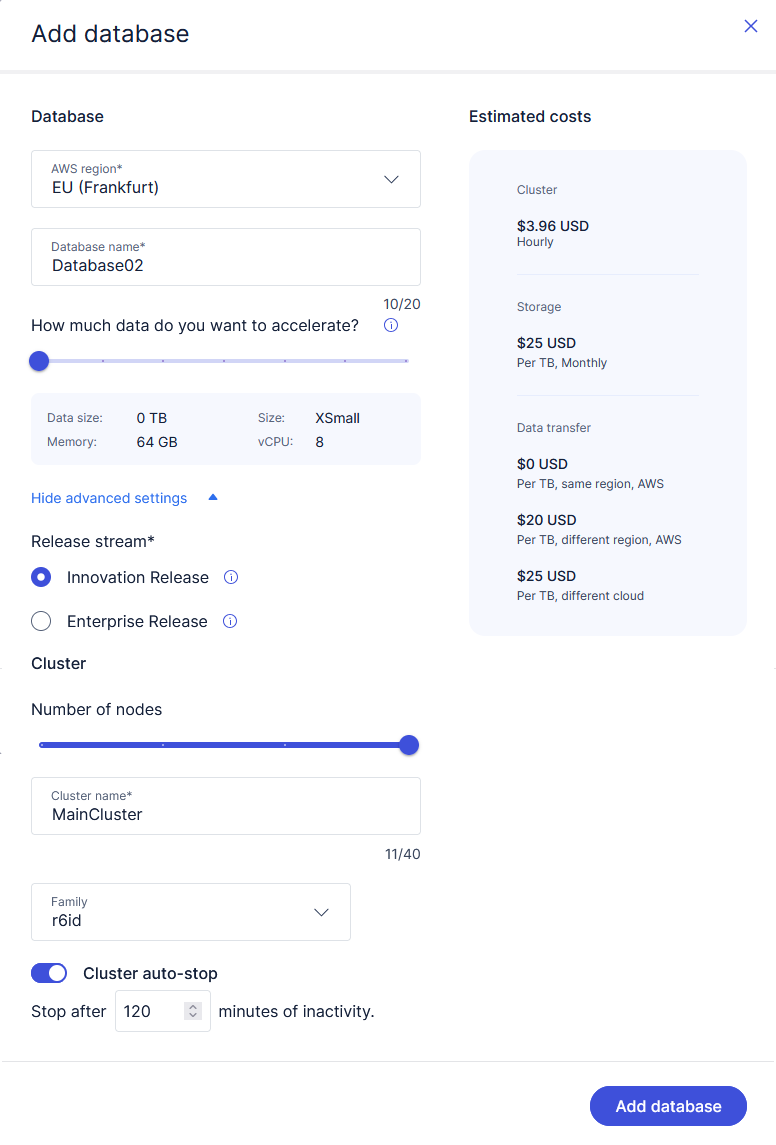
Select the AWS region where your new database will be deployed.
Exasol SaaS can currently only be deployed in the following AWS regions. If you are unsure, select the region that is closest to your location.
| Region | Code |
|---|---|
| US East (Virginia) | us-east-1 |
| US East (Ohio) | us-east-2 |
| US West (N. California) | us-west-1 |
| US West (Oregon) | us-west-2 |
| Europe (Ireland) | eu-west-1 |
| Europe (London) | eu-west-2 |
| Europe (Frankfurt) | eu-central-1 |
Use the slider to select the amount of data you want to accelerate. Exasol SaaS will select the optimal cluster size and instance type for your use case.
The optimal cluster size for an Exasol database is based on usage patterns. As a rule of thumb, start with a RAM size that corresponds to about 10 percent of the size of your raw data.
Depending on your workload, you may need a larger cluster size to use additional CPU and memory. Sometimes, a smaller cluster may however also meet your requirements and be more cost effective. You can dynamically test which size best fits your needs by resizing a cluster.
Advanced settings
In the advanced settings you can fine-tune your cluster by manually setting the number of nodes and choosing an EC2 instance family. You can also choose to use either the Innovation and Enterprise release streams. For more information, click on the Info buttons .
All EC2 instance families are not supported in all AWS regions. If the selected instance family and region are not compatible, you will see an error message. For more information, contact Support.
The Cluster auto-stop feature automatically stops the cluster after 120 minutes of inactivity. You can change the timeout value or disable the auto-stop feature.
Disabling the auto-stop feature may result in increased cloud resource usage.
When you have set the desired options for your database, click on Add database.
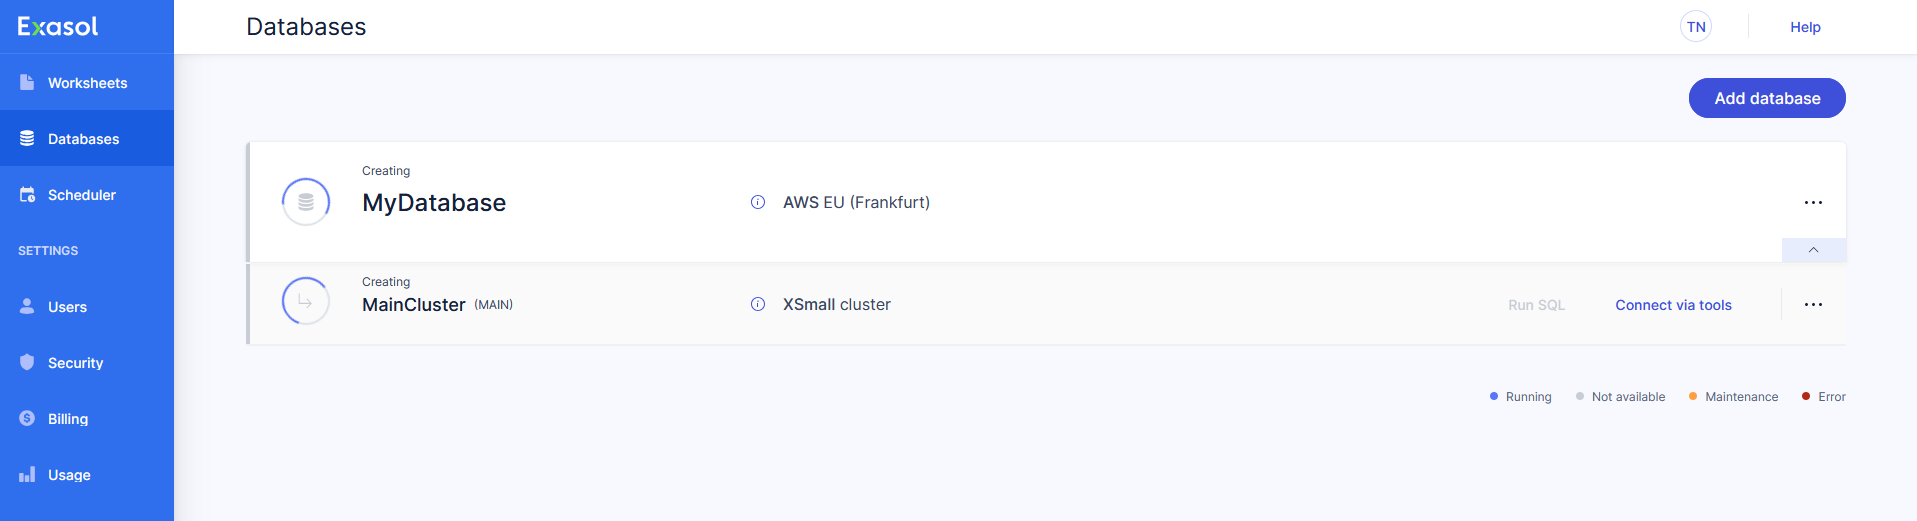
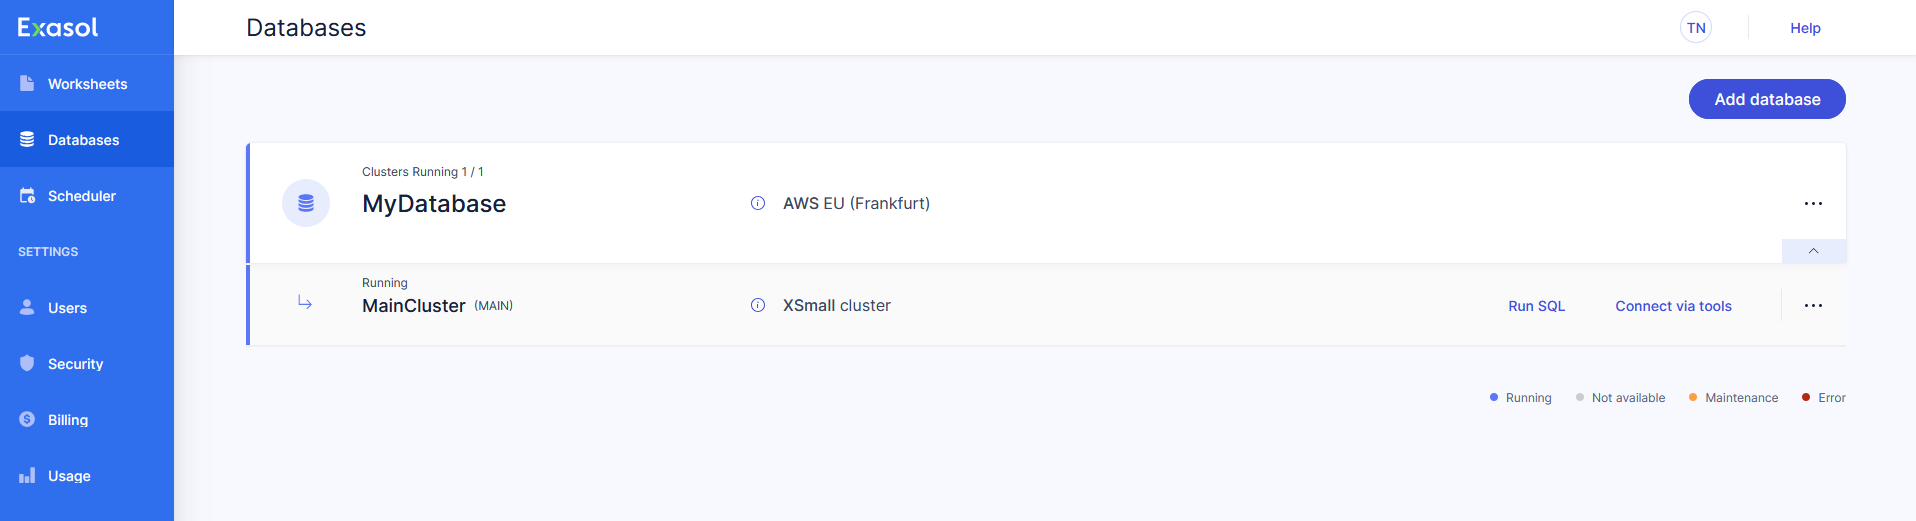
On the Databases page, the new database and cluster will have the status Creating until they are ready for use. The creation process will take about 15 minutes to complete. You will receive an email when your database is ready for use.