Information About Nodes
Exasol typically runs on a cluster of powerful servers. Each server, or node, is connected cluster-internally through at least one private network, and is connected to at least one public network.
Using EXAoperation, which is the operation user interface, you can manage or configure nodes in a cluster, or you can make use of the XML RPC commands
Exasol Cluster Nodes Essentials
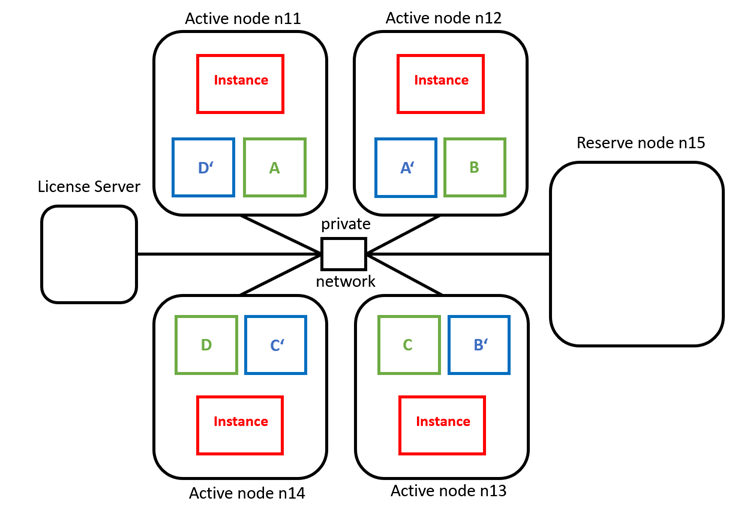
An Exasol Cluster contains two kinds of nodes: License Server and Data nodes. The Data nodes are either in an active role or in a reserve role. Active nodes host database instances in their main memory, and the Main Segments and Secondary Segments (mirrored Main Segments) on disk.
View Node in Cluster
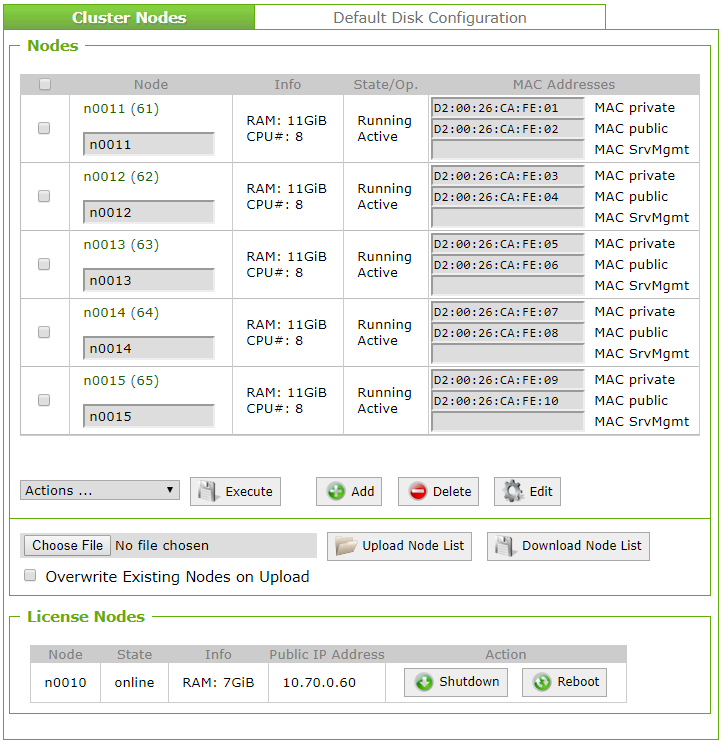
To see a list of nodes in a cluster, in EXAoperation, go to Configuration > Nodes. This opens the Cluster Nodes screen, where the data nodes and license node(s) are shown.
Data Nodes
The data nodes are listed in the Nodes group box with the following information:
| Column | Description |
|---|---|
| Node |
The node number and node label. The node number is a link. If you click on the node link, the Node Information screen opens and you can view or edit the node's properties. |
| Info | Information regarding the node's RAM, and the CPU number. |
| State/Op. |
The state and operational status of each node. The following states are possible:
The following operational statuses are possible:
|
| MAC Addresses | The MAC addresses for the private, public and SrvMgmt networks for each node. |
License Nodes
The license nodes are listed in the License Nodes group box with the following information:
| Column | Description |
|---|---|
| Node |
The node number is displayed (usually 'n0010'). |
| State |
The current state of the license node. The following states are possible:
|
| Info | Information regarding the node's RAM. |
| Public IP Address | The public IP address for the license node. |
| Action | Actions you can perform on the license node. You can either shut down or restart the license node. |
View Node Properties
To see the details of a specific node, in the EXAoperation screen, go to Configuration > Nodes and click the node number link in the Node column for the node you want to view. The Cluster Node Information screen opens, as show below.
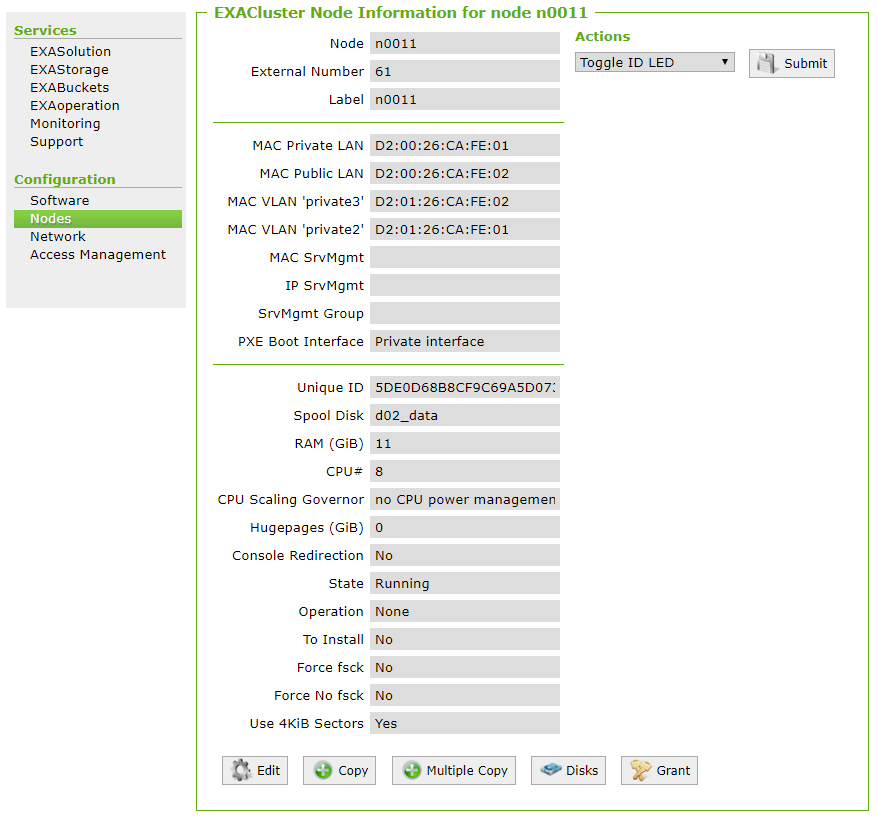
For a description of each property, as well as how to configure the node, refer to Configure Node Properties section.
View Node Usage
You can see which nodes in a cluster are used by specific volumes or database instances.
View Nodes Used By a Volume
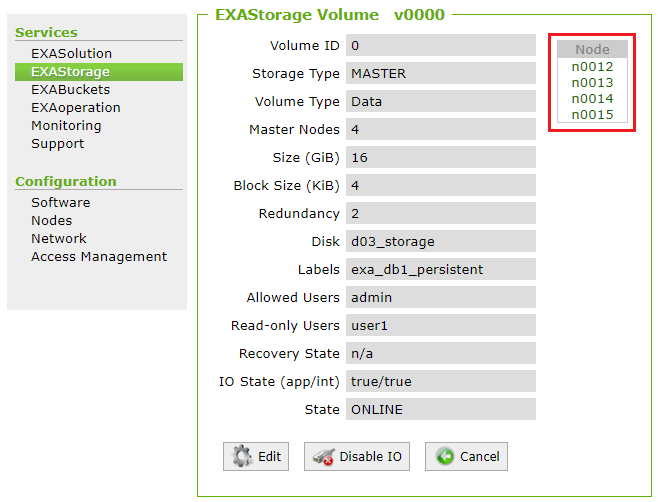
In EXAoperation, go to Services > EXAStorage and click name of the volume you want to check. The Volume screen opens. The nodes used by the volume are listed:
View Nodes Used By a Database Instance
In EXAoperation, go to Services > EXASolution and click the database instance you want to check. The Database Instance screen opens. The nodes used by the database instance are listed:
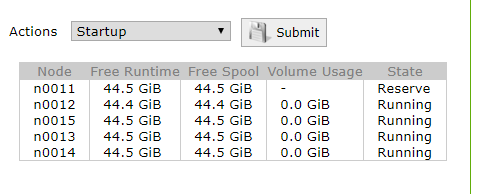
The following information is available for each node:
| Column | Description |
|---|---|
| Free Runtime | The runtime capacity that is available. |
| Free Spool | The spool capacity that is available. |
| Volume Usage | The size of the data stored in the volume. |
| State | Whether the node is an active node in the cluster ('Selected') or a reserve node ('Reserve'). |
Actions on Cluster Node
You can perform specific actions on a node by doing the following:
- In EXAoperation, go to Configuration > Node.
- Select the node or nodes you want to perform the action on.
- Select an option from the Actions ... drop down list.
- Click Execute.
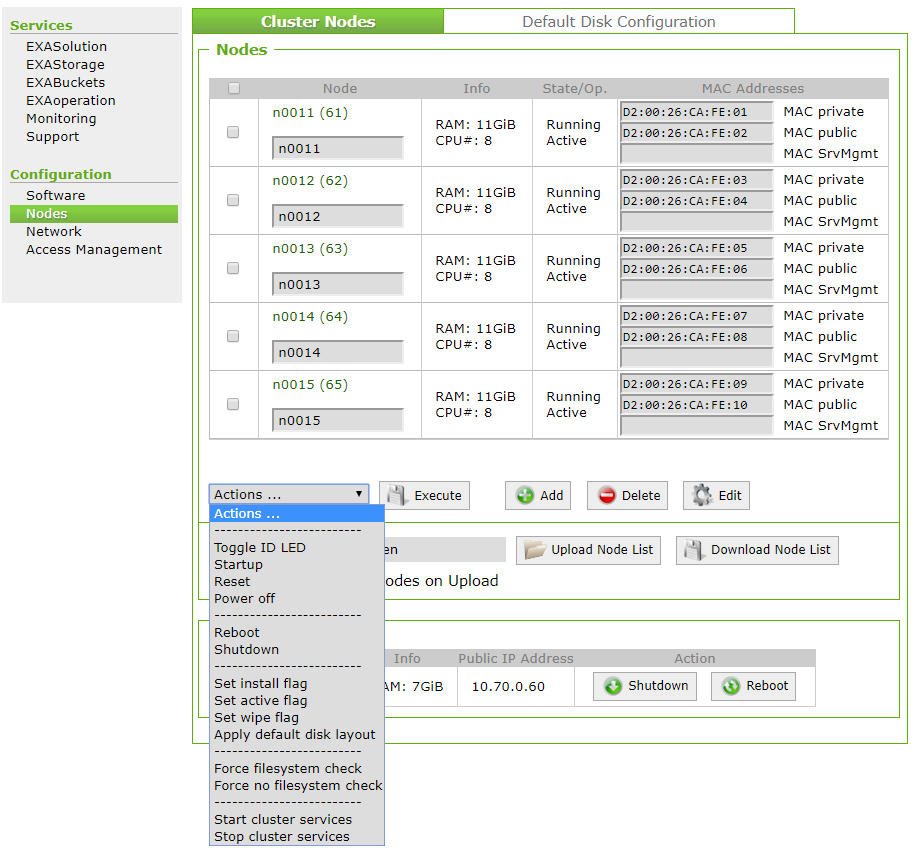
The actions you can perform on a node can be categorized as IPMI (Intelligent Platform Management Interface) commands, operating system commands, boot commands and cluster service commands.
Actions should only be done in conjunction with other tasks. For example, before you shut down a node, you need to ensure that databases using the nodes are stopped first. Refer to the Stop and start nodes for additional information.
IPMI Commands
If there is an IPMI (Intelligent Platform Management Interface) and Exasol is configured to use it, you can send the following IPMI commands to the data nodes:
- Toggle ID LED - toggles the LED of the node on or off.
- Startup - starts the node. Note that any flags associated with the node (for example, 'install' or 'wipe') will be executed upon startup of the node.
- Reset - resets the node.
- Power Off - powers down the node immediately.
Operating System Actions
You can send the following shell commands to the data nodes
- Reboot - restarts the node.
- Shutdown - shuts down the node.
Boot Actions
You can control the boot behavior of the next boot of the nodes.
You should use these options with caution, as data loss may occur depending on the option selected.
- Set install flag - the node will be installed. Note that existing data on the node will be deleted.
- Set active flag - the node will be set to active.
- Set wipe flag - all data on the node will be irrevocably deleted.
- Apply default disk layout - the default disk layout will be assigned to the node.
- Force Filesystem check - force a file system check.
- Force no Filesystem check - prevent a file system check.
Cluster Service Actions
You can start or stop cluster services (EXAClusterOS) on the data nodes.
- Stop cluster services - stops the cluster services and the state/op. is set to Suspended Active.
- Start cluster services - starts the cluster services and the state/op. is set to Running Active.
