Installation Using Exasol Cloud Deployment Wizard
Configure and deploy an Exasol cluster or single node system using Exasol's Cloud Deployment Wizard for public clouds. The wizard guides you through the sizing, configuration, and deployment process (internally it uses and parameterizes Exasol's standard Resource Manager templates).
After configuring your cluster you can either download the pre-configured template or directly open it with the Azure Resource Manager interface to proceed with the deployment process. In the Azure Resource Manager interface, you can further review and customize all settings.
Here is a video that gives you an overview of how the Cloud Deployment Tool works.
Prerequisite
You must have your account set up on Azure Marketplace.
Basic Mode
Do the following to use the wizard in Basic mode:
- Open Exasol Cloud Deployment Wizard in your web browser.
- Select Azure as you cloud platform.
- Select your region from the drop-down and click Continue.

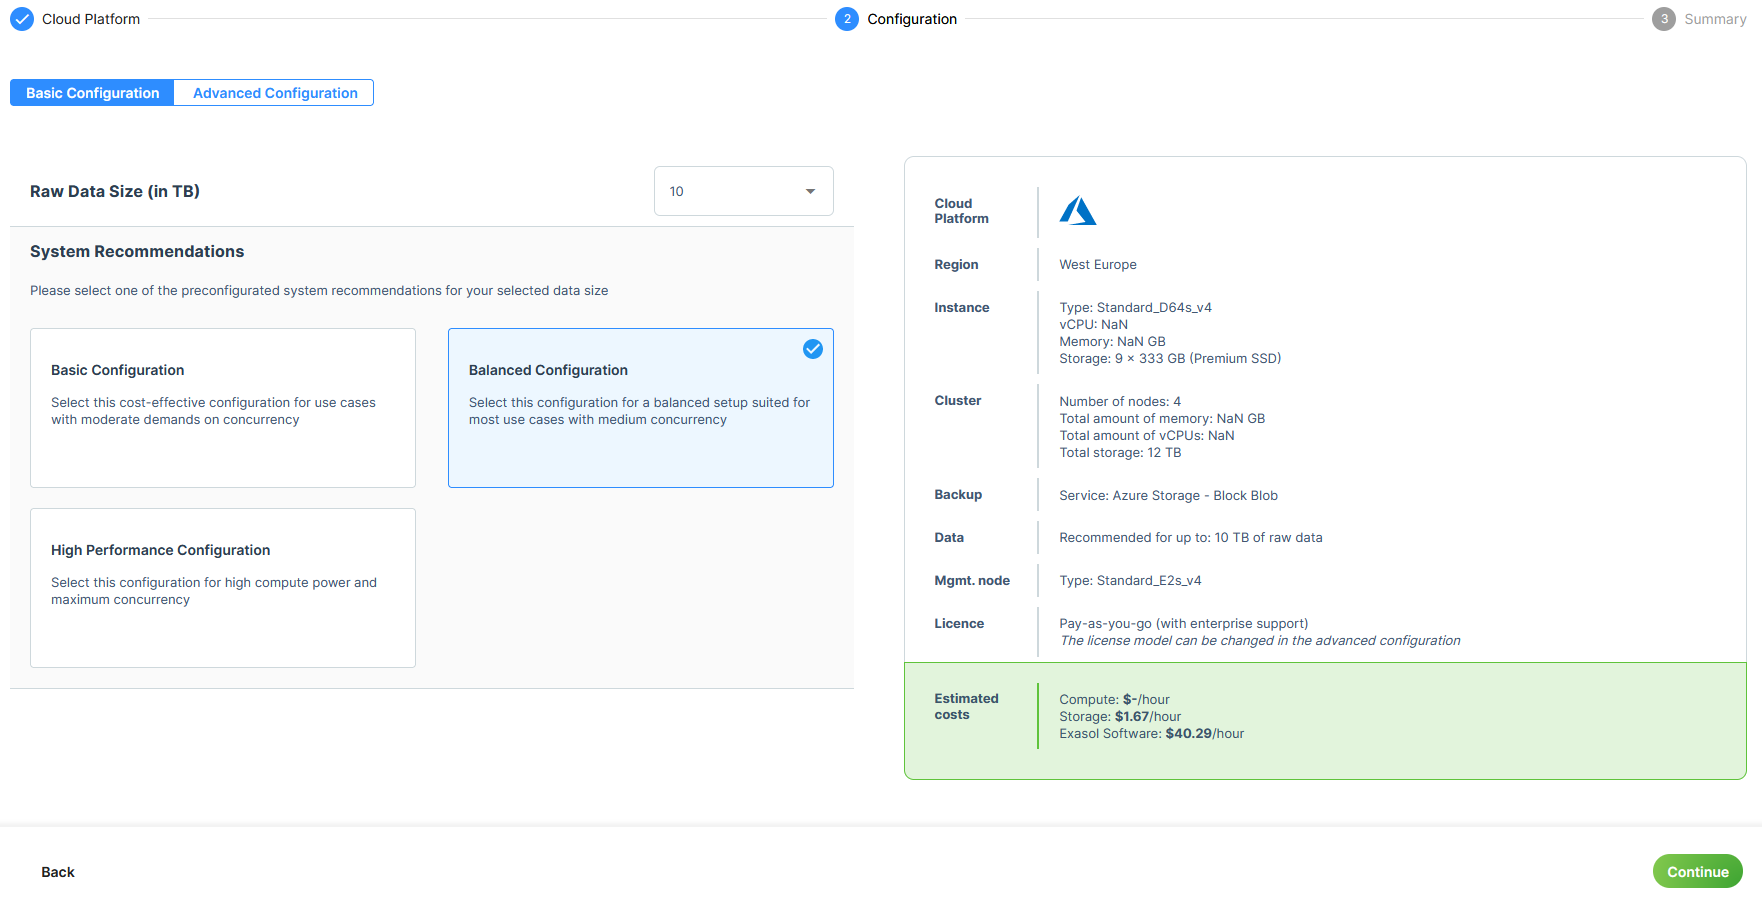
- Select your raw data size from Raw Data Size.
- Select one of the following recommendations from System Recommendations:
- Basic Configuration: Shows a minimum specification for you data size.
- Balanced Configuration: Shows an average specification for you data size for good performance.
- High Performance Configuration: Shows the best possible specification for you data size for high performance.
The above options are shown depending on your selection in Raw Data Size.
- Click Continue.

The Summary pages shows all the details about the Azure instance.
- Do one of the following on the summary page:
- Select Create New VNet or Use Existing VNet: Use this option to create a virtual network or use an existing virtual network.
- Deploy to Azure: Use this option to deploy Exasol on Azure. Clicking this button opens a new browser window and continue with the Exasol deployment in the Azure Resource Manager.
Log in to you account and fill in the required information on the page to continue.
Deploy with a new VNet option
The following screens show you the options you can edit if you select Create New VNet option and then deploy to Azure.
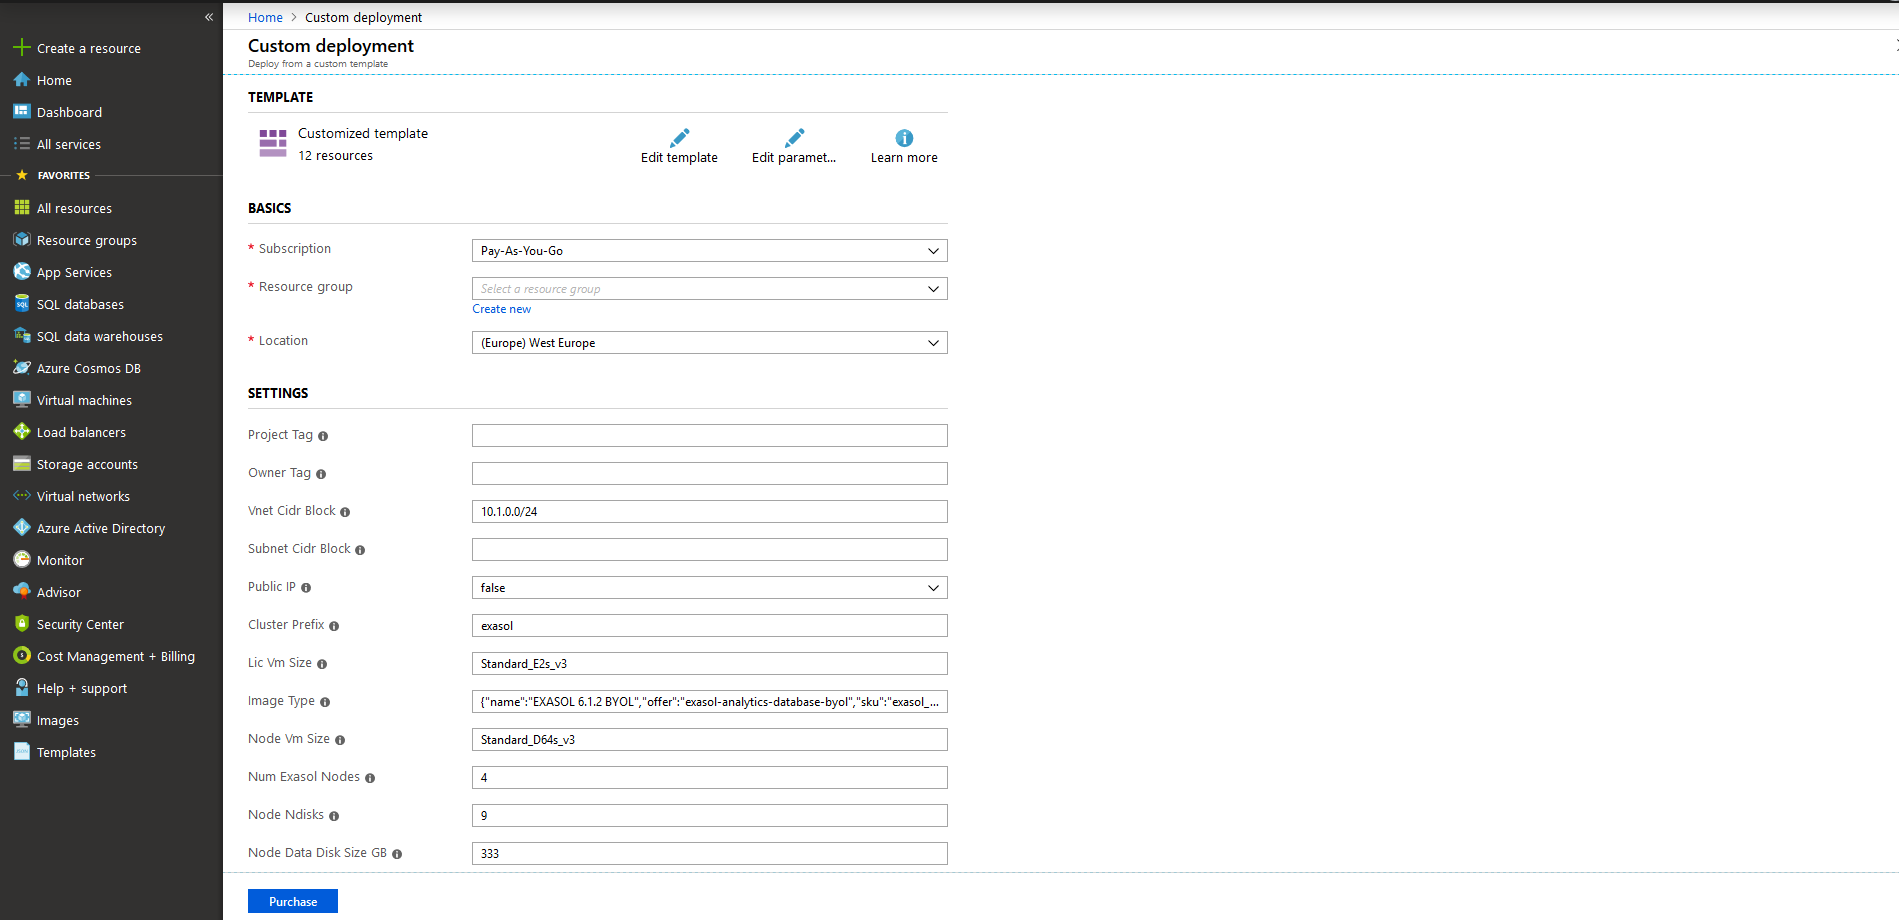
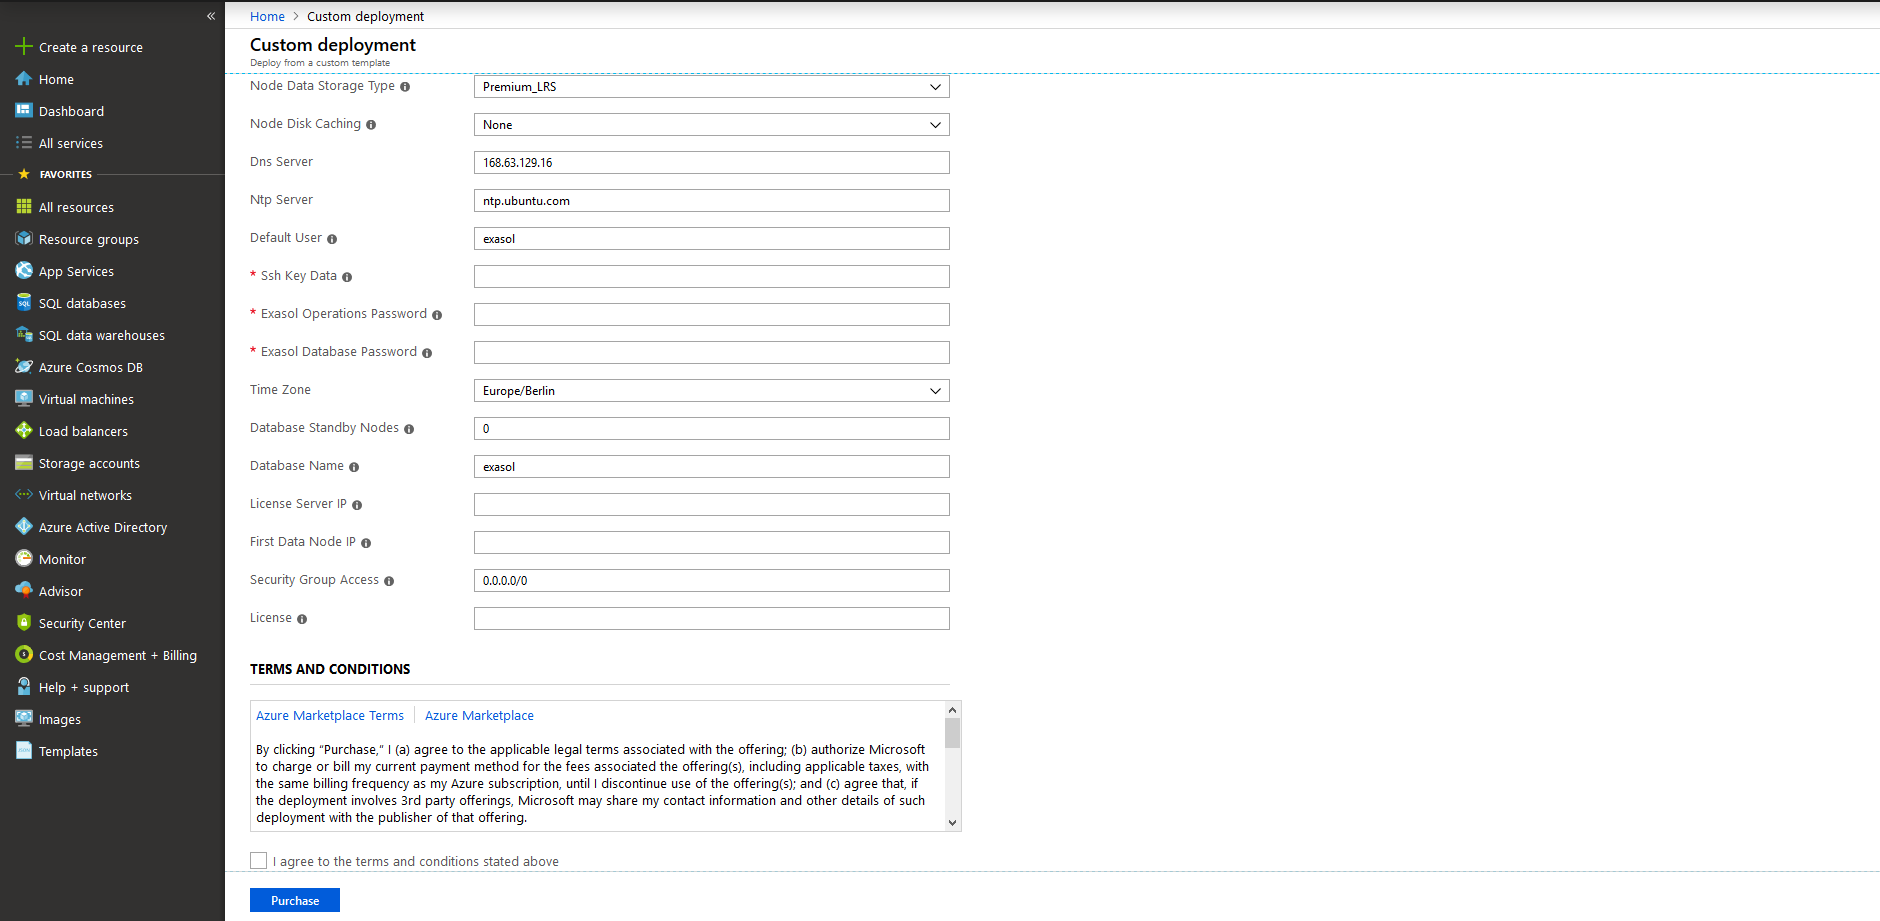
After filling in all the fields in the form, agree to the terms and conditions and click Purchase and provide further details (payment and so on).
Deploy with an existing VNet option
The following screen shows you the additional options from the above screen that you can edit if you select Use Existing VNet option and then deploy to Azure. You have to provide the details of the VNet additionally.

For more information on the parameters and to proceed further, see Template Parameters.
- Resource Manager Templates: You can download the Resource Manager templates on your system and upload them later to your Azure instance through Azure Resource Manager.
Advanced Mode
Do the following to use the wizard in Advanced mode:
- Open Exasol Cloud Deployment Wizard in your web browser.
- Select your cloud platform.
- Select your region from the drop-down and click Continue.

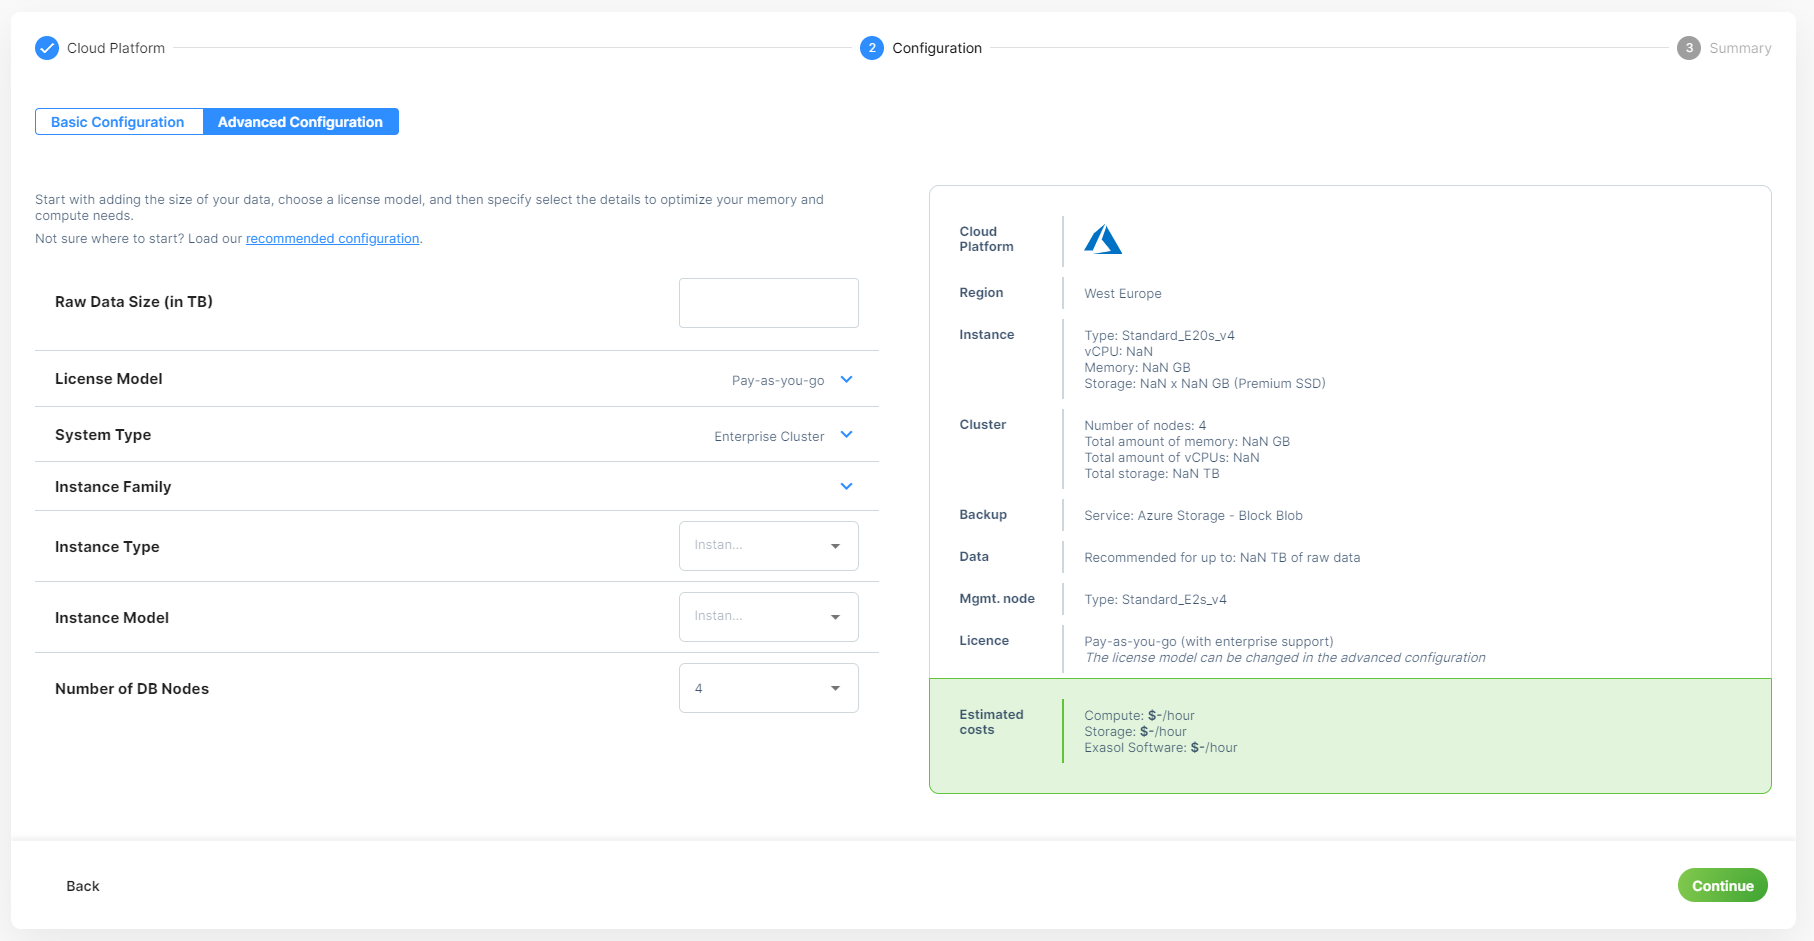
- Click Advanced Configuration button on the Configuration page.
- Configure the instance based on your requirements.
- Click Continue.

The Summary pages shows all the details about the Azure instance.
- Do one of the following on the summary page:
- Select Create New VNet or Use Existing VNet: Use this option to create a virtual network or use an existing virtual network.
- Deploy to Azure: Use this option to deploy Exasol on Azure. Clicking this button opens a new browser window and continue with the Exasol deployment in the Azure Resource Manager.
Log in to you account and fill in the required information on the page to continue.
Deploy with a new VNet option
The following screens show you the options you can edit if you select Create New VNet option and then deploy to Azure.


After filling in all the fields in the form, agree to the terms and conditions and click Purchase and provide further details (payment and so on).
Deploy with an existing VNet option
The following screen shows you the additional options from the above screen that you can edit if you select Use Existing VNet option and then deploy to Azure. You have to provide the details of the VNet additionally.

For more information on the parameters and to proceed further, see Template Parameters.
- Resource Manager Templates: You can download the Resource Manager templates on your system and upload them later to your Azure instance through Azure Resource Manager.
Launch Instance
Once the instance is in running state, you can connect to it using the IP address or the DNS name displayed in the console. To launch the instance, follow these steps:
- Copy and paste the IP address or the DNS name of the instance in a browser.
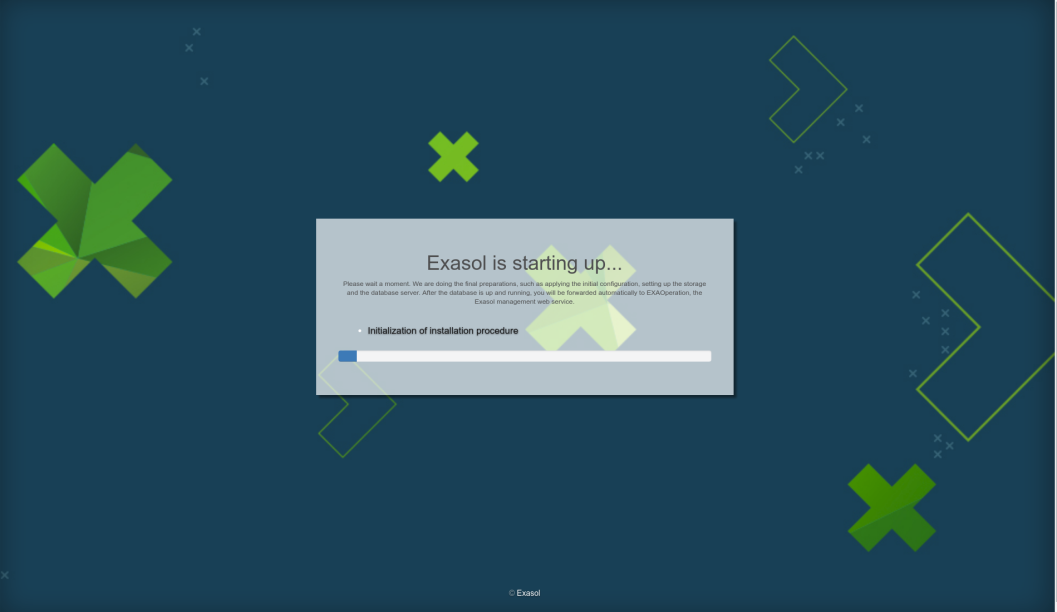
- You will receive a digital certificate to confirm. Once you have confirmed this, the installation is initialized, and the following screen is displayed.
- Once installation is complete, you will be redirected to the EXAoperation screen.
It may take up to 45 minutes for the EXAoperation to be online after deployment.
Next Steps
Connect to Exasol
After installing Exasol on Azure, you can do the following:
- Install drivers required to connect to other tools.
- Connect SQL clients to Exasol.
- Connect Business Intelligence tools (BI tools) to Exasol.
- Connect Data Integration - ETL tool to Exasol.
- Connect Data Warehouse Automation tools to Exasol.
Load Data
After you have connected your choice of tool to Exasol, you can load your data into Exasol and process further. To learn more about loading data into Exasol, see Loading Data.
Administration
For the maintenance tasks related to Exasol on Azure, see Administration (Azure).
