Learn how to connect to Exasol with DataGrip.
DataGrip is a cross-platform database IDE developed by JetBrains. For more information, see DataGrip on the JetBrains website.
Exasol takes no responsibility for changes in functionality or terms of use for third-party tools. For more details about the compatibility and use of these tools with Exasol, refer to the respective software vendor’s website.
Prerequisites
-
DataGrip must be installed. For download links and instructions, see Download DataGrip on the JetBrains website.
-
Your Exasol database must be running and reachable from the environment where the tool is used.
Exasol SaaS
-
The IP address of the host where the tool is running must be in the allowed IP address list in Exasol SaaS. To learn how to allow traffic to your database, see Network security (SaaS).
-
To connect the tool to an Exasol SaaS cluster you will need the connection string and a personal access token (PAT) for authentication. To learn how to get the connection details, see Connect to Exasol SaaS.
Connect to Exasol
DataGrip comes with a built-in Exasol driver.
- In DataGrip, create a new Exasol data source.
- If the database driver is missing or outdated, click on Download driver to download the latest Exasol JDBC driver.
-
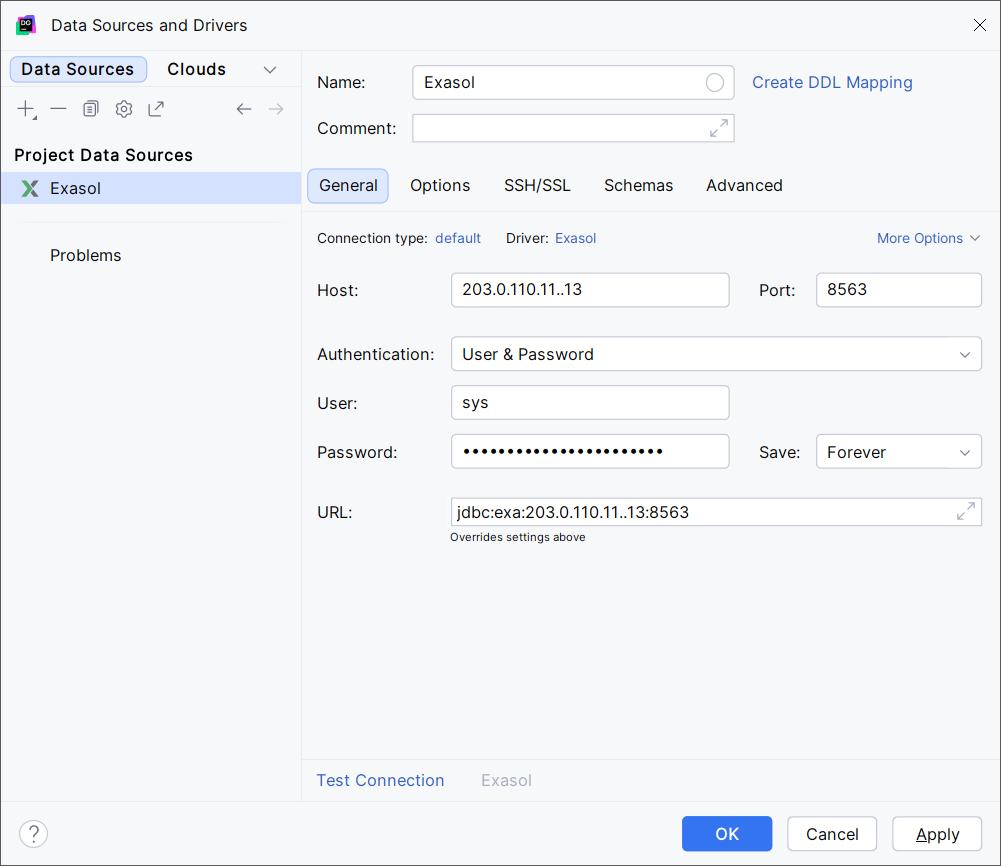
In the data source configuration, enter the following details:
Host: The hostname or IP address to a node, or a list of nodes.
For example:
203.0.110.11or203.0.110.11..13For Exasol SaaS, use the connection string provided in the web console as hostname.
Port: The Exasol database port (8563).
DataGrip will generate a connection string from the Host and Port entries. You can also enter a connection string directly in the URL field.
To learn about supported URL structures for the JDBC driver, see Exasol URL structure.
Authentication: Select
User & Password
User: The username of the Exasol user.
Password: The password of the Exasol user.
For Exasol SaaS, use a valid personal access token as password.
-
Click on Test Connection to test the connection.
-
If the connection attempt is successful, click on OK to connect to Exasol.
If the connection test fails, check the connection string and authentication details.
Next steps
To learn how to use DataGrip with Exasol, refer to the DataGrip documentation on the JetBrains website.