Deploy Exasol on the hosts
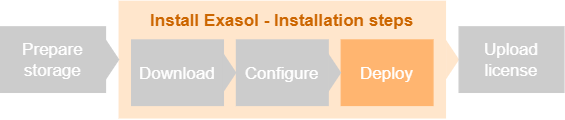
When you have completed all the previous steps you are ready to deploy your Exasol cluster. The deployment process will install Exasol on all the nodes over the private network and then start up the database.
Run the installation
-
On the installation host, run the following command:
Copy./c4 host play -i configThe
-ioption tells c4 to use a specific configuration file. By default, c4 reads the configuration from the configuration file./config(in the current directory). If the configuration is stored in another file, specify the path to this file as an argument on the command line:Copy./c4 host play -i /path_to_config_file/myconfigRootless install
If you are installing Exasol for a non-root user, you must add
--ccc-play-rootless trueto the command:Copy./c4 --ccc-play-rootless true host play -i configIf you install Exasol for a non-root user, some additional configuration steps are required. For more information, see Rootless deployment.
-
If the configuration is valid, c4 will show the parameter values that will be used and ask you to either proceed with this configuration or cancel the installation.
Copy|||||||||||||||||||||||||||||||||||||||||||||||||||||||||||||||||||||||||||||||
Exasol installation procedure is about to be started.
During this procedure, Exasol software will be installed to remote hosts.
It will take some time (several minutes).
The installation is finished when every node reaches stage 'd' (see 'c4 ps').
After the installation is finished, you can connect to the Database or COS.
During the installation, you can login to the hosts via SSH,
and watch the process using:
sudo journalctl -f
After the installation finished, you can connect to COS using:
ssh -p 20002 root@$IP
IP addresses of the systems:
* 203.0.113.11
* 203.0.113.12
* 203.0.113.13
* 203.0.113.14
Exasol version: 2025.1.0
Exasol package: @exasol-2025.1.0
SSH username : exasol
SSH keyfile : id_rsa
User password : exasol123
Data disk(s) : /dev/mapper/exasol_disk_1,/dev/mapper/exasol_disk_2
Press ENTER to proceed or Control+C to cancel the installation procedure.
||||||||||||||||||||||||||||||||||||||||||||||||||||||||||||||||||||||||||||||| -
Press Enter to start the installation.
-
If the necessary installation packages are present in the current directory they will be used for the installation. In this case no internet connection is required.
-
If the installation packages are not found in the current directory and the host used to run the installation is connected to the internet, c4 will automatically download the necessary packages from the Exasol download portal.
-
If no installation packages are found and c4 is not able to connect to the Exasol download portal, the installation process will be aborted and no changes are made to the system.
To troubleshoot a failed installation, first make sure that all the steps above have been carried out correctly and that all system requirements are met. To get help from our Support team, create a support case. .
If the packages are available, the installation process will start. The installation requires no user intervention and can be run unattended. It comprises the following steps:
- Copying Exasol packages to the hosts
- Initial OS preparation
- Verifying OS configuration
- Configuring OS on the hosts
- Extracting packages
- Installing c4 on the hosts
- Syncing time between hosts
- Triggering remote installation finalization
The installation will typically require 20 to 90 minutes to complete, depending on the number of hosts and the location of the installation files. This however depends on many factors, and the installation may take longer.
-
-
When the installation has finished, a confirmation message is shown (this is just an example, the actual message will be different depending on the installed version of Exasol):
Copy|||||||||||||||||||||||||||||||||||||||||||||||||||||||||||||||||||||||||||||||
The final steps of the Exasol installation procedure were successfully
started on remote hosts now.
It will take yet some time to complete (several minutes).
After the installation is finished, you can connect to the Database or COS.
During the installation, you can login to the hosts via SSH,
and watch the process using:
sudo journalctl -f
After the installation finished, you can connect to COS using:
ssh -p 20002 root@$IP
IP addresses of the systems:
* 203.0.113.11
* 203.0.113.12
* 203.0.113.13
* 203.0.113.14
Exasol version: 2025.1.0
Exasol package: @exasol-2025.1.0
Happy Exasolling!
|||||||||||||||||||||||||||||||||||||||||||||||||||||||||||||||||||||||||||||||
Monitoring the installation process
To monitor the progress of the installation process, connect to one of the nodes over SSH and use the c4 ps command. The output shows details about each node, including the current deployment stage. The installation is finished when all database nodes have reached stage d
and are in the running
state.
Example:
ssh -i KEY_FILE user@203.0.113.11
...
user@ip-10-0-0-11:~$ ./c4 ps
      N  PLAY_ID   NODE  MEDIUM  INSTANCE     DB_VERSION  EXTERNAL_IP     INTERNAL_IP  STAGE  STATE    UPTIME    TTL
  ┌─  1  c3275f84  11    host    -            2025.1.0    203.0.113.11    10.0.0.11    d      -        03:50:12  +∞
  │   1  c3275f84  12    host    -            2025.1.0    203.0.113.12    10.0.0.12    d      -        03:50:13  +∞
  │   1  c3275f84  13    host    -            2025.1.0    203.0.113.13    10.0.0.13    d      -        03:50:13  +∞
  └─  1  c3275f84  14    host    -            2025.1.0    203.0.113.14    10.0.0.14    d      -        03:50:13  +∞
2 c3275f84 14 local - 2025.1.0 - 10.0.0.14 d - 03:50:13 +∞| Deployment stage | Description |
|---|---|
| a |
Cloud resources are being allocated. Nothing is reachable in this stage. Note: c4 will report stage See also Deploy Exasol on the hosts. |
| a1 |
The node has been created and is reachable over SSH on port 22. The c4 service on the node is not yet reachable. |
| b |
The host is booting up and running startup scripts. The c4 service is running on the node and is reachable. |
| b1 | The working copy and its dependencies are being fetched. The node is reachable over SSH on the port defined in CCC_PLAY_HOST_SSH_PORT. |
| c | The cluster operating system (COS) service is running and reachable. |
| d | The database is running and reachable. |
| Node state | Description |
|---|---|
| creating | The node is being created. |
| pending | The node is preparing to enter the running state. |
| running | The node is running at the indicated stage, see Deployment stage |
| stopped | The node is shut down and cannot be used. |
| rollingback | Node creation failed and is rolling back. |
| succeeded |
The previous deployment operation succeeded. NOTE: This node state does not indicate that the node is running, it only means that the last operation succeeded. In most cases, this node state indicates that node creation failed and was successfully rolled back. |
| failed | The previous deployment operation failed. |
For more details about the c4 ps command, see How to use c4.
To get more detailed information about the installation process, connect to one of the nodes over SSH and use the command sudo journalctl -fto monitor the installation in real time.
Troubleshooting
If an error occurs during the installation process, the process is automatically interrupted and the installation is rolled back. The last INFO message on the screen provides information about the error. For example:
INFO[2023-09-02 09:22:44]: Extracting packages...
cp: cannot create regular file '/var/lib/ccc/bin/': No such file or directory
In this example, an error happened during the packages extraction step. When you have located and resolved the error, run the installation script again.
If you need help with the installation process, create a support case.
Post-installation steps
When the installation has completed you can connect to your database using a client, access the nodes over SSH, and use the different administrative interfaces in Exasol to carry out additional configuration tasks such as uploading a license, configuring backup schedules, adding scripts and integrations, and much more.
The following steps do not have to be carried out in any specific order.