Yellowfin
This article explains how to connect Yellowfin to an Exasol database.
Yellowfin is a business intelligence tool that supports analytics and collaborative BI. For more information about Yellowfin, refer to the Yellowfin website.
Prerequisites
- A running Exasol database
- Exasol JDBC driver must be installed. You can download drivers from the Exasol Downloads portal. For more information, see Drivers.
- Yellowfin is installed
Connect Yellowfin to Exasol
Login to Yellowfin
- After you have installed Yellowfin, navigate to the Yellowfin installation directory and start the Yellowfin services by clicking the Yellowfin startup batch (startup.bat) file.
- Once Yellowfin is running, open a web browser and enter the following URL: http://<server-ip>:8080
- Enter the login credentials and click Login. For example:
Username: admin@yellowfin.com.au
Password: test
Install Exasol Driver
To be able to connect Exasol to Yellowfin, you must first install the Exasol JDBC driver. You can use the Plugin Management page in Yellowfin to install and manage the drivers.
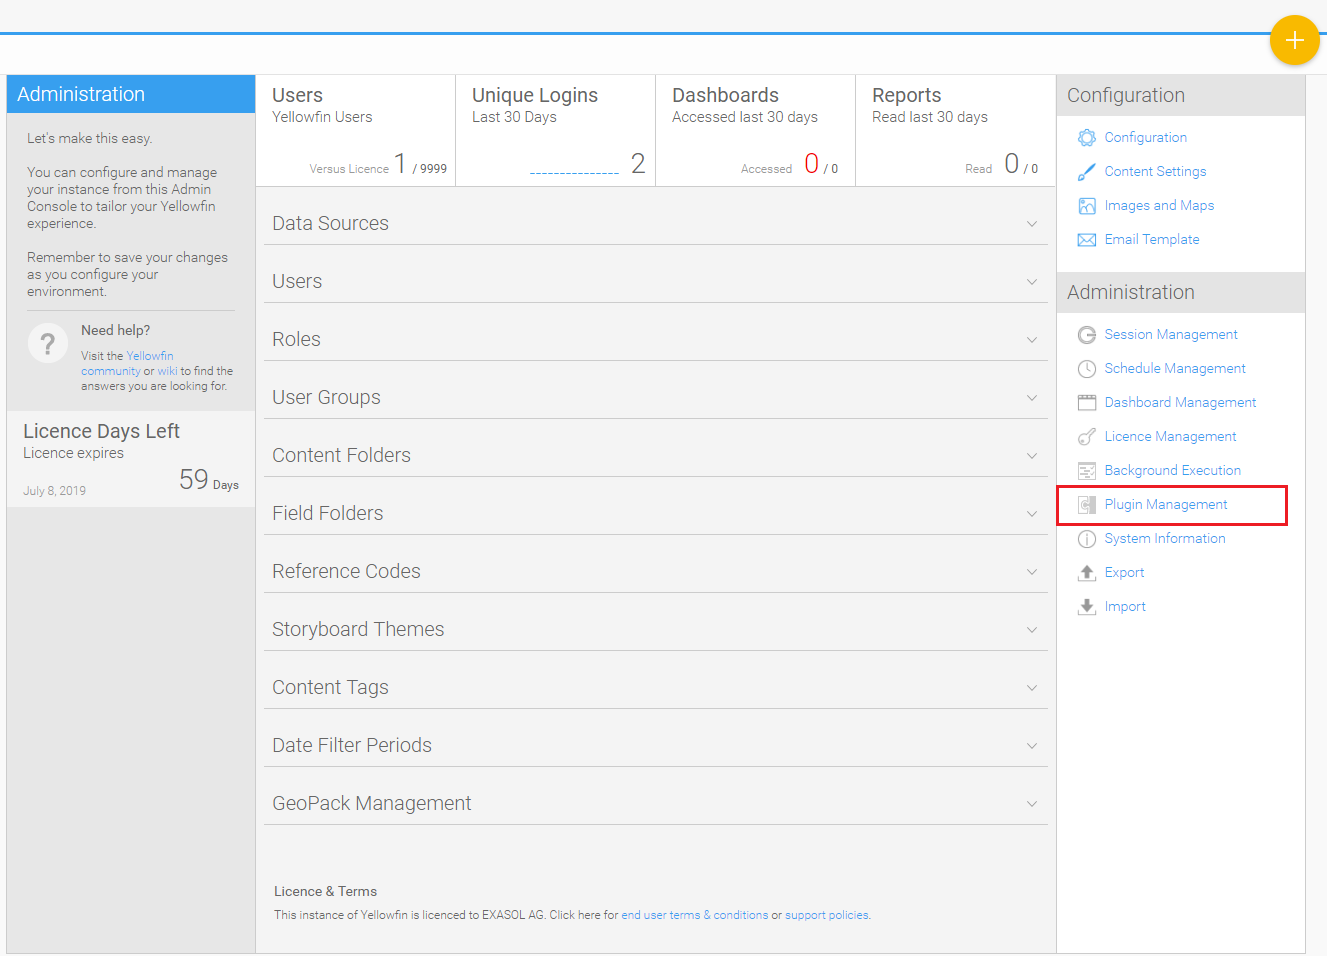
- From the menu button on the left corner of the screen, select Administration to open the Admin Console.
- In the Admin Console, select the Plugin Management option.
- In the Plugin Management page, click the Add button to add a plugin/driver.
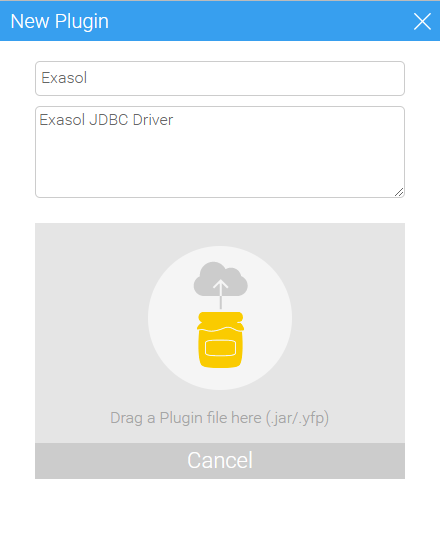
- In the New Plugin screen, enter a name and description for the plugin/driver.
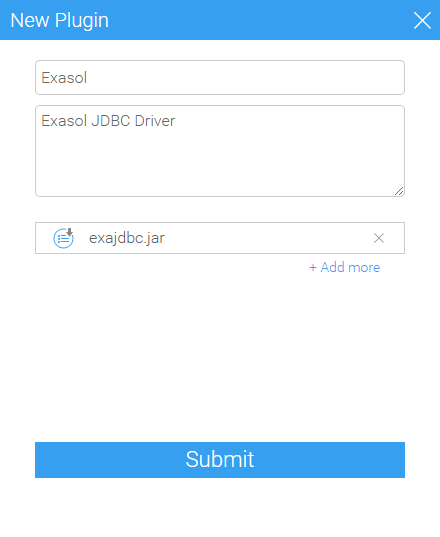
- Next, drag and drop the Exasol JDBC driver file. Once the driver is added, click Submit.
- You will now see the driver you added in the Plugin Management page.
Add Exasol as Data source
Once you have Yellowfin running and the Exasol driver installed, you can connect Exasol as the data source to Yellowfin. Follow these steps to add Exasol as a data source:
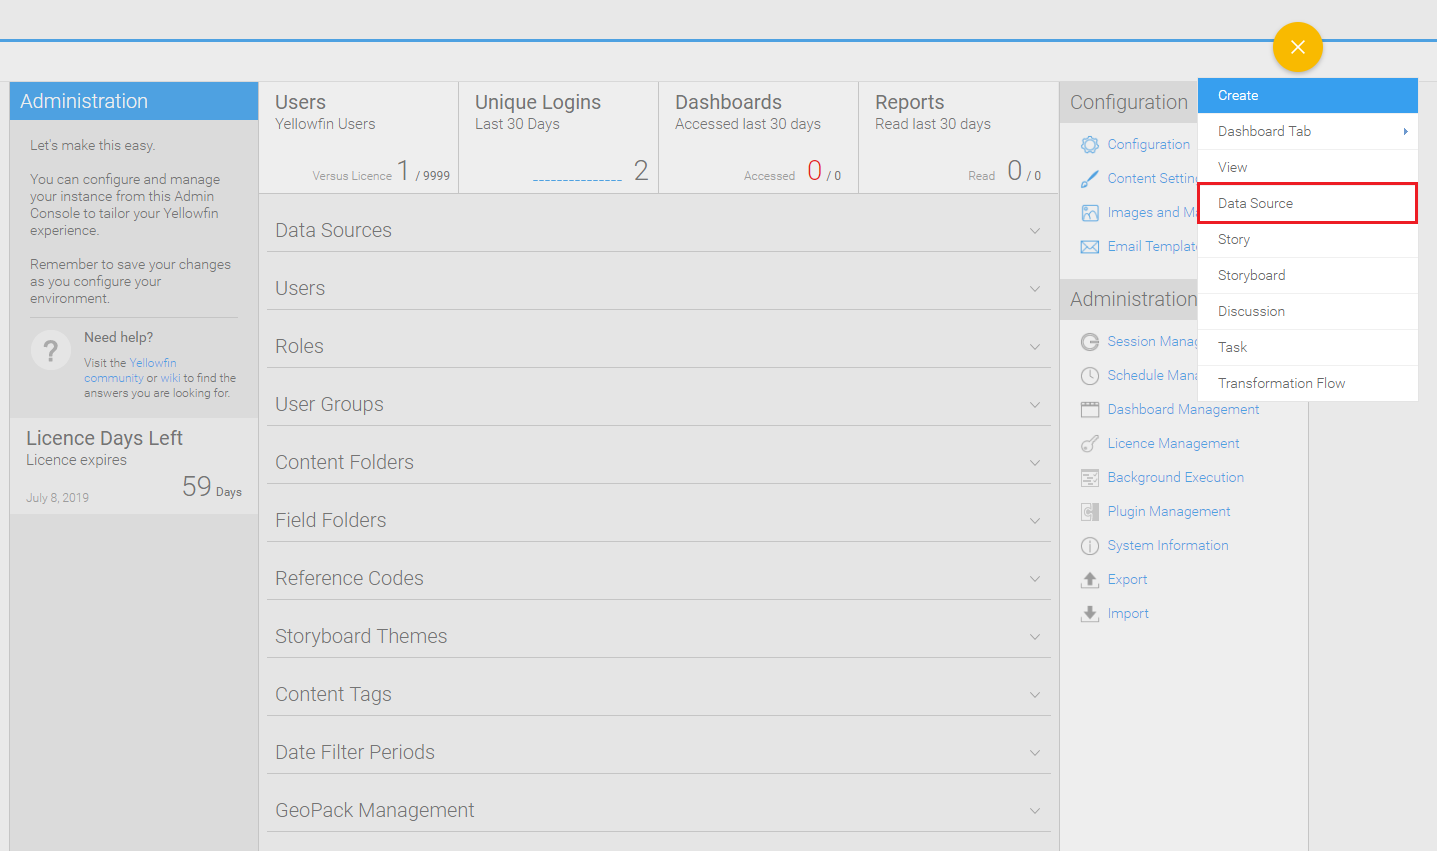
- On the default Yellowfin screen, click the plus sign.
- Select Data Source from the Create menu.
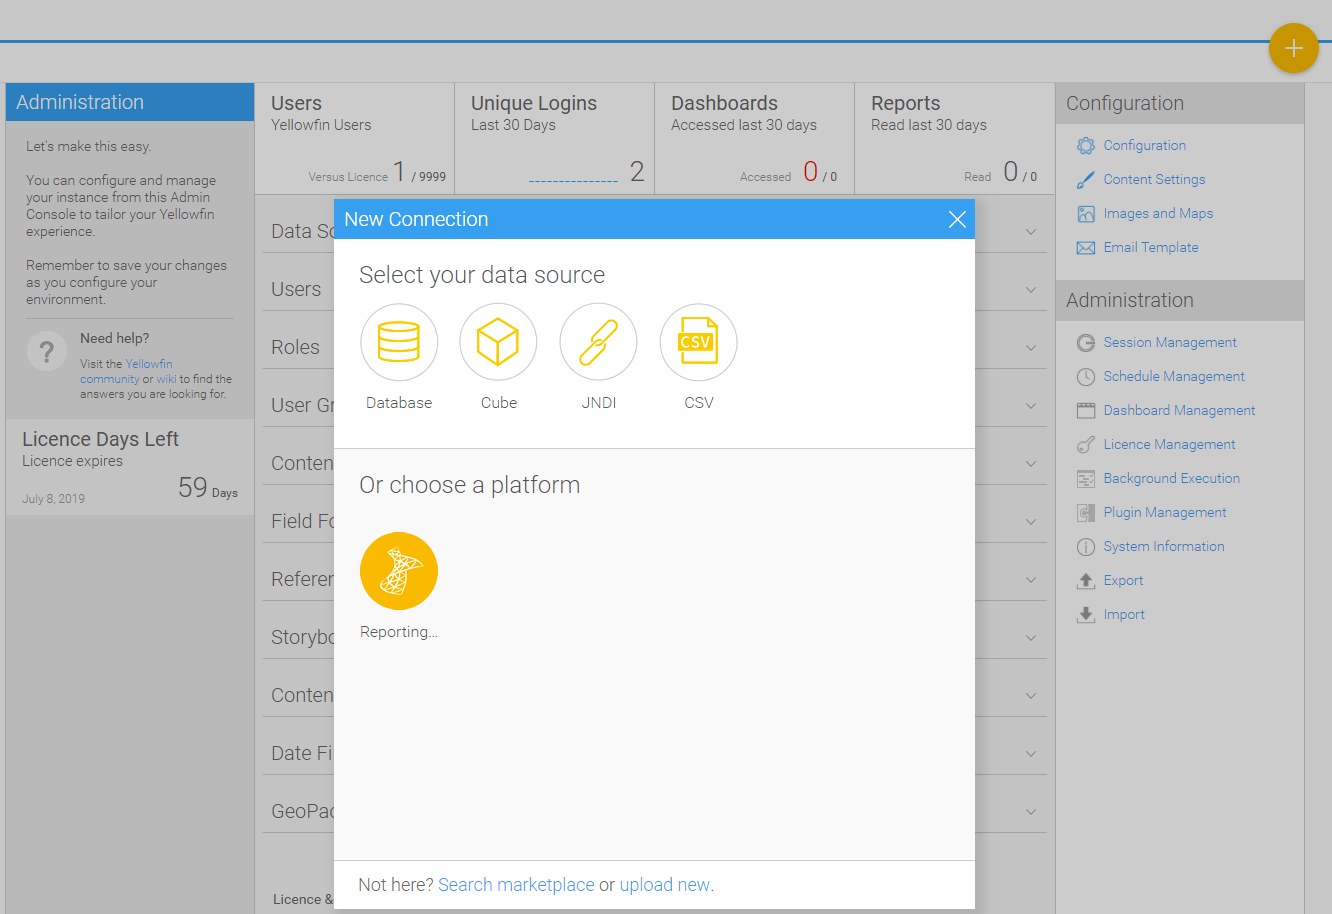
- Next, select the Database option in the New Connection screen.
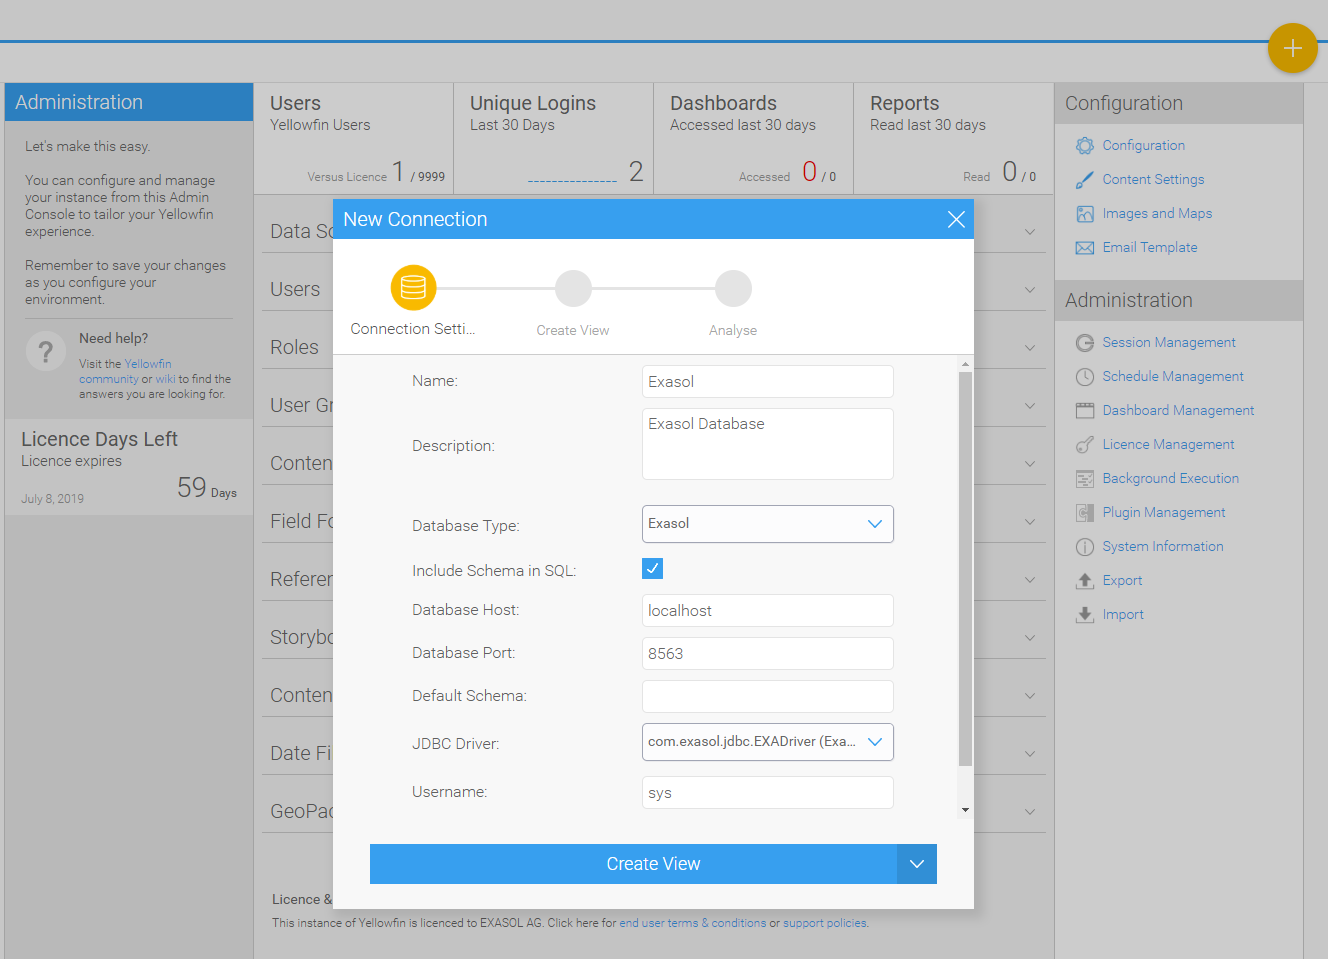
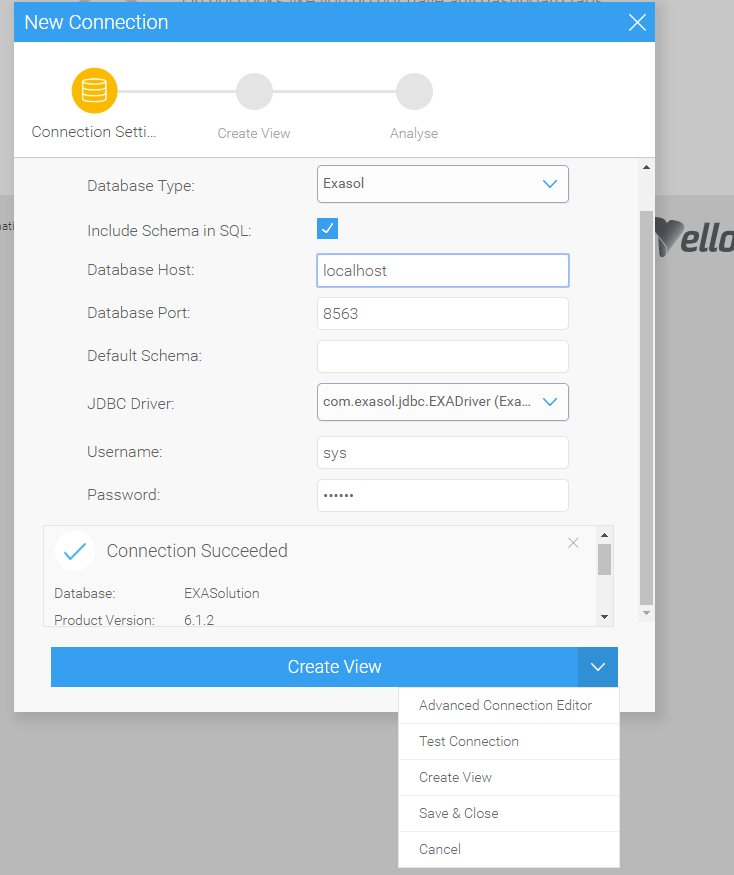
- Enter the following connection details for the database as shown in the screen shot below:
- Name: Name of the database
- Description: Description for the database.
- Database Type: The type of the database.
- Include Schema in SQL: Select this check box to add the schema name when addressing database tables in SQL queries.
- Database Host: Name or IP address of the server hosting the Exasol database.
- Database Port: Port number for this connection.
- Default Schema: Default schema to be opened on login.
- JDBC Driver: JDBC driver to talk to Exasol database.
- Username: Username of your database account.
- Password: Password for your database account.
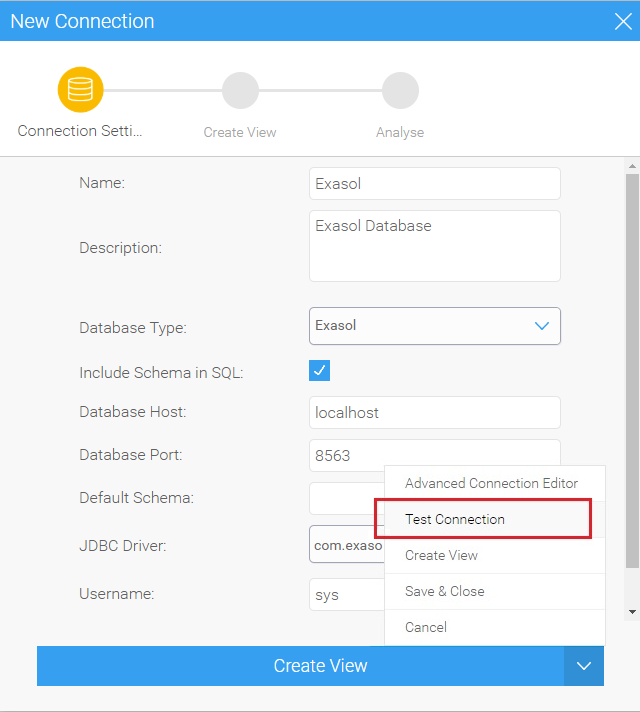
- Once you have entered all the connection information, you can test the connection. Click the down arrow next to the Create View button and select Test Connection.
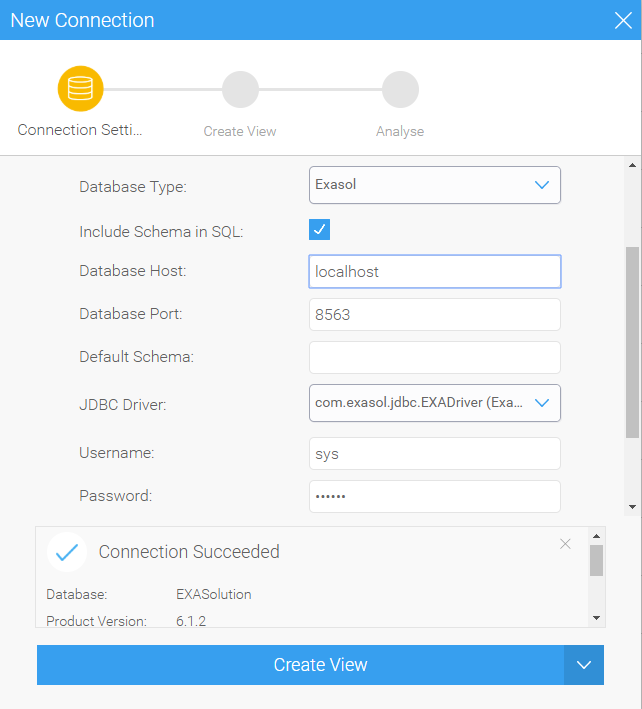
- When the connection is successful, a Connection Succeeded message is displayed in the New Connection screen.
- Next, you can create views by clicking the Create View button.
- Save the connection by selecting the Save & Close option when you click the down arrow as shown below.

