WebFOCUS BI
This article explains how to connect WebFOCUS to an Exasol database using the Exasol OBDC driver.
Exasol takes no responsibility for changes in functionality or terms of use for third-party tools. For more details about the compatibility and use of these tools with Exasol, refer to the respective software vendor’s website.
Prerequisites
- Exasol ODBC driver is installed on your operating system. You can download the driver from the Exasol Downloads portal.
- Both the Exasol database and WebFOCUS Server must be able to communicate with each other through a network.
- The Exasol database must be running.
Connect WebFOCUS to Exasol
To be able to connect to Exasol from WebFOCUS, you need to first configure the adapter. You can configure the adapter from either the Web Console or the Data Management Console. If an adapter is already configured, it is listed in the Configured Adapters section.
Using the Web Console
- Log onto the WebFOCUS home page from the web console. Click Connect to connect to a data source.
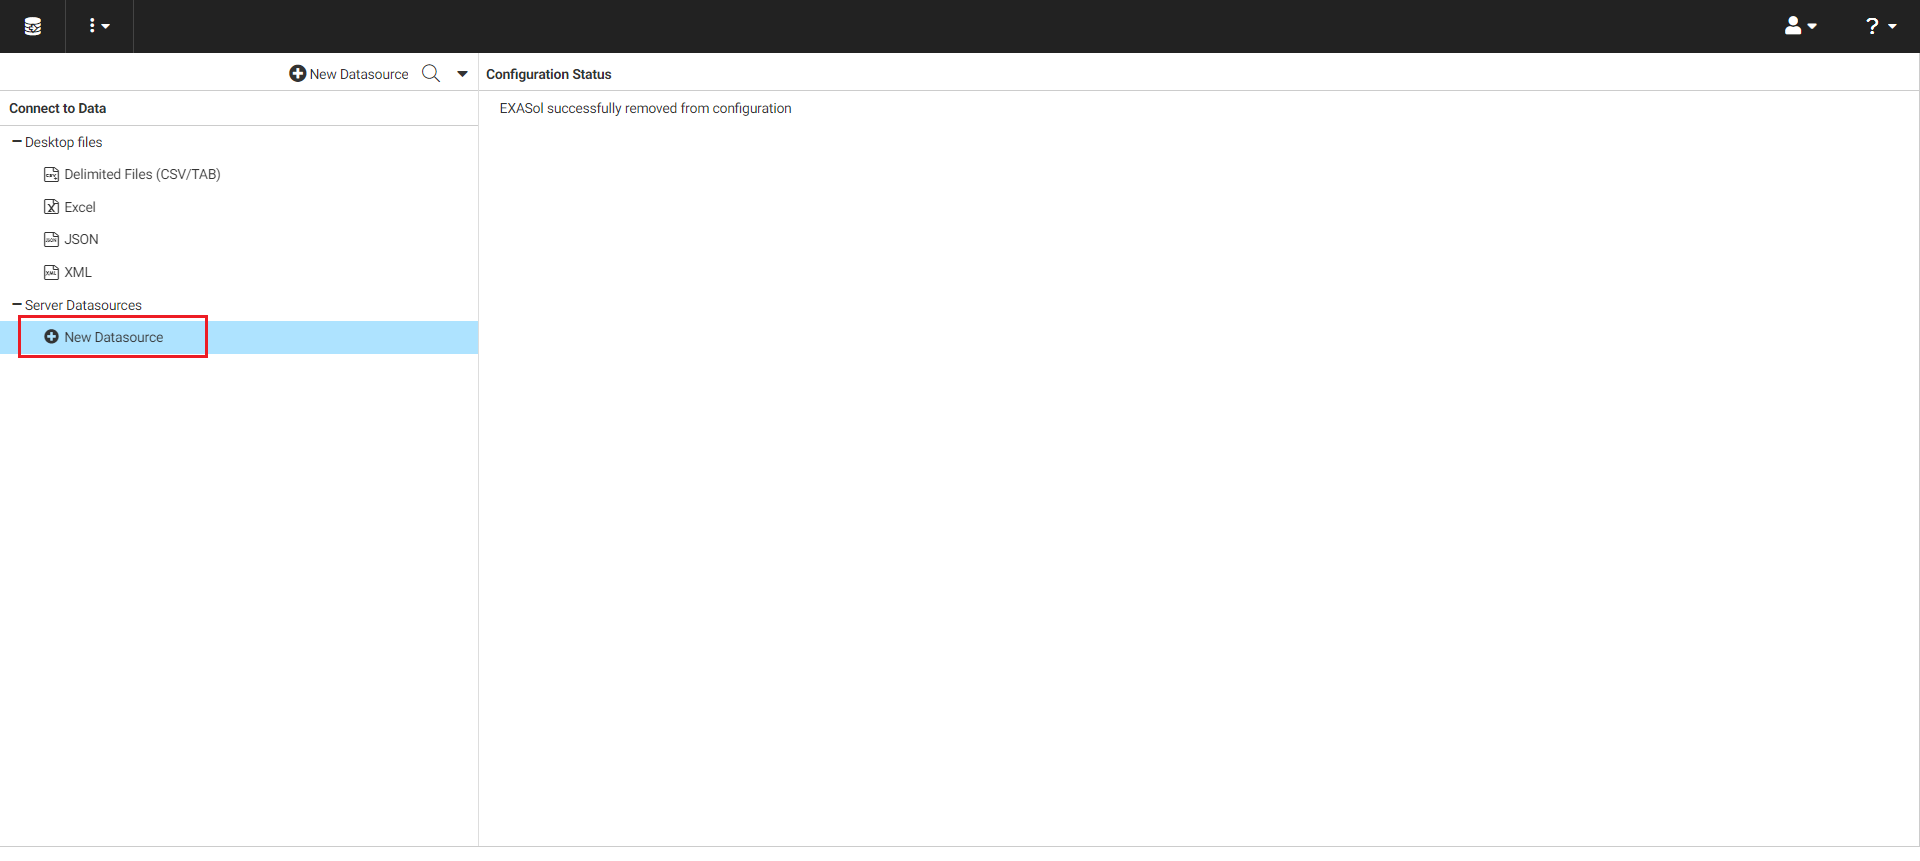
- To configure a new data source, in the Connect to Data web console, right click New Datasource
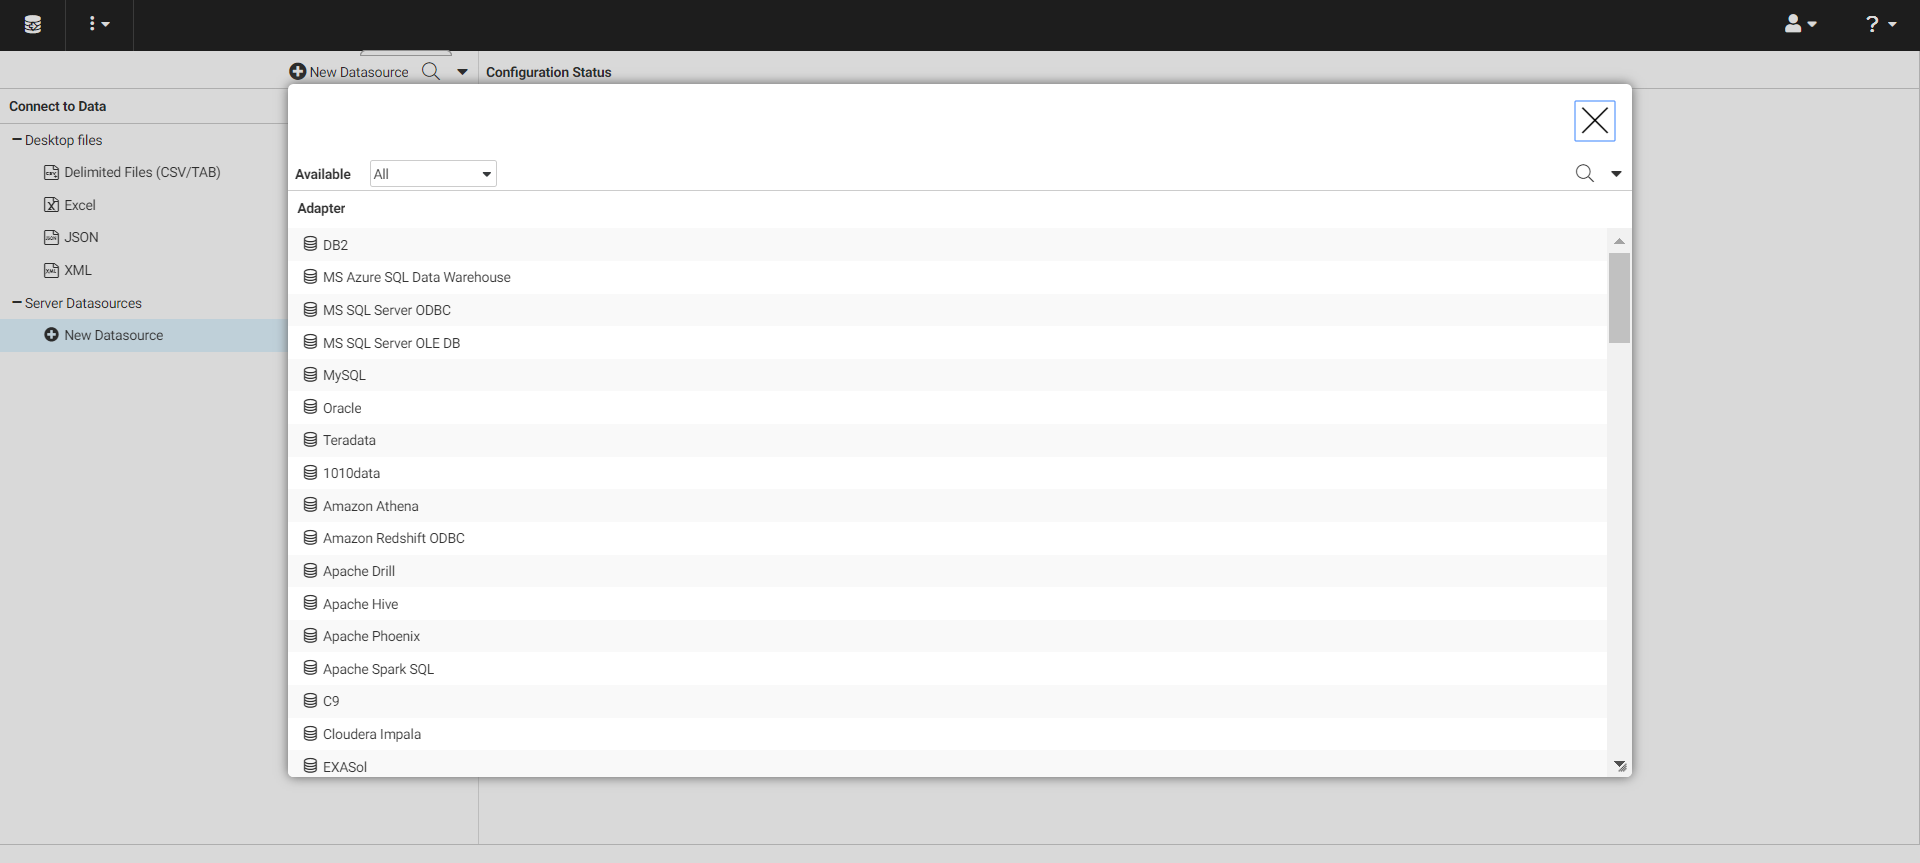
- A splash screen with a list of adapters is displayed. Select Exasol from the list.
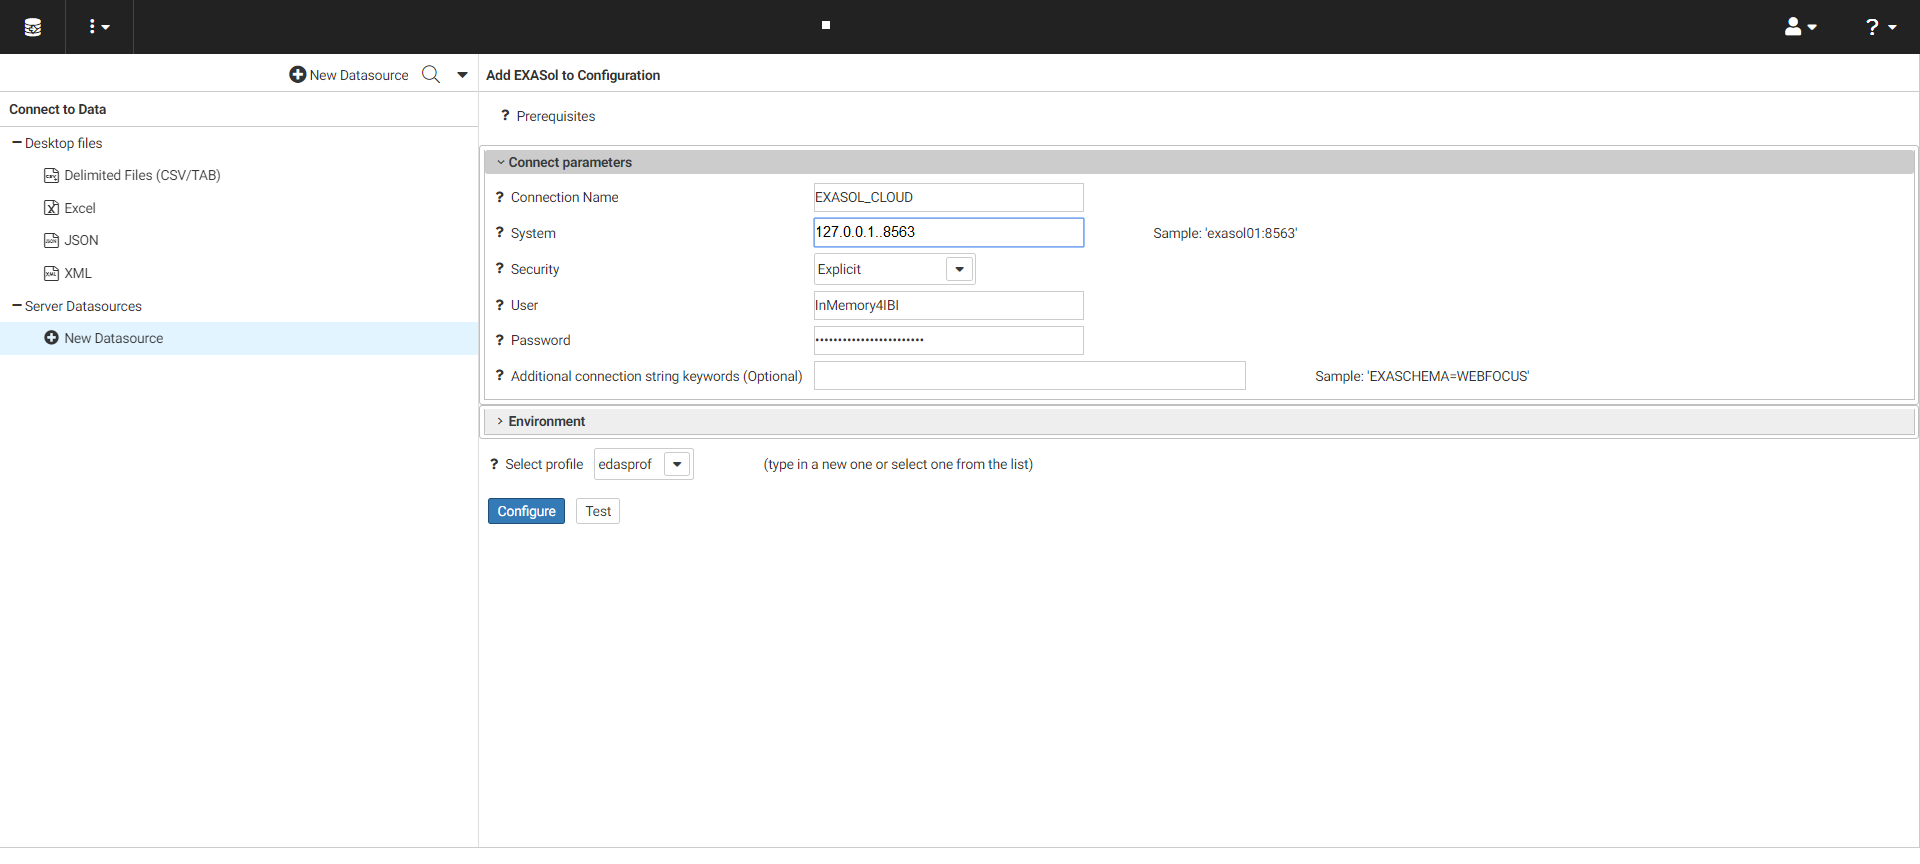
- Configure the connection by entering the relevant parameters in the Connect parameters section. In the Environment section, select edasprof from the drop-down menu to the add this connection for all users or select a user profile.
- Connection Name: Name to identify this connection.
- System: Address of the machine where Exasol database is running.
- Security: Authentication method to be used when connecting the user to the database.
- User: Primary authorization ID by which you are known to the data source.
- Password: Password associated with the primary authorization ID.
- Additional connection string keywords: Can be used to add options to the connection string.
- Click Test to test the connection. You should see a sample list of objects stored in the Exasol data source you are accessing. Click Configure to complete the configuration.
- Right click on the Exasol data source and then select Show DBMS objects.
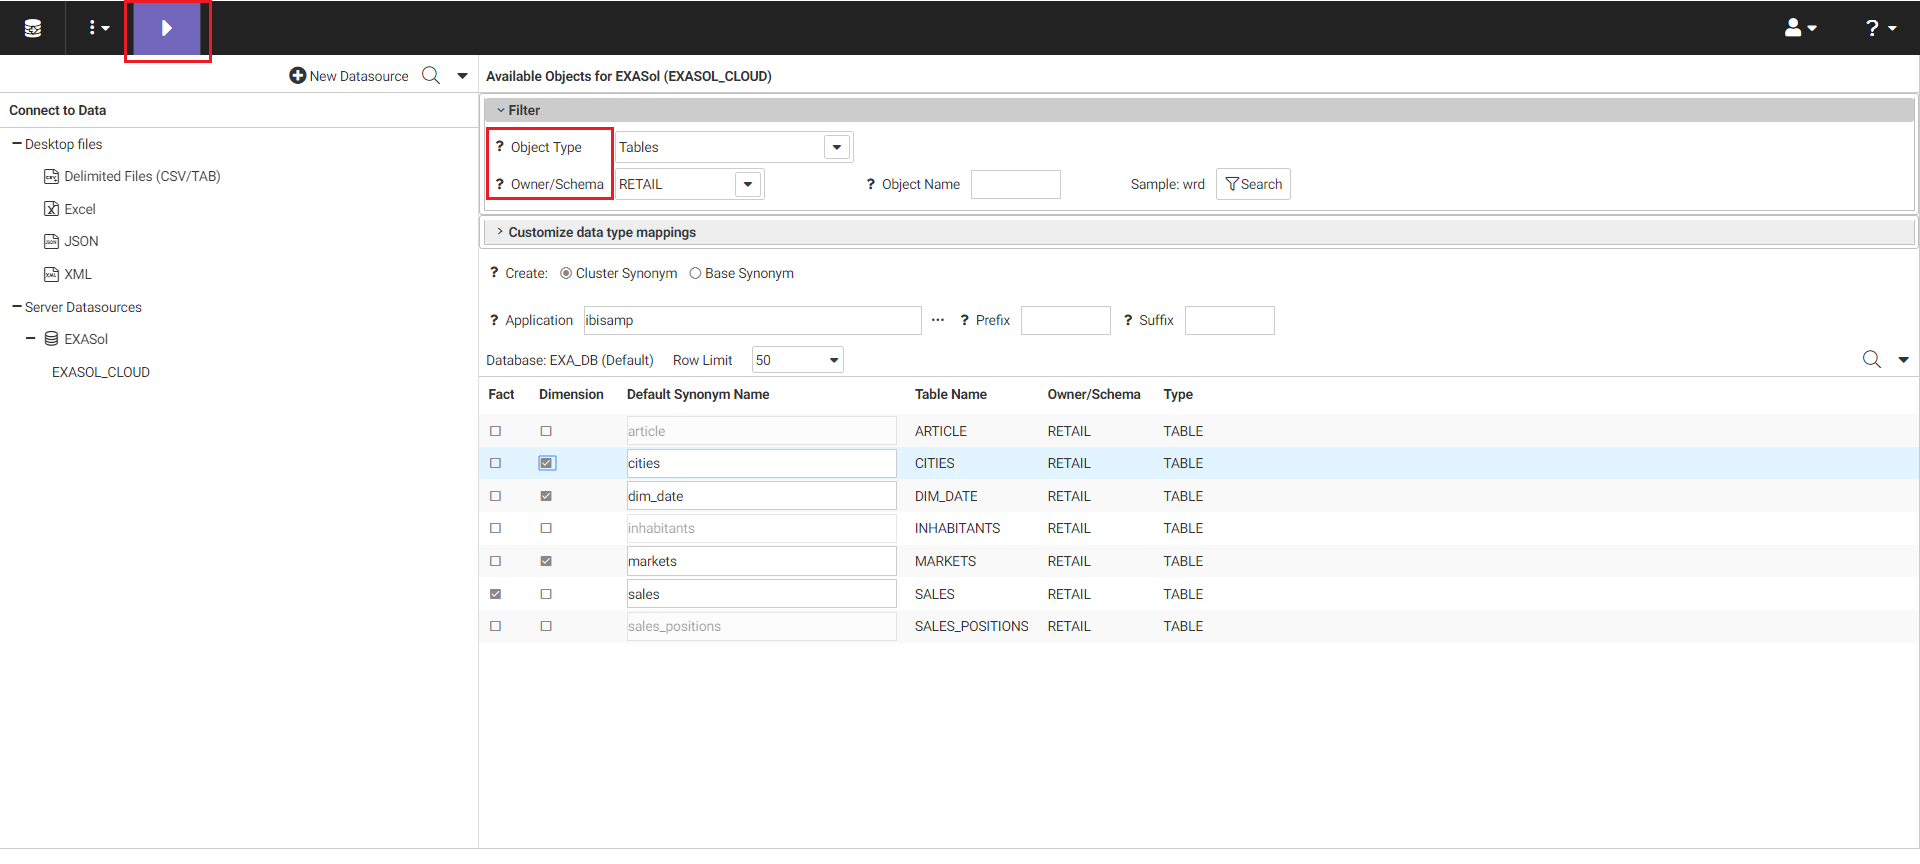
- The Owner/Schema drop-down list displays all the schema in your Exasol database. Select the desired schema. As an example in the below screen shot,
RETAILis selected as the Owner/Schema. All the tables for the selected schema are displayed. - Select the check box next to the tables you need. Next, select the purple Run icon on the top left of the screen.
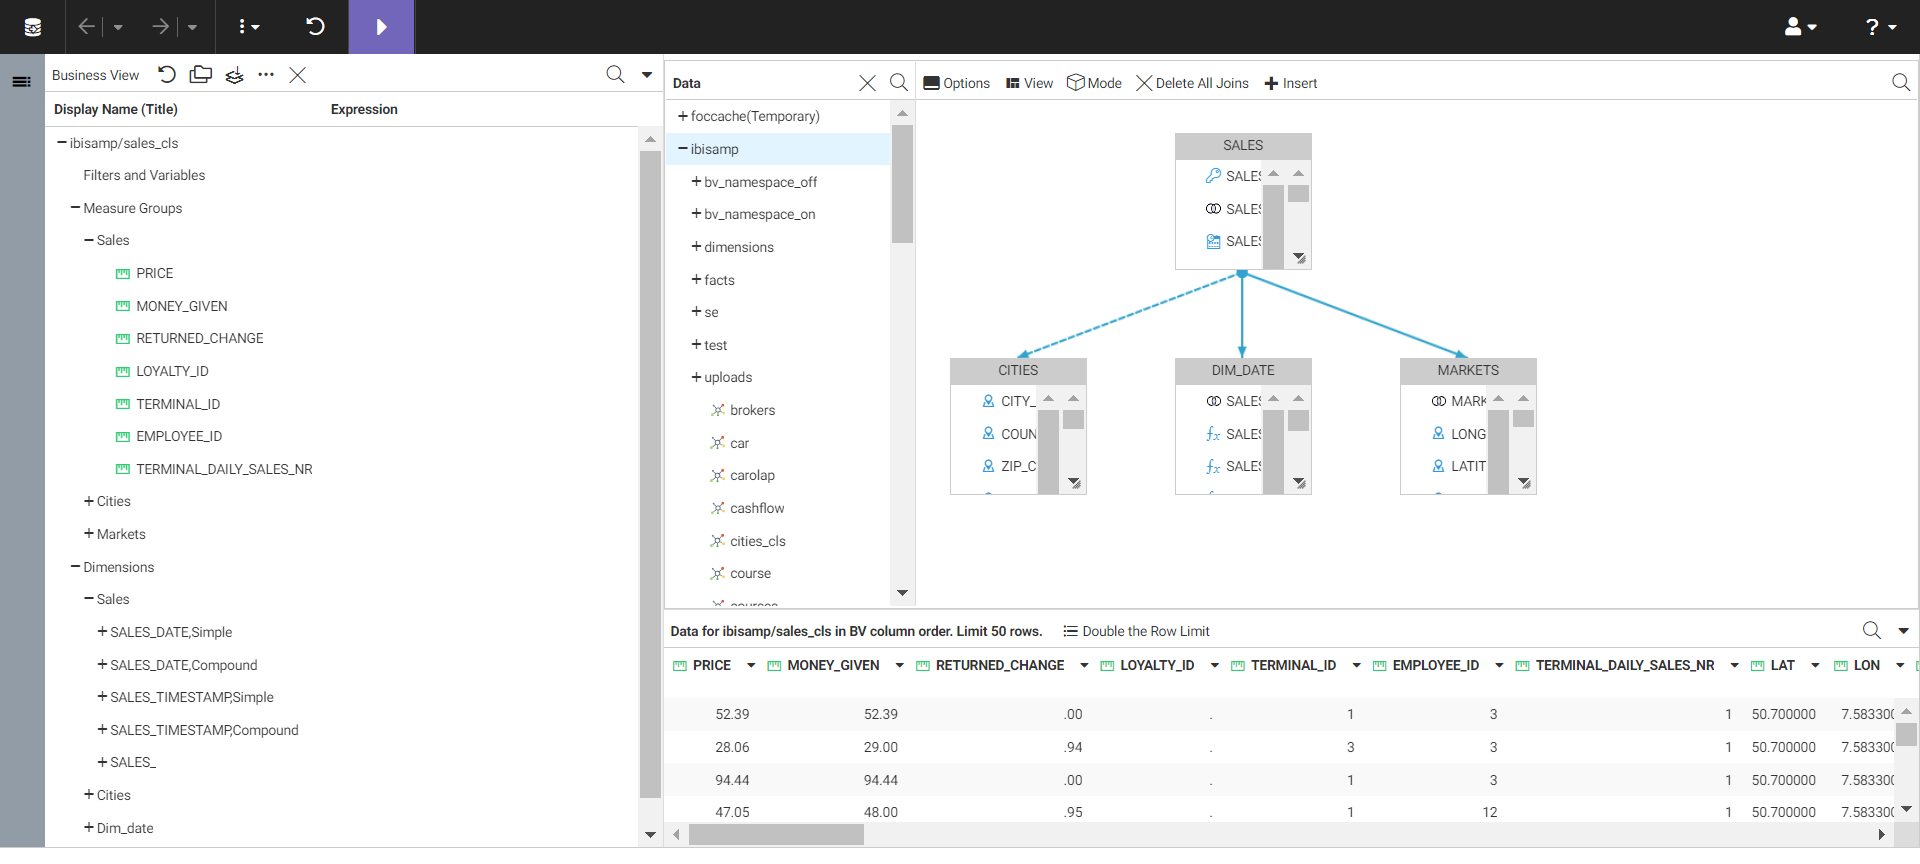
- A class diagram of the selected tables and the relationship between them is displayed. You can further model the data if you wish and preview it. Once complete, select the purple Run icon.
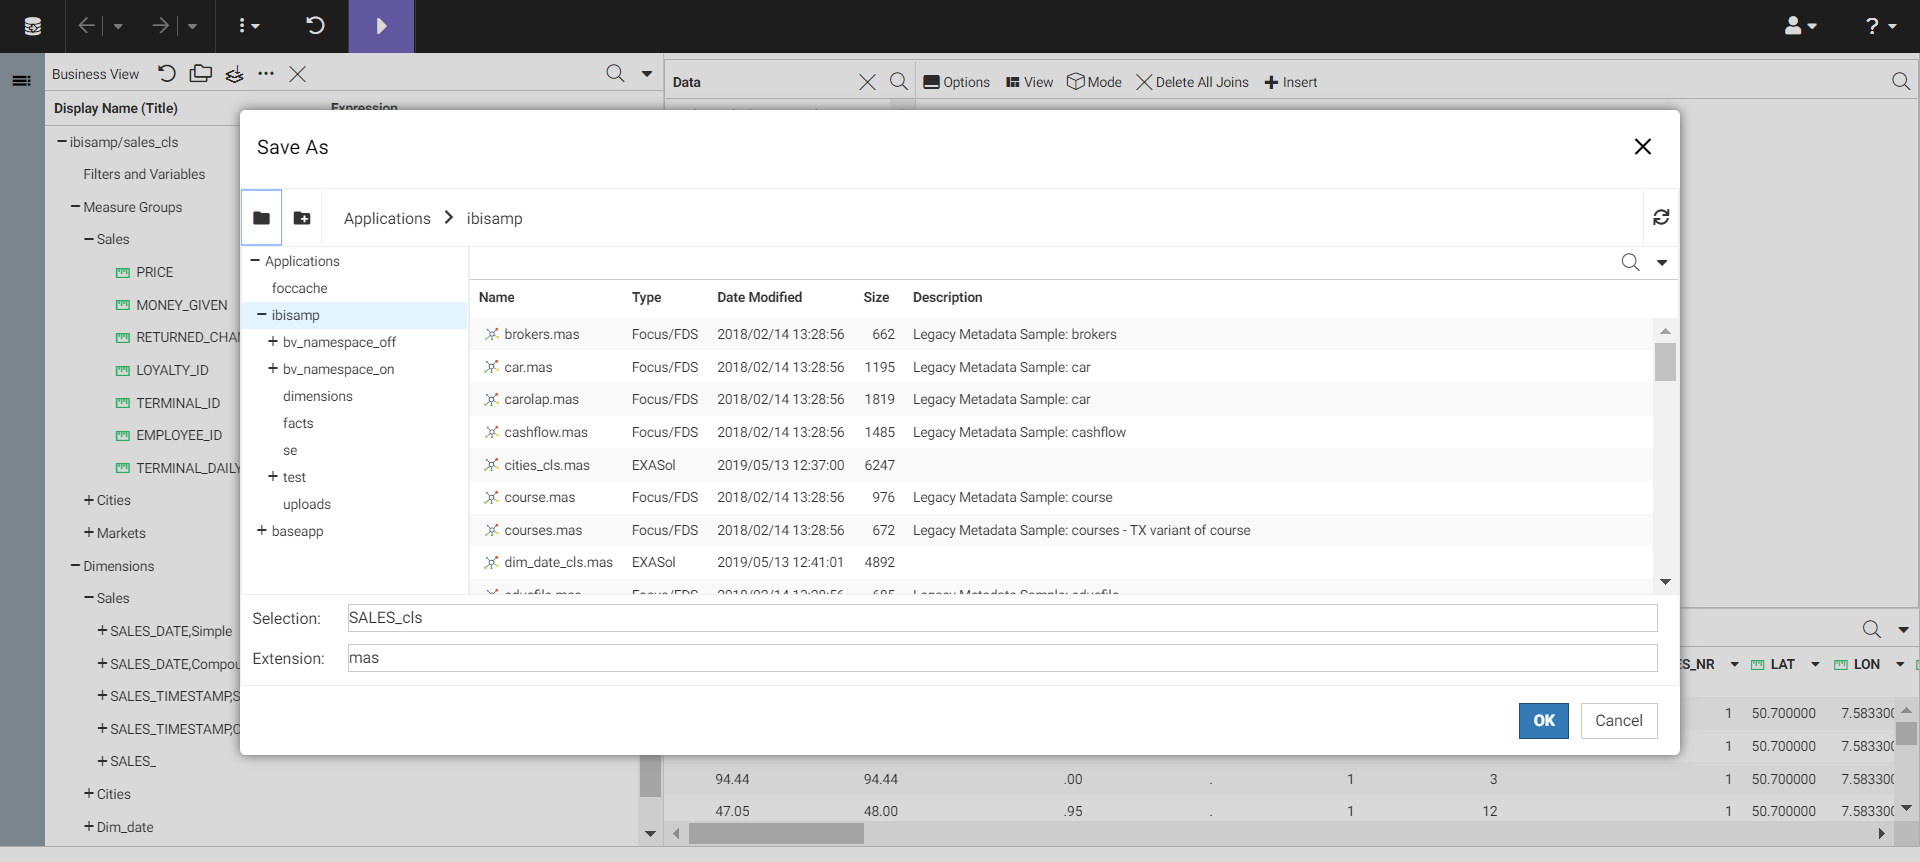
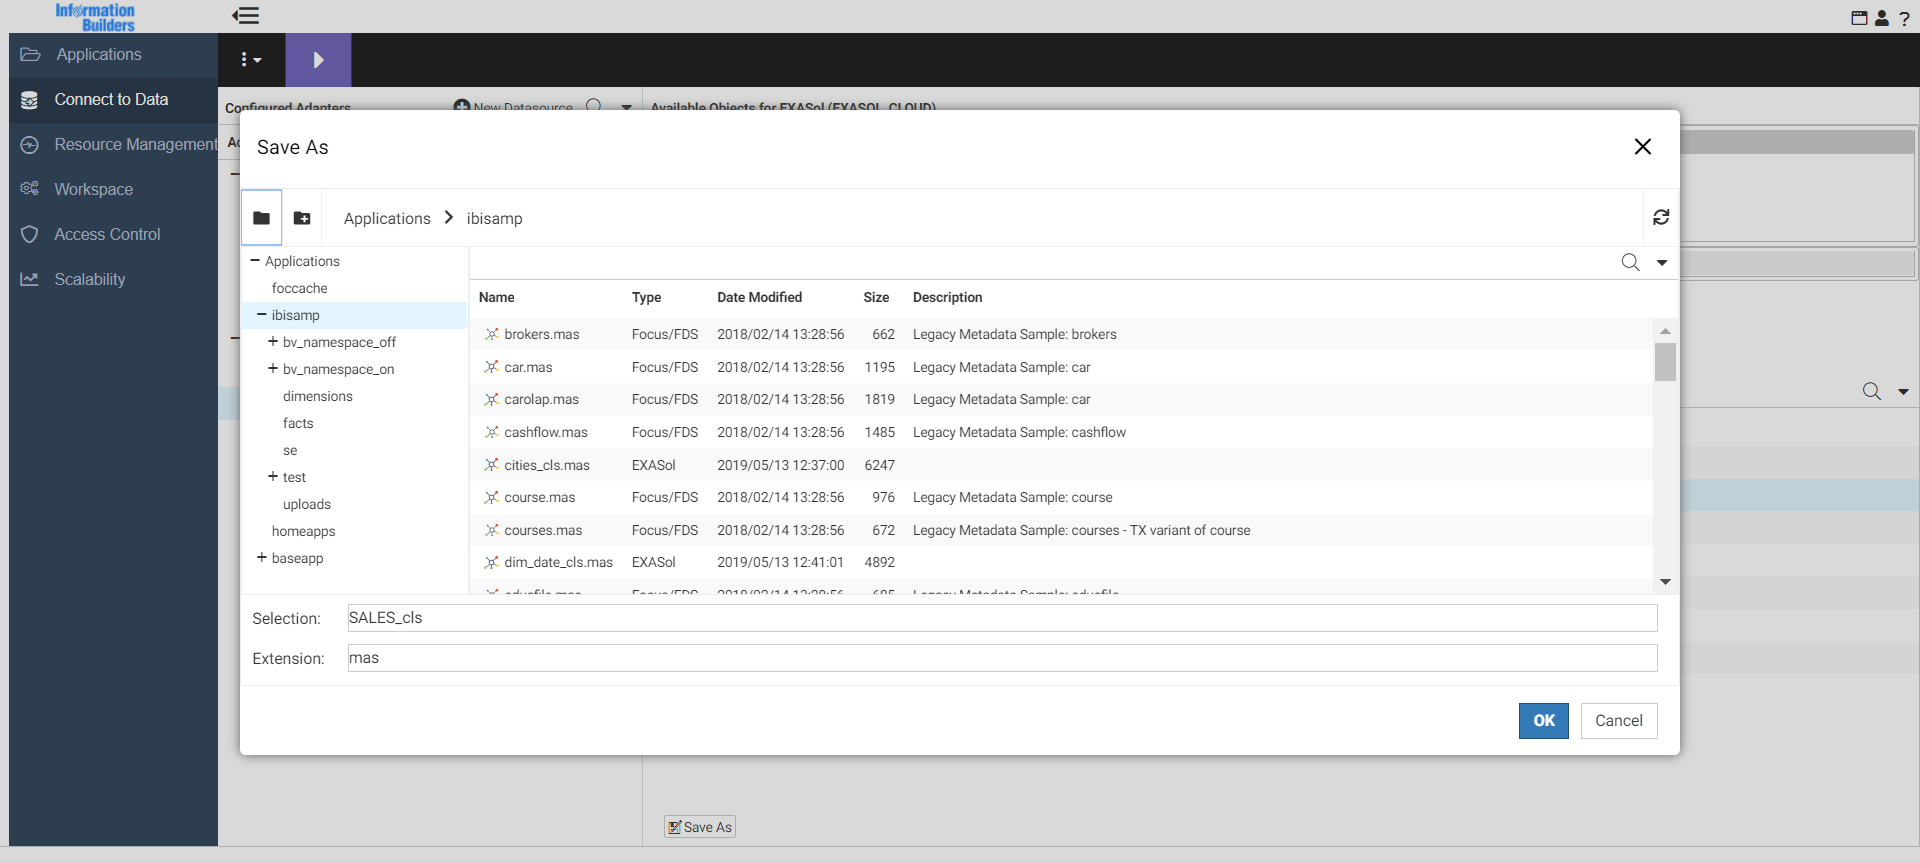
- Save the Synonym in the designated application folder. Synonym is a unique name or alias for each Exasol table accessible from the server.
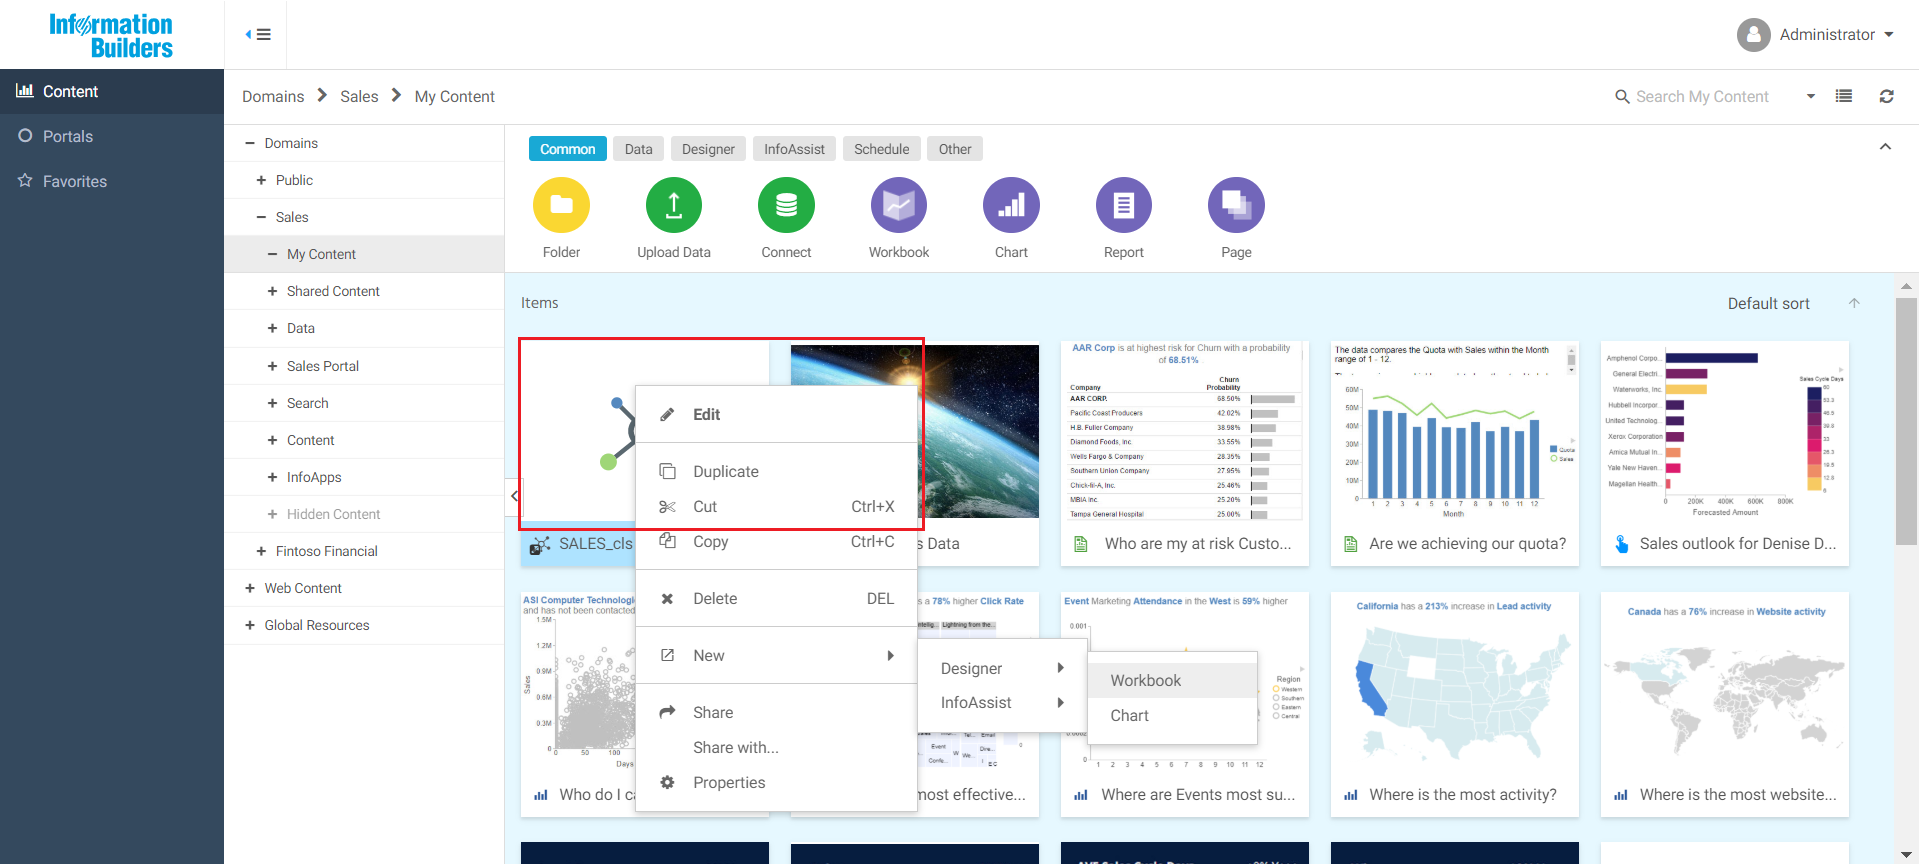
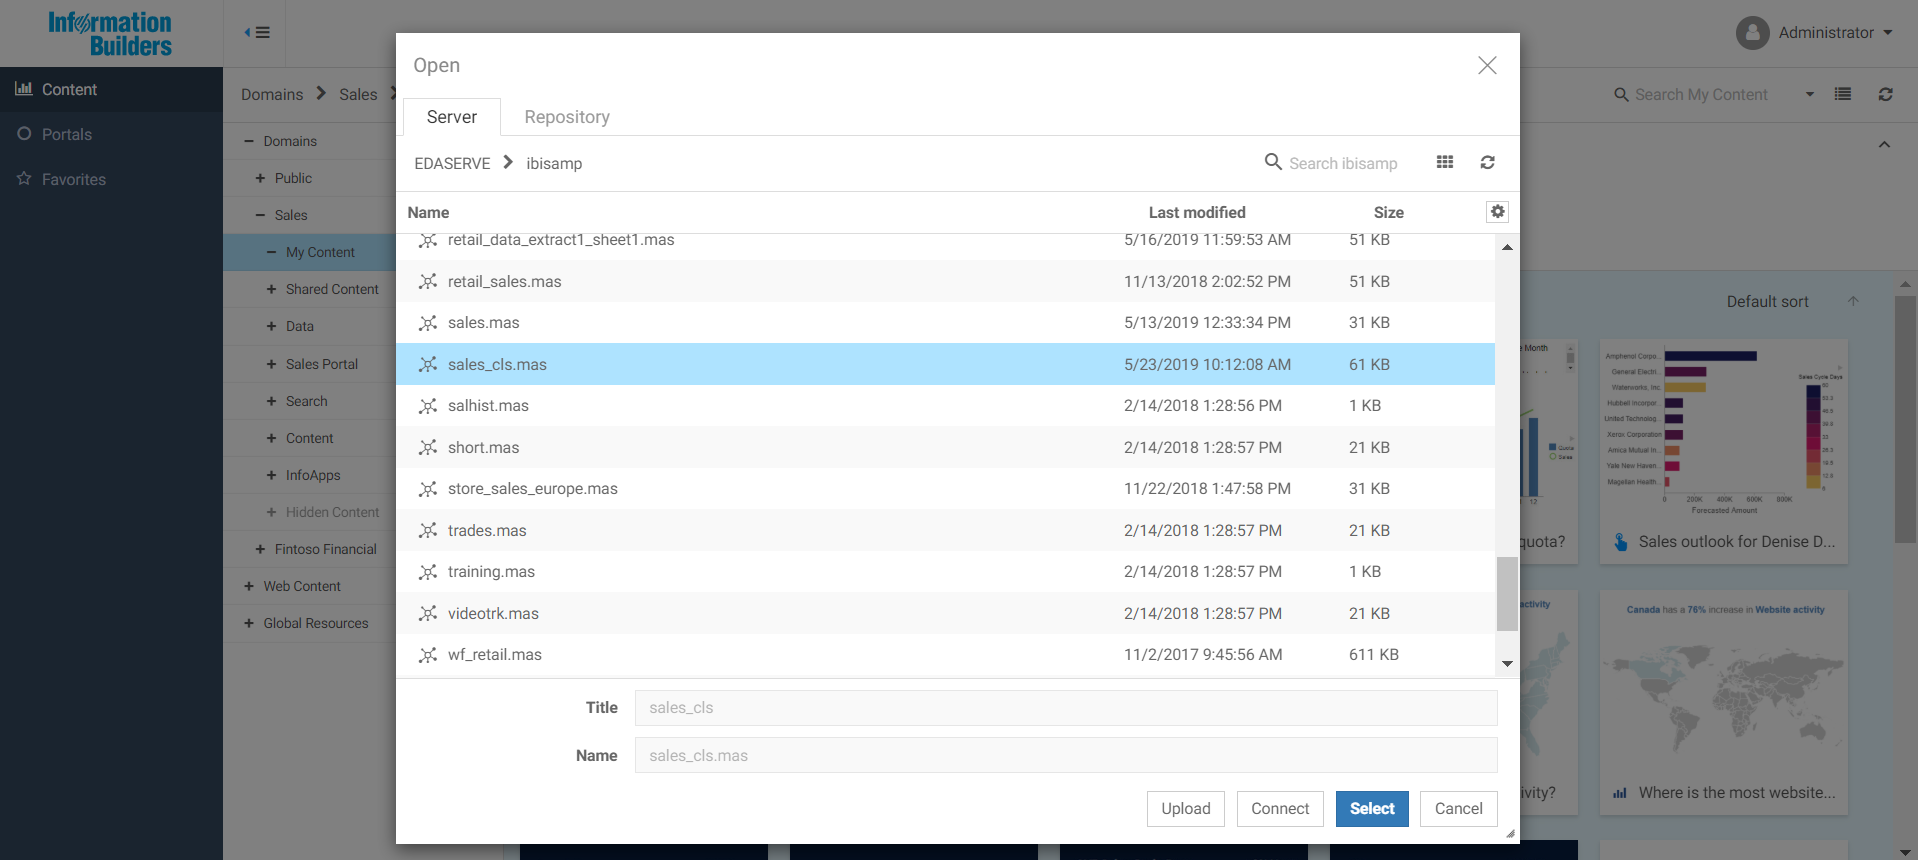
- The saved data model will now appear in your Domains folder within your Home page. Right clicking on the data model allows you to create content or, if you create a chart, you can browse to the application folder in which you saved the Synonym.
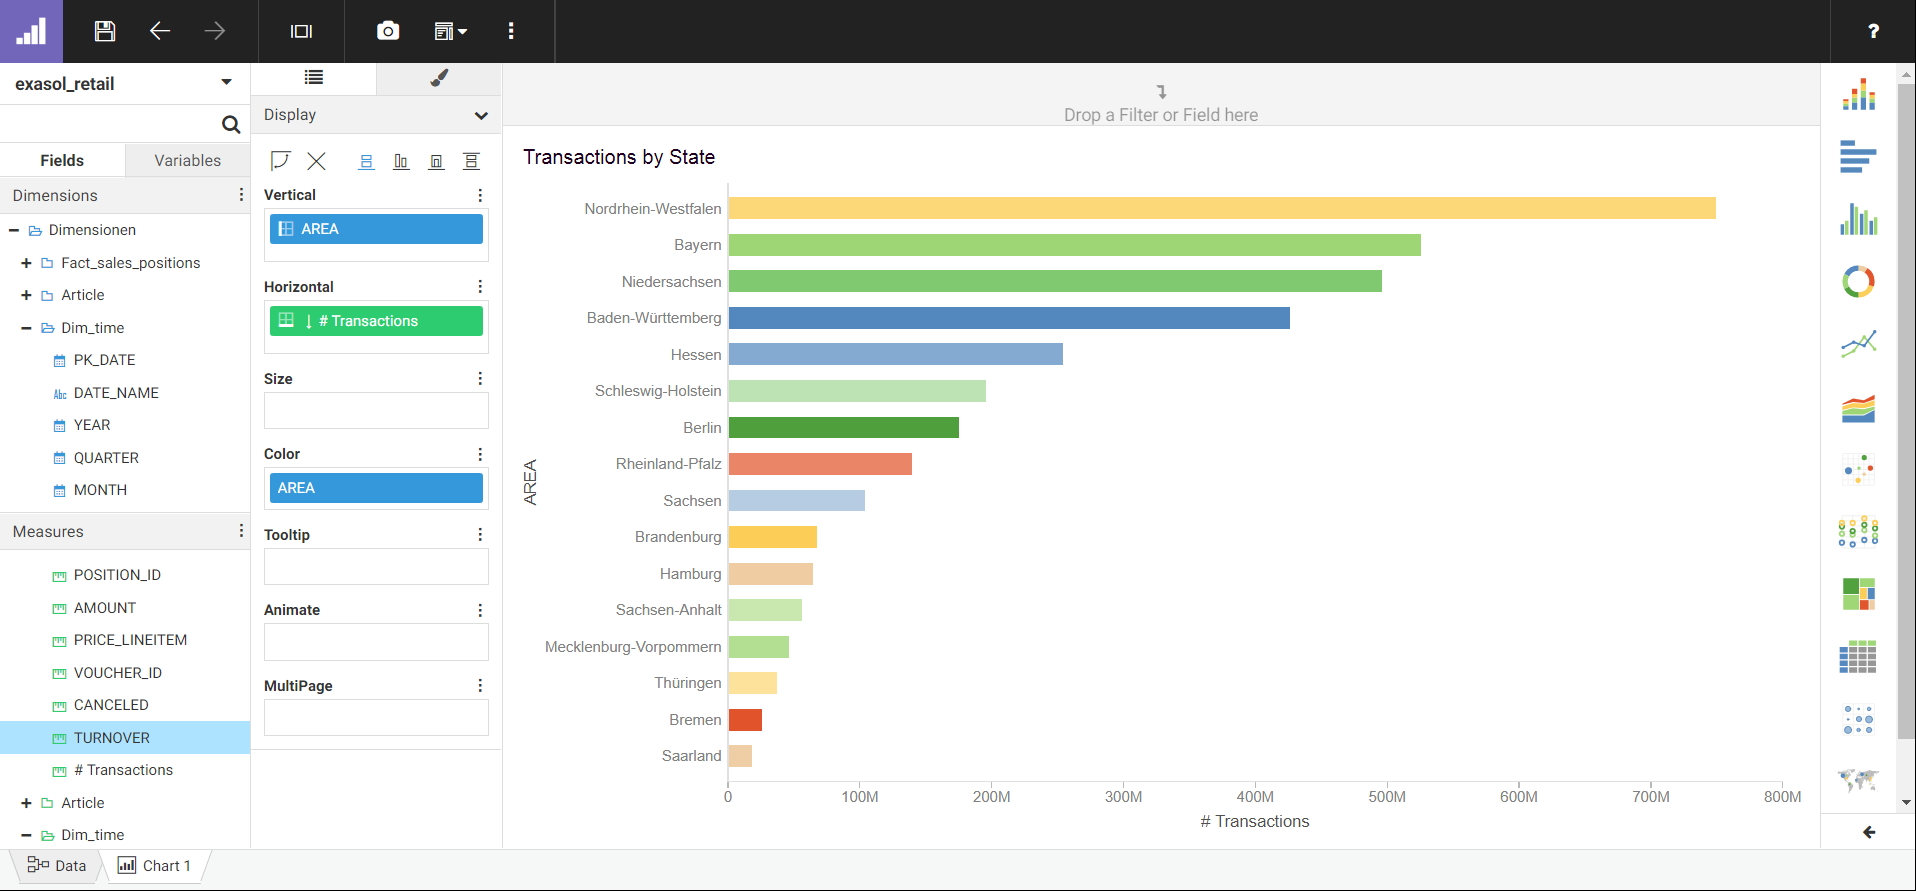
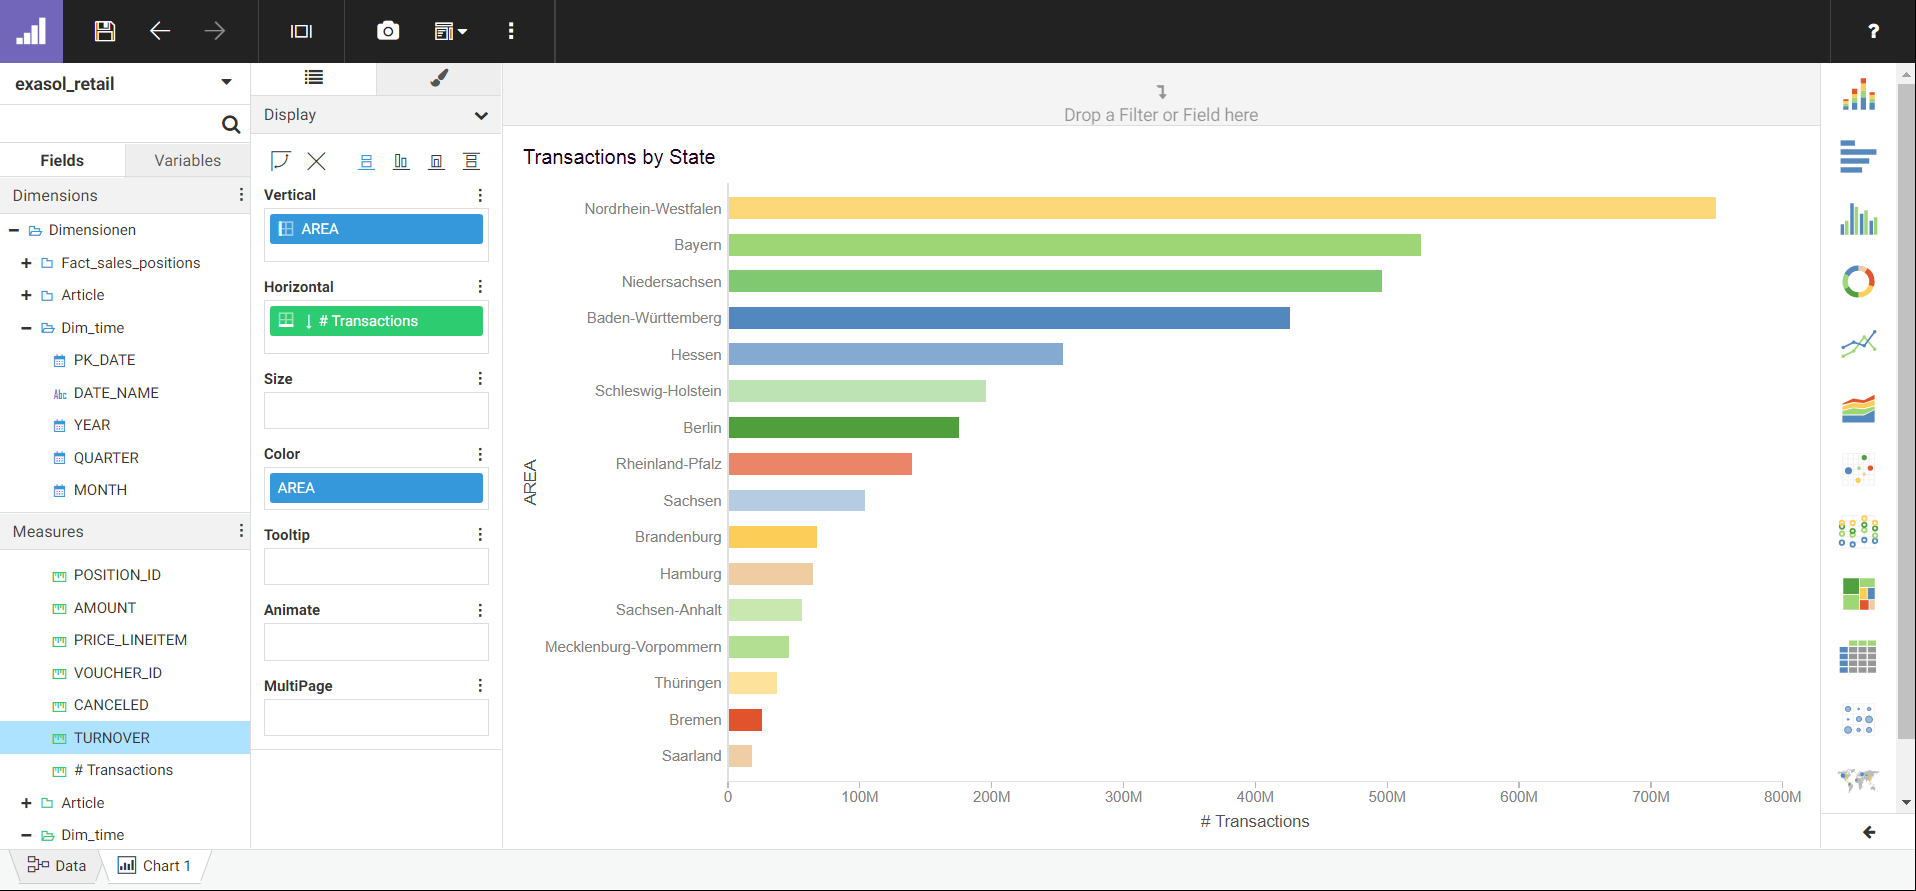
- Next, you can drag Measures and Dimensions from the fields on the screen to create content.
Using the Data Management Console
The procedure to configure a data source using the Data Management Console is identical to using the Web Console. However, the Data Management Console provides additional administration functionality to an administrator. Follow the steps below to configure a data source using the Data Management Console:
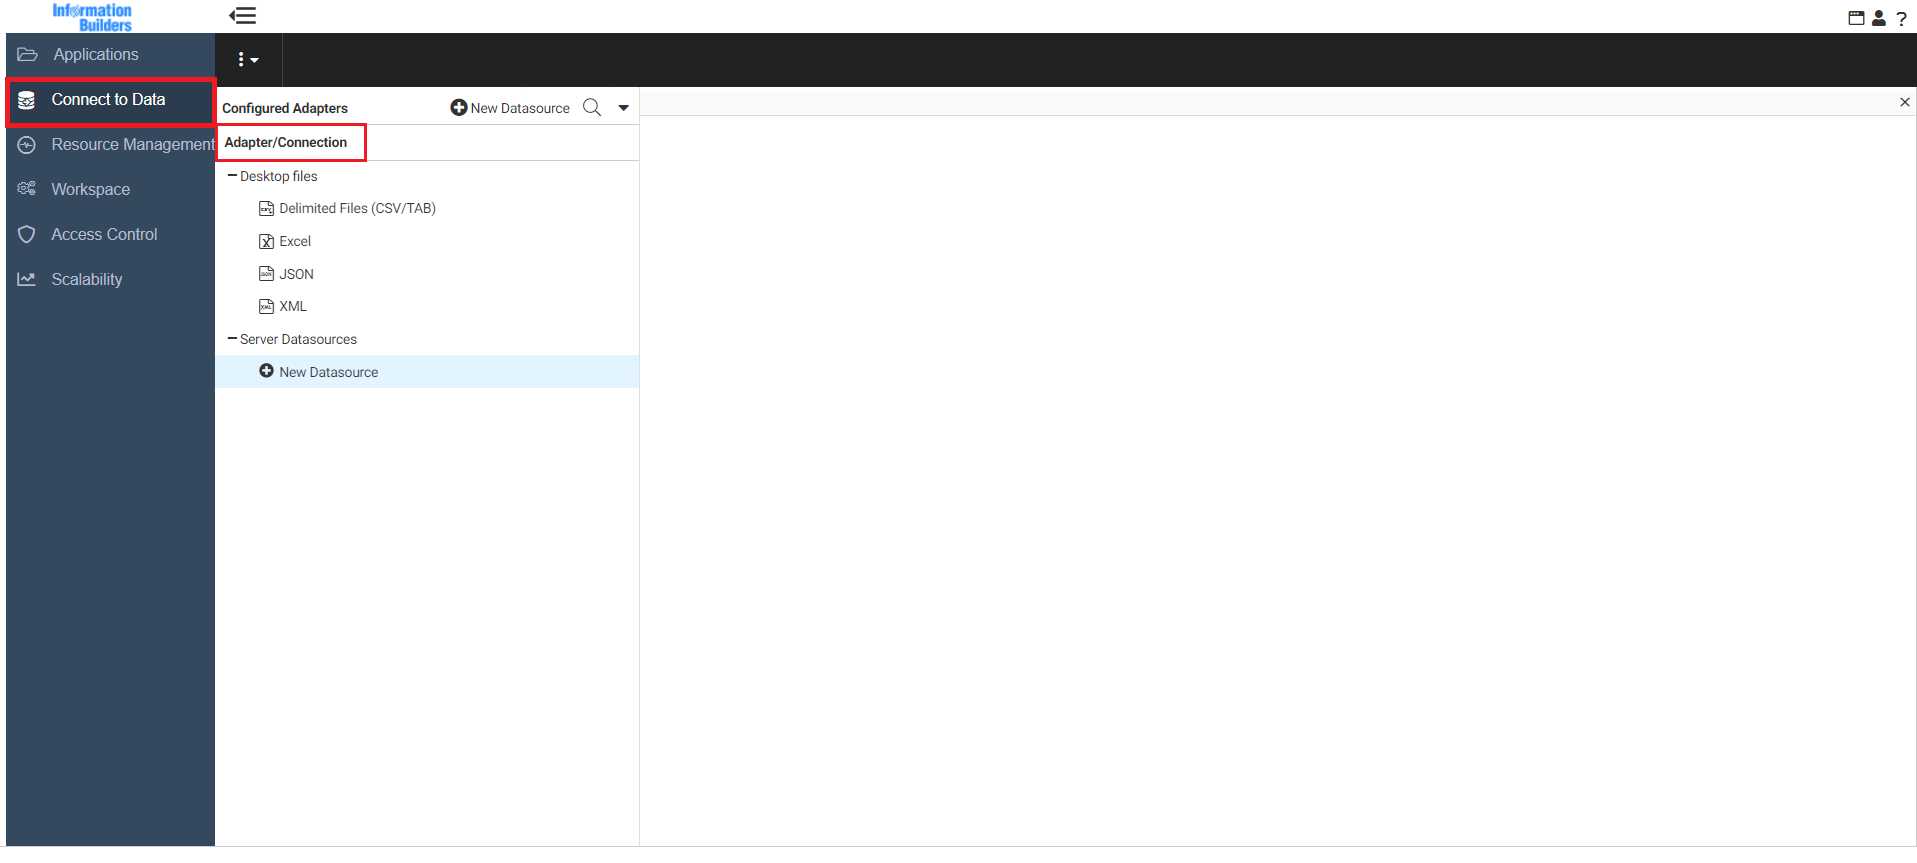
- Login to WebFOCUS Data Management Console, select Connect to Data from the menu on the left of the screen. Then select New Datasource in the Adapters/ Connections panel.
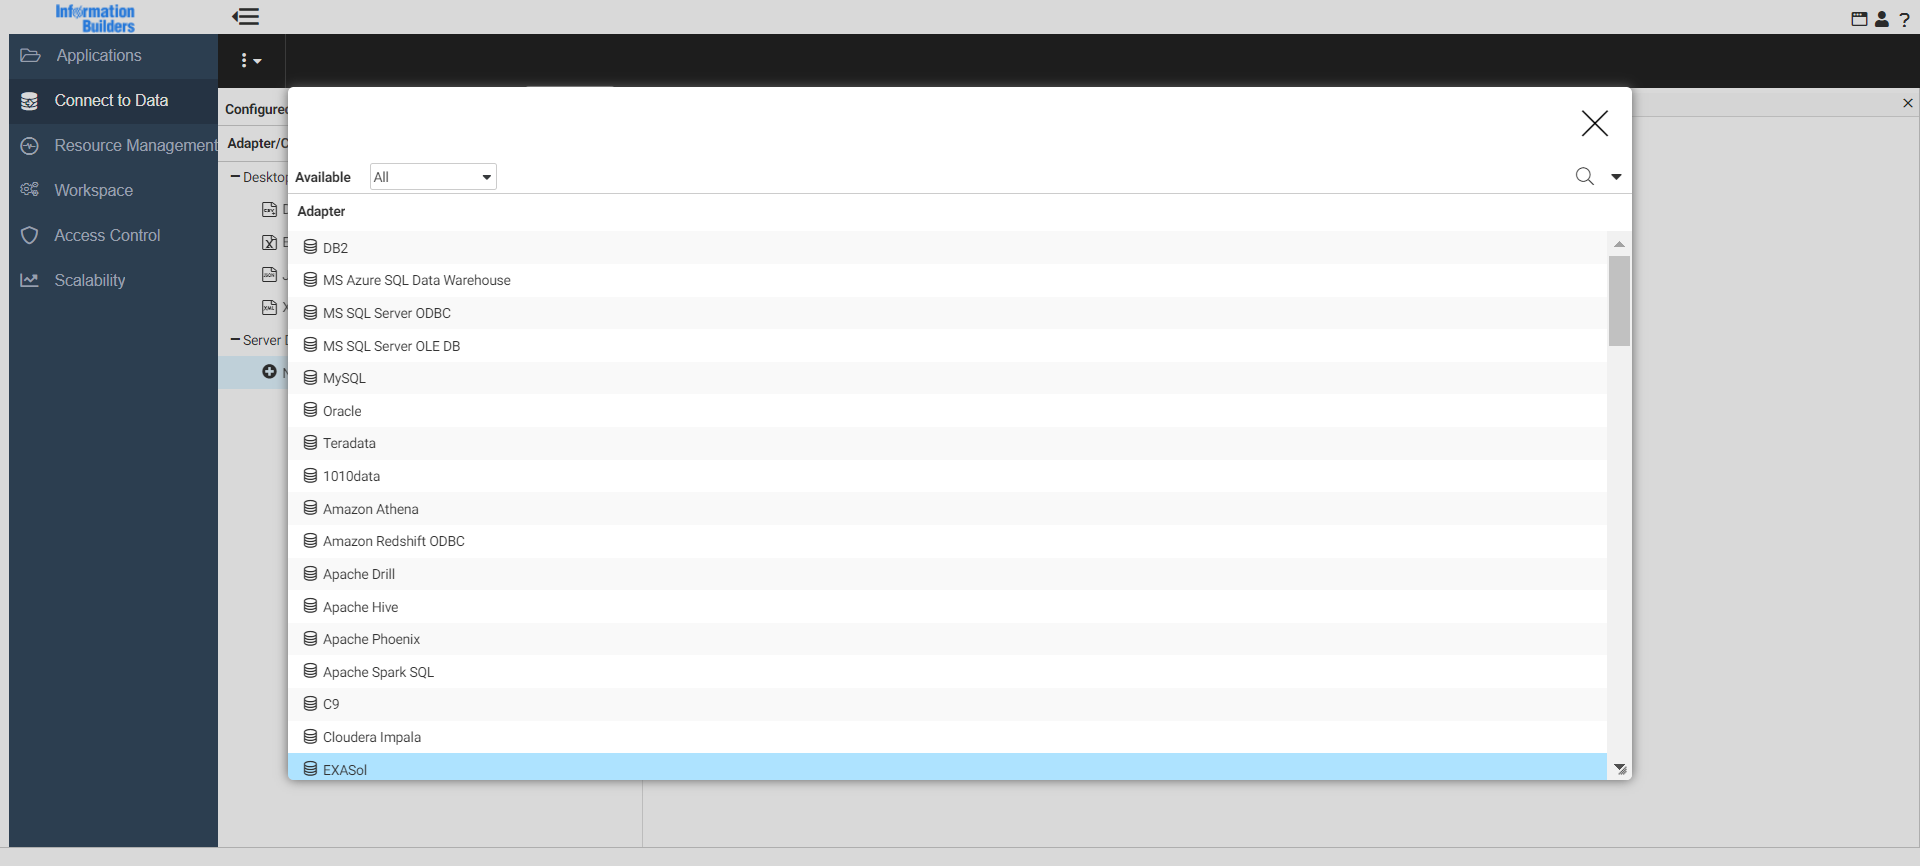
- A splash screen with a list of adapters is displayed. Select Exasol from the list.
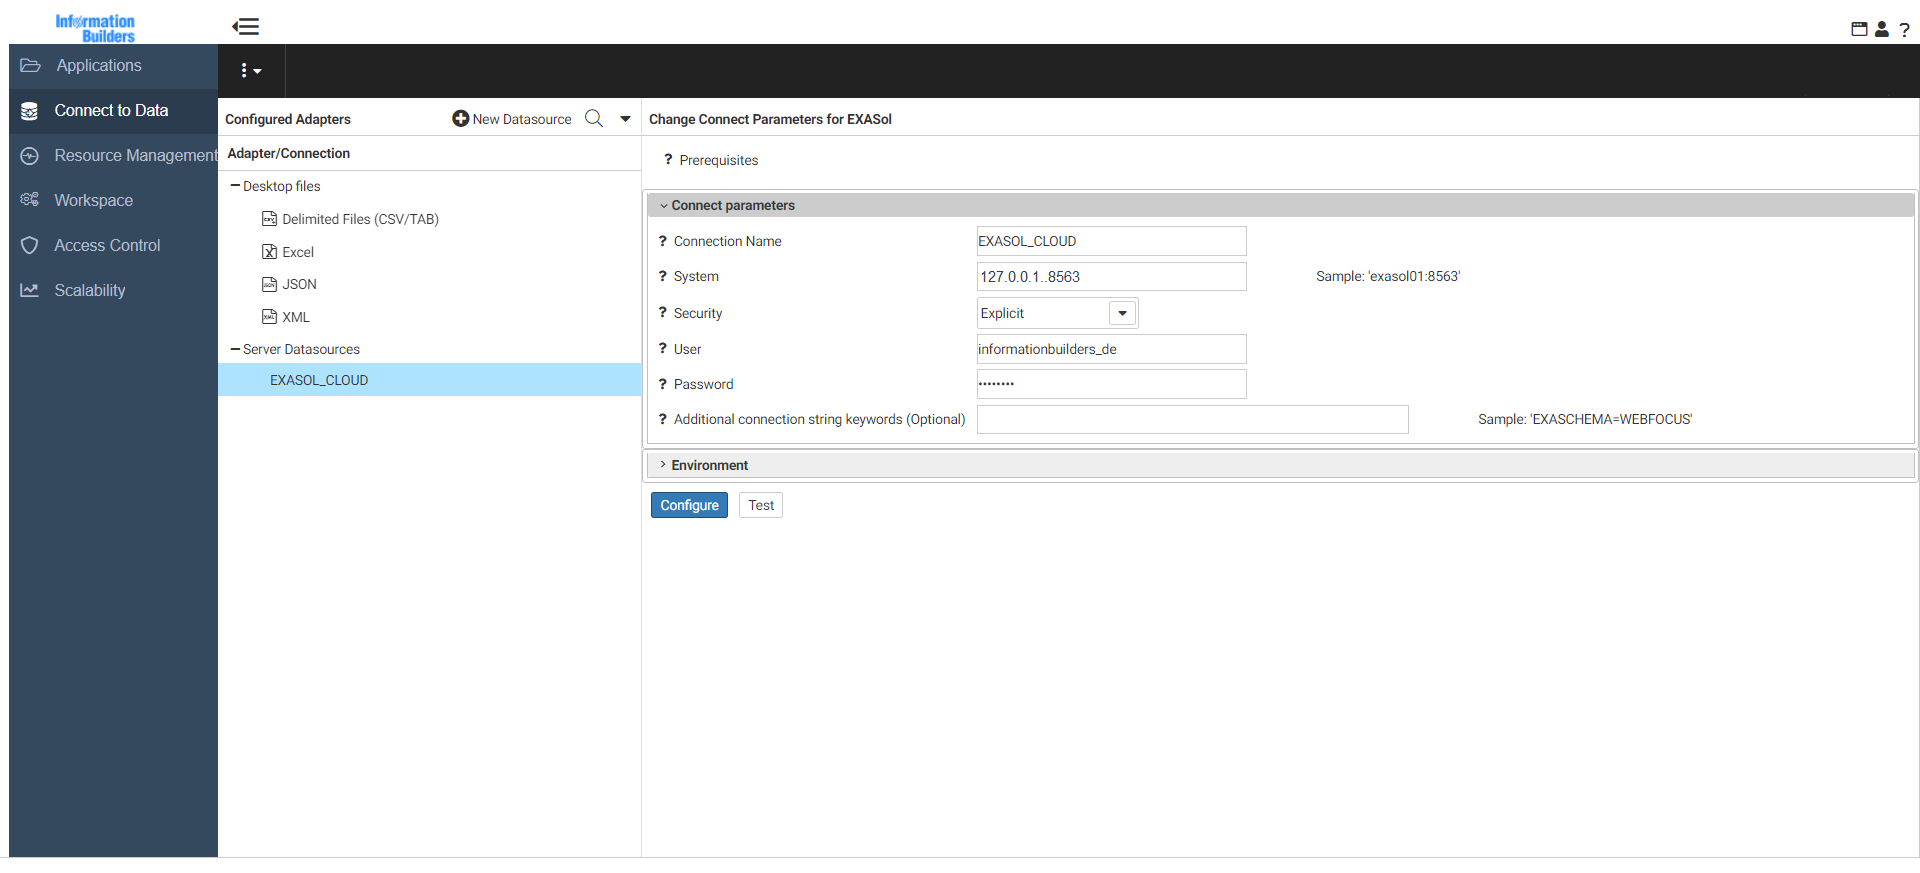
- Configure the connection by entering the relevant parameters in the Connect parameters section. In the Environment section, select edasprof from the drop-down menu to the add this connection for all users or select a user profile.
- Connection Name: Name to identify this connection.
- System: Address of the machine where Exasol database is running.
- Security: Authentication method to be used when connecting the user to the database.
- User: Primary authorization ID by which you are known to the data source.
- Password: Password associated with the primary authorization ID.
- Additional connection strung keywords: Can be used to add options to the connection string.
- Click Test to test the connection. You should see a sample list of objects stored in the Exasol data source you are accessing. Click Configure to complete the configuration.
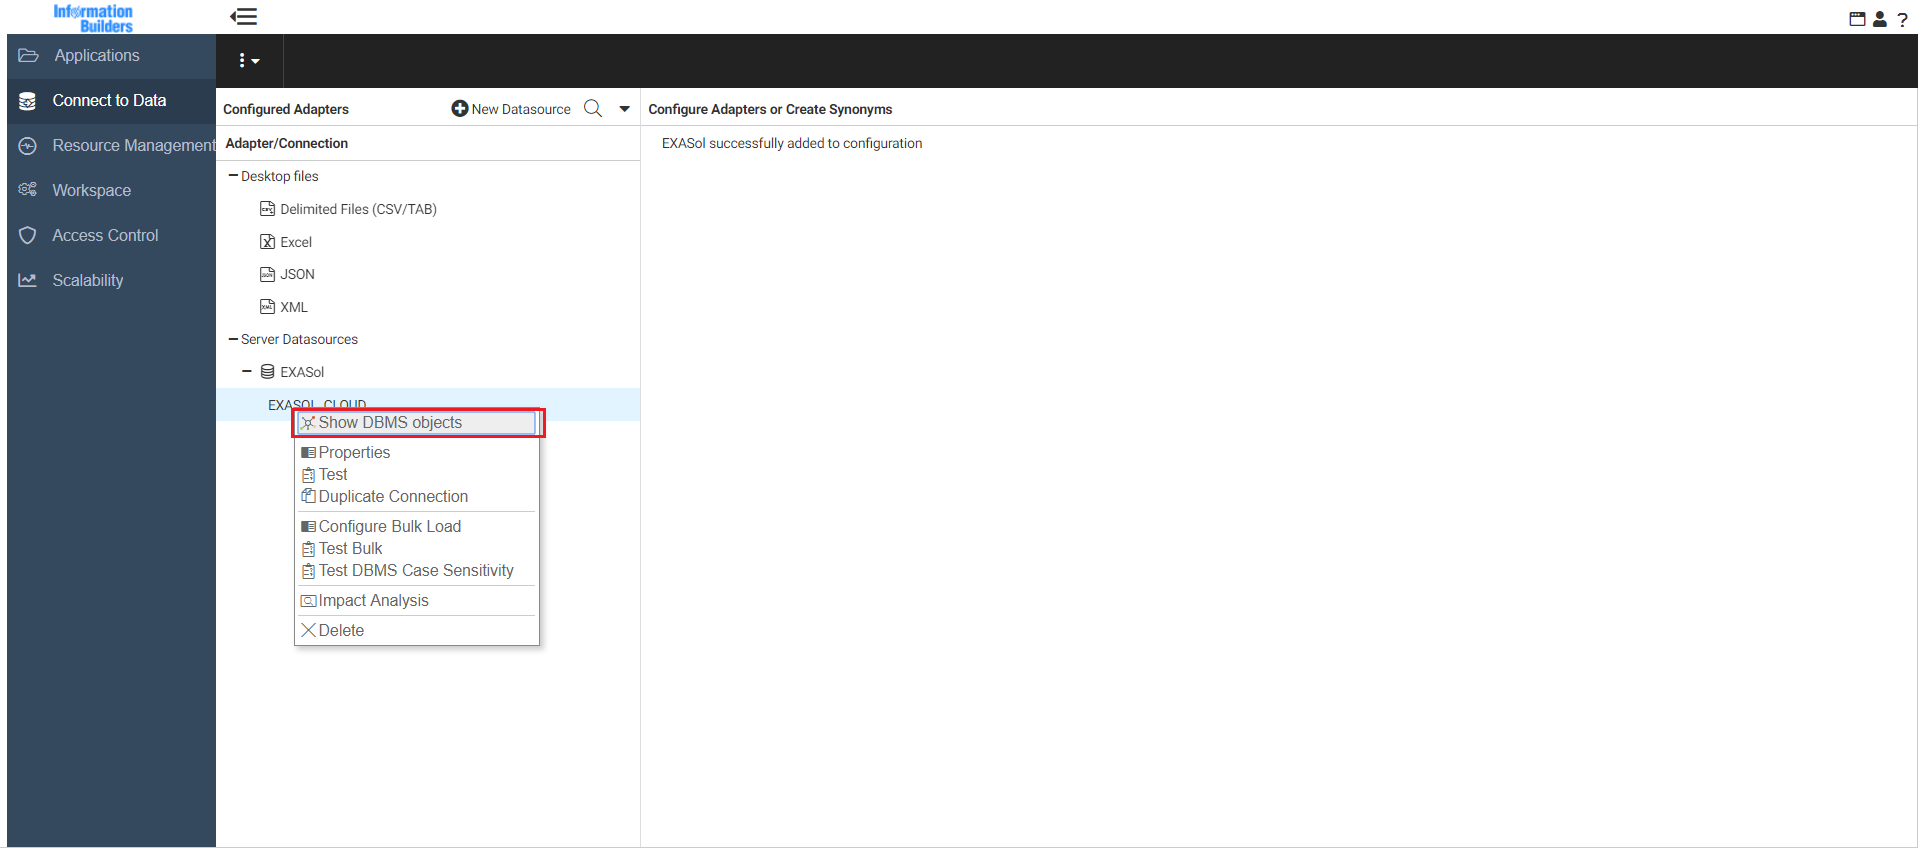
- Right click on the Exasol data source and then select Show DBMS objects.
- The Owner/Schema drop-down list displays the schema in your Exasol database. Select the desired schema. As an example in the below screen shot,
RETAILis selected as the Owner/Schema. All the tables for the selected schema are displayed. - Select the check box next to the tables you need. Next, select the purple Run icon on the top left of the screen.
- A Business View of the selected tables and the relationship between them is displayed. You can further model the data if you wish and preview it. Once complete, select the purple Run icon.
- Save the Synonym in the designated application folder. The Synonym is a unique name or alias for each Exasol table accessible from the server.
- The saved data model can be accessed from the Data Management Console Home page.
- Next, you can drag Measures and Dimensions from the fields on the screen to create content.

