Pentaho Business Analytics
This article explains how to connect Pentaho Business Analytics to an Exasol database.
Exasol takes no responsibility for changes in functionality or terms of use for third-party tools. For more details about the compatibility and use of these tools with Exasol, refer to the respective software vendor’s website.
Prerequisites
- A running Exasol database
- Exasol JDBC driver must be installed. You can download drivers from the Exasol Downloads portal. For more information, see Drivers.
Connect Pentaho to Exasol
- Copy and paste the Exasol JDBC driver into the Pentaho server directory. The server directory is located at C:\Program Files (x86)\Pentaho\server\pentaho-server\tomcat\lib
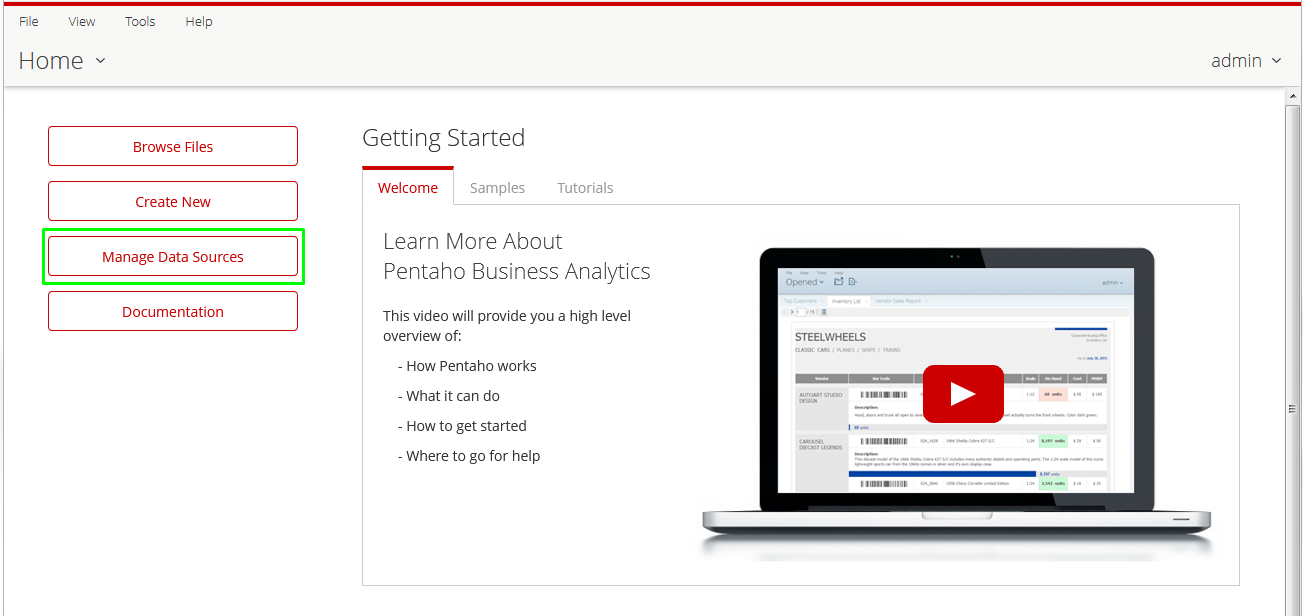
- From the Pentaho User Console (PUC), click Manage Data Sources.
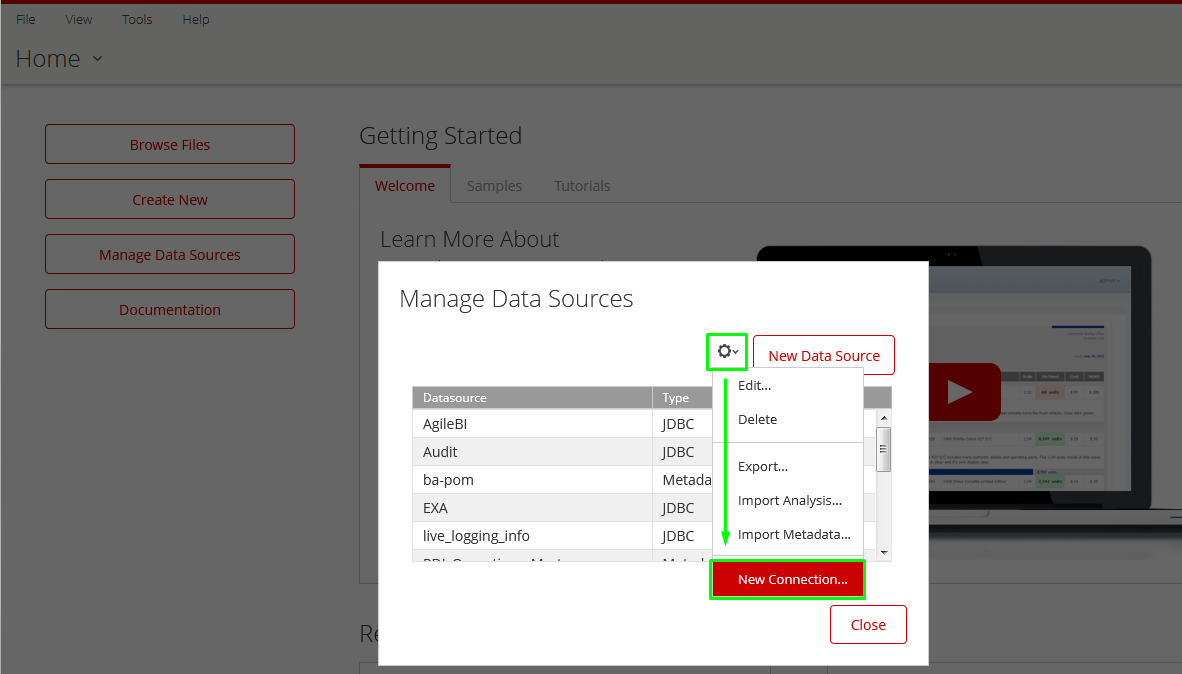
- On the Manage Data Source dialog box, you need to define a new connection. Click the gear icon for more menu options and then click New Connection.
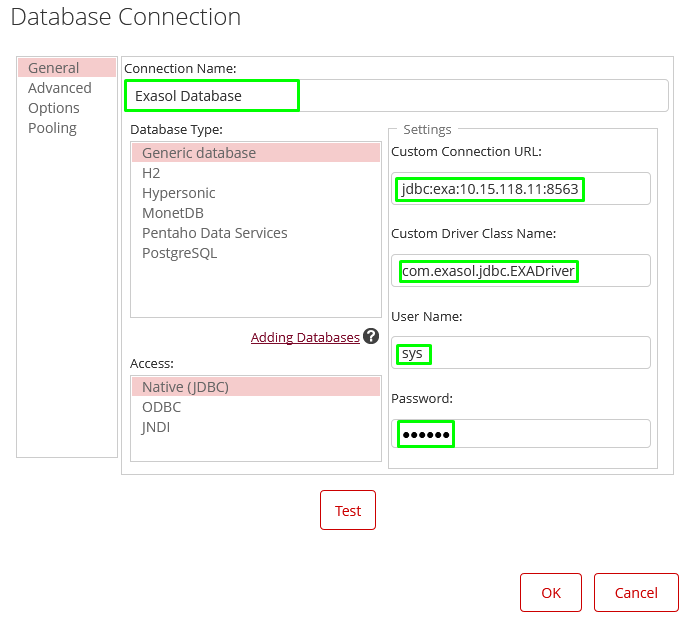
- The Database Connection dialog box is displayed as show in the below image. Enter the data connection information:
- Connection Name: Enter a name for the connection.
- Database Type: Set the database type to Generic database.
- Access: Set it to Native (JDBC).
- Settings:
- Custom Connection URL: Enter the connection URL to your database instance along with the port number.
- Custom Driver Class Name: Enter the drive class name, which is
com.exasol.jdbc.EXADriver. - User Name: Enter the user name to connect to the database. This step is optional.
- Password: Enter the password to connect to the database. This step is optional.
- Click Test to test the connection. A success message is displayed if a connection is established.
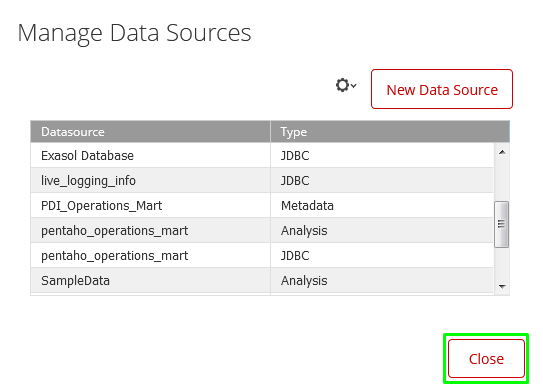
- Click Ok to close the Database Connection dialog box and then click Close.
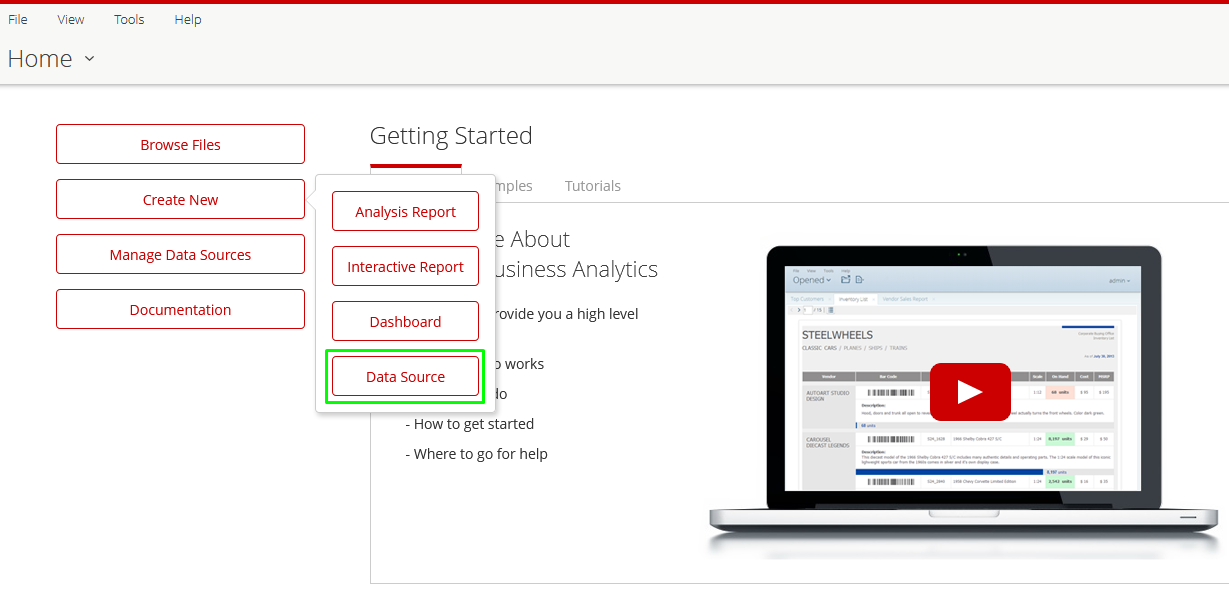
- To be able to use tables that you need from the Exasol instance, you may need to create a new data source. On the User Console Home, click Create New, then click Data Source.
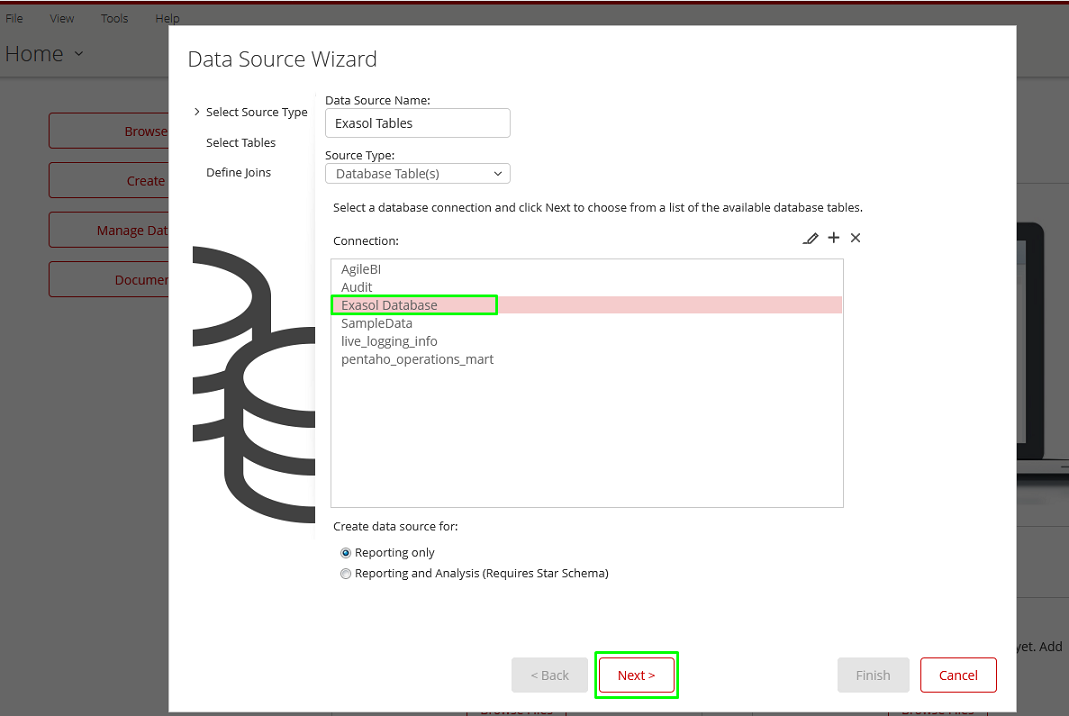
- The Data Source Wizard is displayed. Enter a name for the data source. From the Source Type drop-down list select Database Tables(s). Click Next.
- In the Connections section, select the connection you created in earlier (in step 3). Click Next.
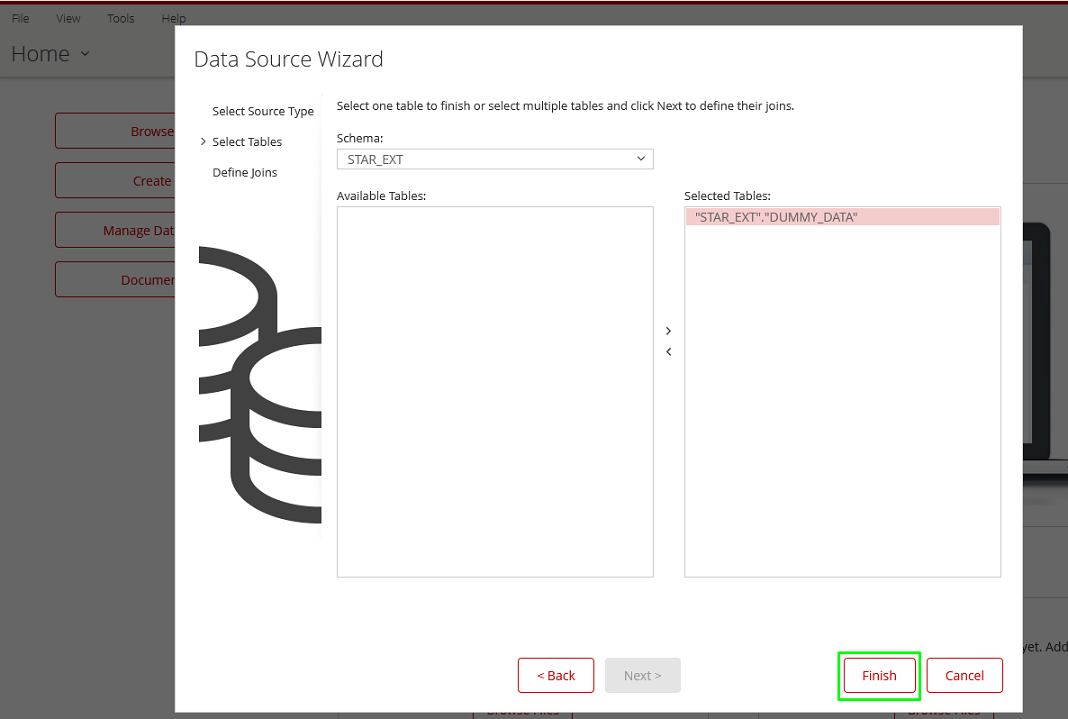
- Select the schema you want to use from the Schema drop-down list and select the tables by moving them to the Selected Tables section.
- Click Finish. You will now be able to create dashboards and reports from User Console Home.
Once done, you need to restart the Pentaho server if it is already running.
