Profiling Information
This article explains how to collect profiling information from your Exasol system.
In some scenarios you may be asked by Support to provide profiling information for a problematic query. To get this information you must first run a test of the problematic statement with profiling enabled, and then collect the log files for that session.
Prerequisites
You must have enough free disk space for the logs.
Procedure
Step 1: Run a test of the problematic statement with profiling enabled
- Open a new database connection using your preferred SQL client.
- Copy the problematic SQL query into the following statement and execute it:Copy
alter session set profile='on';
//  <insert your query here>;
alter session set profile='off';
alter session set NLS_NUMERIC_CHARACTERS='.,';
alter session set NLS_TIMESTAMP_FORMAT='YYYY-MM-DD HH:MI:SS.ff3';

commit;

flush statistics;

commit;

export (
    select *
    from EXA_STATISTICS.EXA_USER_PROFILE_LAST_DAY
    where session_id = current_session
)
into LOCAL CSV
FILE 'profile_output.csv'; - Attach the generated CSV file profile_output.csv to your support ticket.
Step 2: Get the log files for the test session
- Open EXAoperation and go to Services > Support.
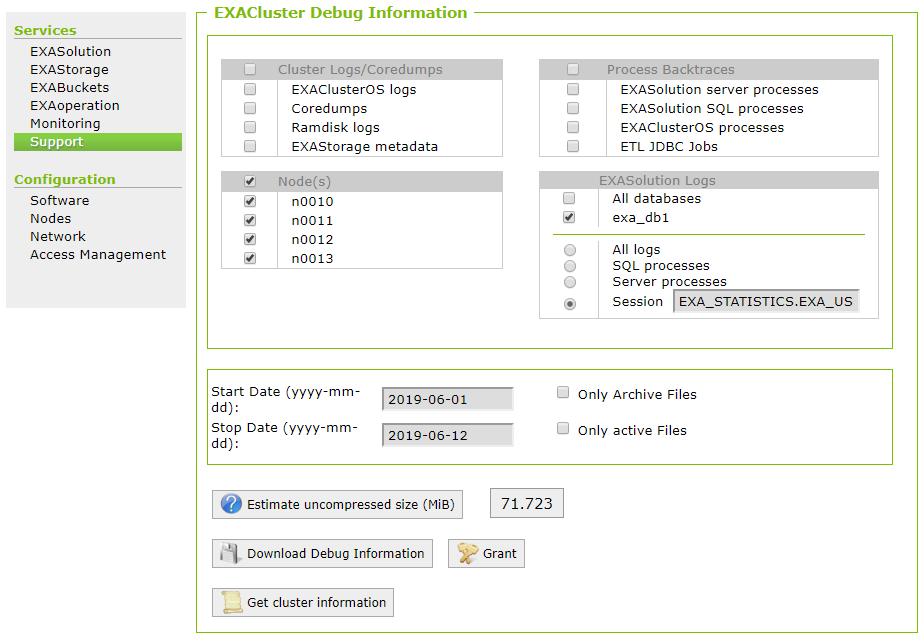
- Set up the options on the EXACluster Debug Information screen as follows:
- In Cluster Logs/Coredumps, leave all options unchecked.
- InProcess Backtraces, leave all options unchecked.
- In Node(s), select all nodes.
- In EXASolution Logs, select the impacted database.
- Select Session and enter the identifier of the test session you ran in step 1 (use the
SELECT CURRENT_SESSIONstatement to get this). - Set the start and stop dates for the day the issue occurred.
-
Click on Download Debug Information to download the file locally, or click on Store Debug Information into Archive Volume to save the file to a remote server.
- Attach the downloaded file to your support ticket.

