Manage JDBC drivers
Learn how to add, view, or update the JDBC driver through EXAoperation.
The following procedure is not applicable for the JDBC driver that comes pre-installed with Exasol.
The JDBC driver file must be compiled with Java 8 or older.
Add JDBC driver
- Log in to EXAoperation as an Administrator user.
- Go to Configuration > Software > JDBC Drivers.
- Click on Add to add the JDBC driver details.
- Enter the following details for the JDBC properties:
- Driver Name:
<driver name> - Main Class:
<driverclass> - Prefix:
<driver prefix> - Disable Security Manager: This is an optional field. This allows the JDBC Driver to access certificate and additional information.
- Comment: This is an optional field.
- Driver Name:
- Click on Add to save the settings.
- In the list of drivers, click on the radio button next to the new JDBC driver, then click on Browse.
- In the file manager window, select the downloaded driver, then click on Open.
- Click on Upload to upload the JDBC driver.
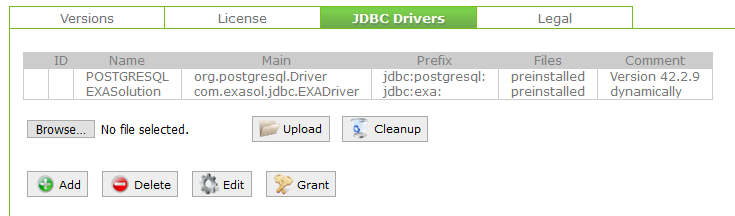
View JDBC driver versions
To view the JDBC driver version, go to Configuration > Software > JDBC Drivers.
Update JDBC driver version
Do the following to update the JDBC driver:
- Download the latest JDBC driver from your preferred vendor’s download page.
- Log in to EXAoperation as an Administrator user.
- Go to Configuration > Software > JDBC Drivers.
- In the list of drivers, click on the radio button next to the driver that you want to update and click on Cleanup.
- Click on Browse and select the downloaded driver in the file manager, then click on Open.
- Click on Upload to upload the file.
The JDBC driver is updated.