Manage JDBC Drivers
This section explains how you can add, view, or update the JDBC driver through EXAoperation interface.
The procedure given in the section is not applicable for the JDBC driver that comes pre-installed with Exasol.
Add JDBC Driver
Do the following to add a JDBC driver:
- Log in to EXAoperation user interface as an Administrator user.
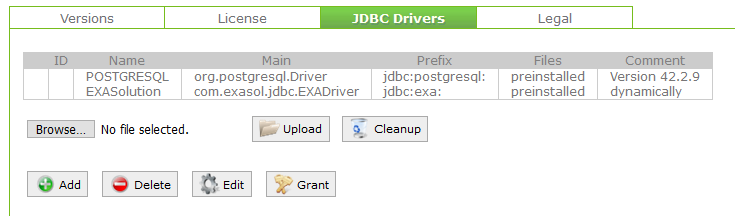
- Select Configuration > Software and click the JDBC Drivers tab.
- Click Add to add the JDBC driver details.
- Enter the following details for the JDBC properties:
- Driver Name: <driver name>
- Main Class: <driverclass>
- Prefix: <driver prefix>
- Disable Security Manager: This is an optional field. This allows the JDBC Driver to access certificate and additional information.
- Comment: This is an optional field.
- Click Add to save the settings.
- Select the radio button next to the driver from list of JDBC driver.
- Click Choose File to locate the downloaded driver and click Upload to upload the JDBC driver.
The JDBC driver file must be compiled with Java 8 or older.
View JDBC Driver Versions
To view the JDBC driver version, select Configuration > Software and click the JDBC Drivers tab.
Update JDBC Driver Version
Do the following to update the JDBC driver:
- Download the latest JDBC driver from your preferred vendor's download page.
- Log in to EXAoperation user interface as an Administrator.
- Go to Configuration > Software and click the JDBC Drivers tab.
- Click Choose File, select the JDBC driver file you downloaded, and click Open.
- Next, click Upload.
The JDBC driver is updated.