Replace Active Node with Reserve Node
For database instances that are running with one or more reserve nodes, it is possible to swap an active node with a reserve node. You might need to do this in the case of a hardware problem with the active node, as an example. The following steps are required to perform the swap:
- Shut down the database instance(s)
- Deactivate the desired active node that will be replaced
- Start up the database instance
- Move data to the reserve node
- Reactivate the node you deactivated in step 2
At the end of the procedure, the node that was previously the reserve node is active.
Prerequisites
- The procedure requires a maintenance window of at least half an hour.
- You need access to a user in Exasol with at least Administrator access rights.
Before you begin the procedure, make sure that the reserve node on EXAStorage is online and running without errors or issues. The reserve node may otherwise not function as expected when you restart the database.
During this procedure, data is recovered from one node to another. The performance of the database is reduced until the data has fully been transferred to the target node.
Procedure
Shut down database(s)
- Before you shut down the database(s), check for running operations. In EXAoperation, go to Services > EXASolution and check for running operations.
- Select the database instances that should be shut down and click Shutdown.
- Refresh the page until the status of all instances change from Running to Created.

If you stop the database while there are operations running, these operations will be aborted. It is recommended to wait until all running operations have completed before stopping the database.


Deactivate Node(s)
- In EXAoperation, go to Services > EXASolution and select the database instance.
- In the database instance screen, click Edit to edit the database instance.
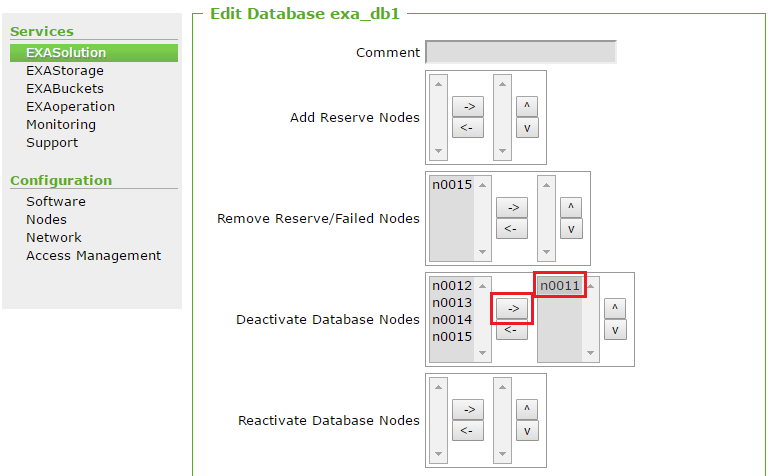
- In the Deactivate Database Nodes field, select the node(s) you want to remove from the database instance, and click the right arrow to move it to the right column.
- Click Apply to deactivate the selected node(s). The node is listed as deactivated.

Before continuing, ensure you are editing the correct database instance.
All nodes in the right column will be removed from the database instance.
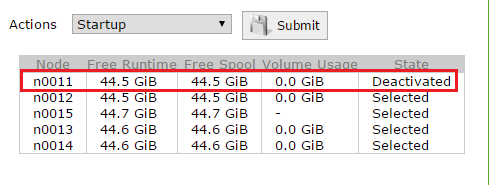
After starting up the database, the former reserve node (n15 in this example) becomes an active node. The data segments that n15 works with are still on the former active node (n11 in the example). This is not as performant as having them residing locally on n15.
Start Database Instance(s)
- Go to Services > EXASolution. The EXASolution Instances screen opens, where you can view the status of the database instance(s). In this case, a database instance exists, but is not running (it has a status Created).
- Select the database and click Start. Once the database is up, there is a green light beside the database name in the EXASolution screen. This indicates the database is accepting client connections.


Move Data Segments to Target Node
In order to resolve the less performant situation described above, you need to move data from the node to the reserve node. This is done by modifying the node in the data volume.
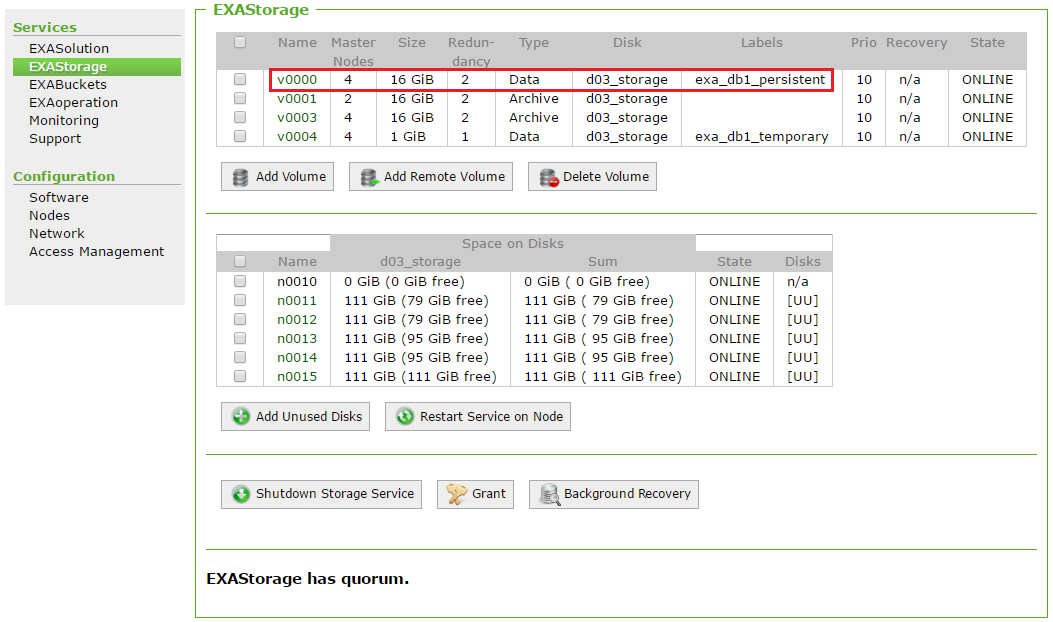
- Go to Services > EXAStorage and click on the data volume of the related database(s). You can identify the correct volume by referring to the volume label (Labels column), which has a naming convention of <database_name>_persistent.
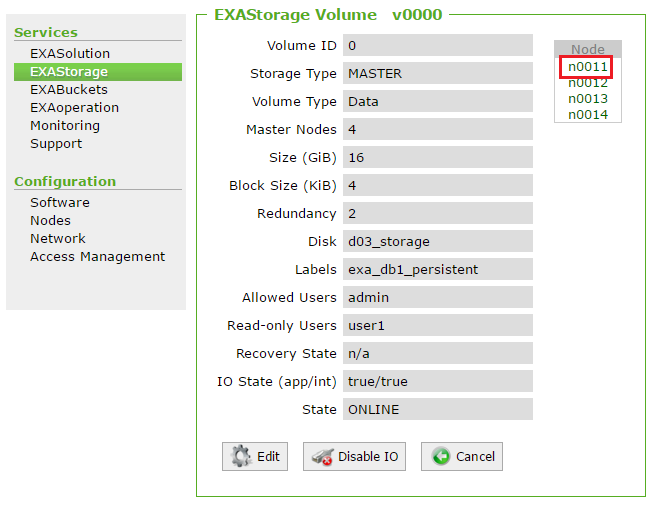
- In the volume's properties screen that is displayed, click on the node that you have deactivated (in our example it is node 'n0011').
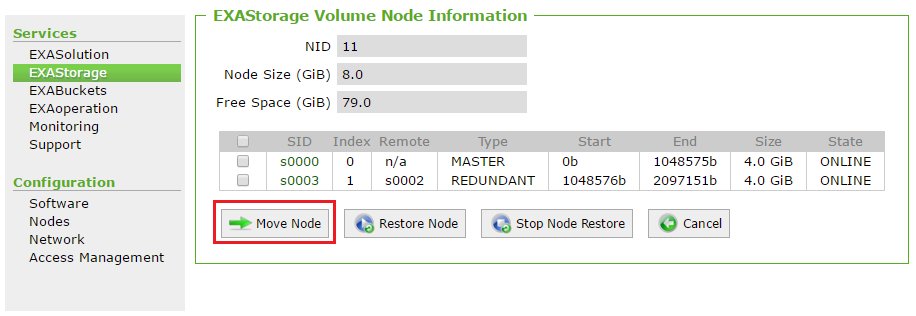
- The Volume Node Information screen is displayed. Click Move Node.
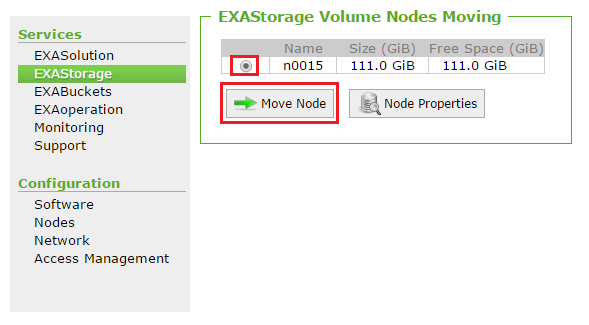
- In the Volume Nodes Moving screen displayed, click the target node (in this example, the reserve node is 'n0015') and click Move Node.
- You are then returned to the volume properties screen. The reserve node is now listed in the volume's nodes list (the deactivated node is no longer listed), and the volume State is displayed as RECOVERING. The data is being copied from the deactivated node to the reserve node.
-
Repeat the above process for any archive volumes the database is using.
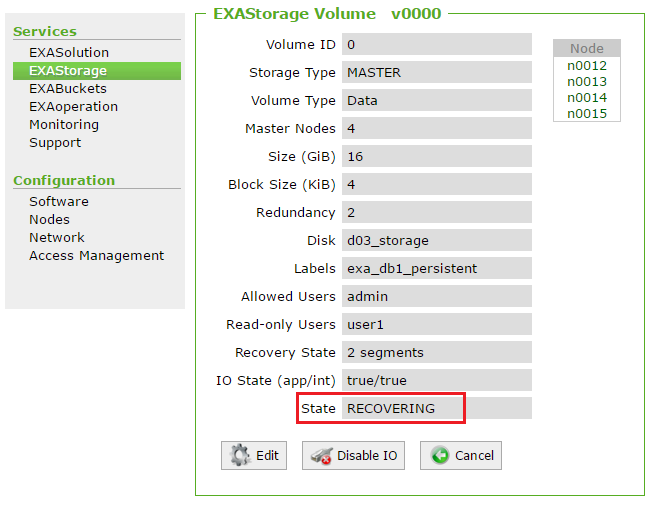
Once the data has been moved, the volume state will change to ONLINE.
The performance of the database instance is reduced until the recovery process has completed.
Reactivate Node
It is now necessary to reactivate the node you previously deactivated (in our example, node 'n0011').
- Go to Services > EXASolution and click on the database instance.
- In the database instance screen that is displayed. click Edit.
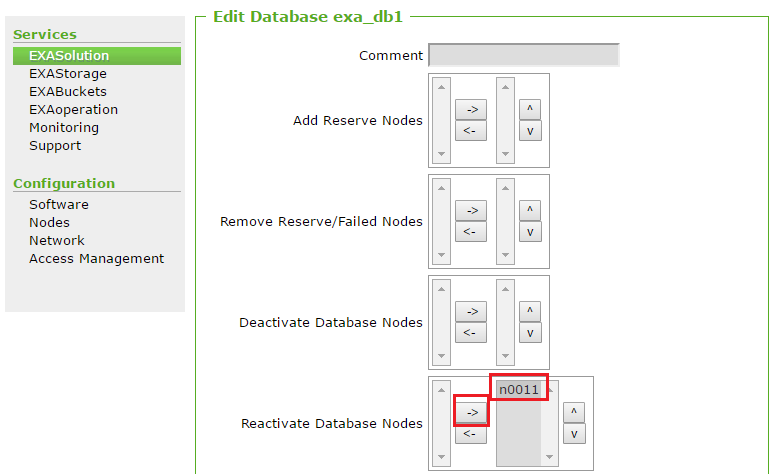
- In the Reactivate Database Nodes option on the Edit Database screen, select the node, and click the right arrow to add it to the list on the right.
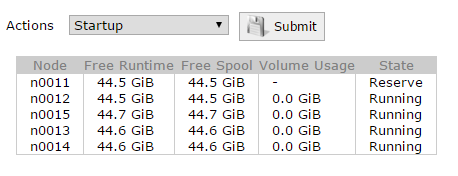
- Click Apply. The node is reactivated and becomes the new reserve node. In our example, 'n0011' was previously active and 'n0015' was the reserve node, and now these have been swapped.
